
How to take a photo with a webcam in eMedia Cards
What you'll learn
Set up a webcam in eMedia Cards, turn on face detection, and take a person's photo straight onto their card in Operating mode. The photo is framed on the face and saved as a file.
Before you start
-
eMedia Cards installed and activated, any edition.
-
A webcam plugged in, or the camera built into your laptop.
-
A card with a photo object. See How to add a photo to a card: its sample badge,
Benjamin Turner badge.eccs, is used here. -
Windows allows apps to use the camera: Settings > Privacy & security > Camera.
How to choose the webcam
-
Click Tools > Options..., then Acquisition.
-
Under Pictures, check Default folder, the pictures folder: the photos you take are saved there. Click ... to choose another folder, for example a folder shared with the other badge stations. If the card has its own folder in Card properties > Database pictures folder > Location (This template's folder, Subfolder of this template or Specific folder), that folder takes priority. Use default uses this Default folder.
-
In Pictures acquisition method:, choose Built-in Webcam. The other choice, Folder supervision, takes pictures that arrive in a folder.
-
Under Webcam, open Camera: and choose your webcam. Default camera uses the first camera Windows finds.
-
In Webcam preview mode, choose Auto face detection. It tracks the face in the live preview and frames the photo on it. Overlay shape and crosshair shows a guide to line the face up by hand instead.
-
Leave Flip image to match webcam preview on: the photo then looks like the mirrored preview. Turn it off to keep the camera's own orientation.
-
Click Close.
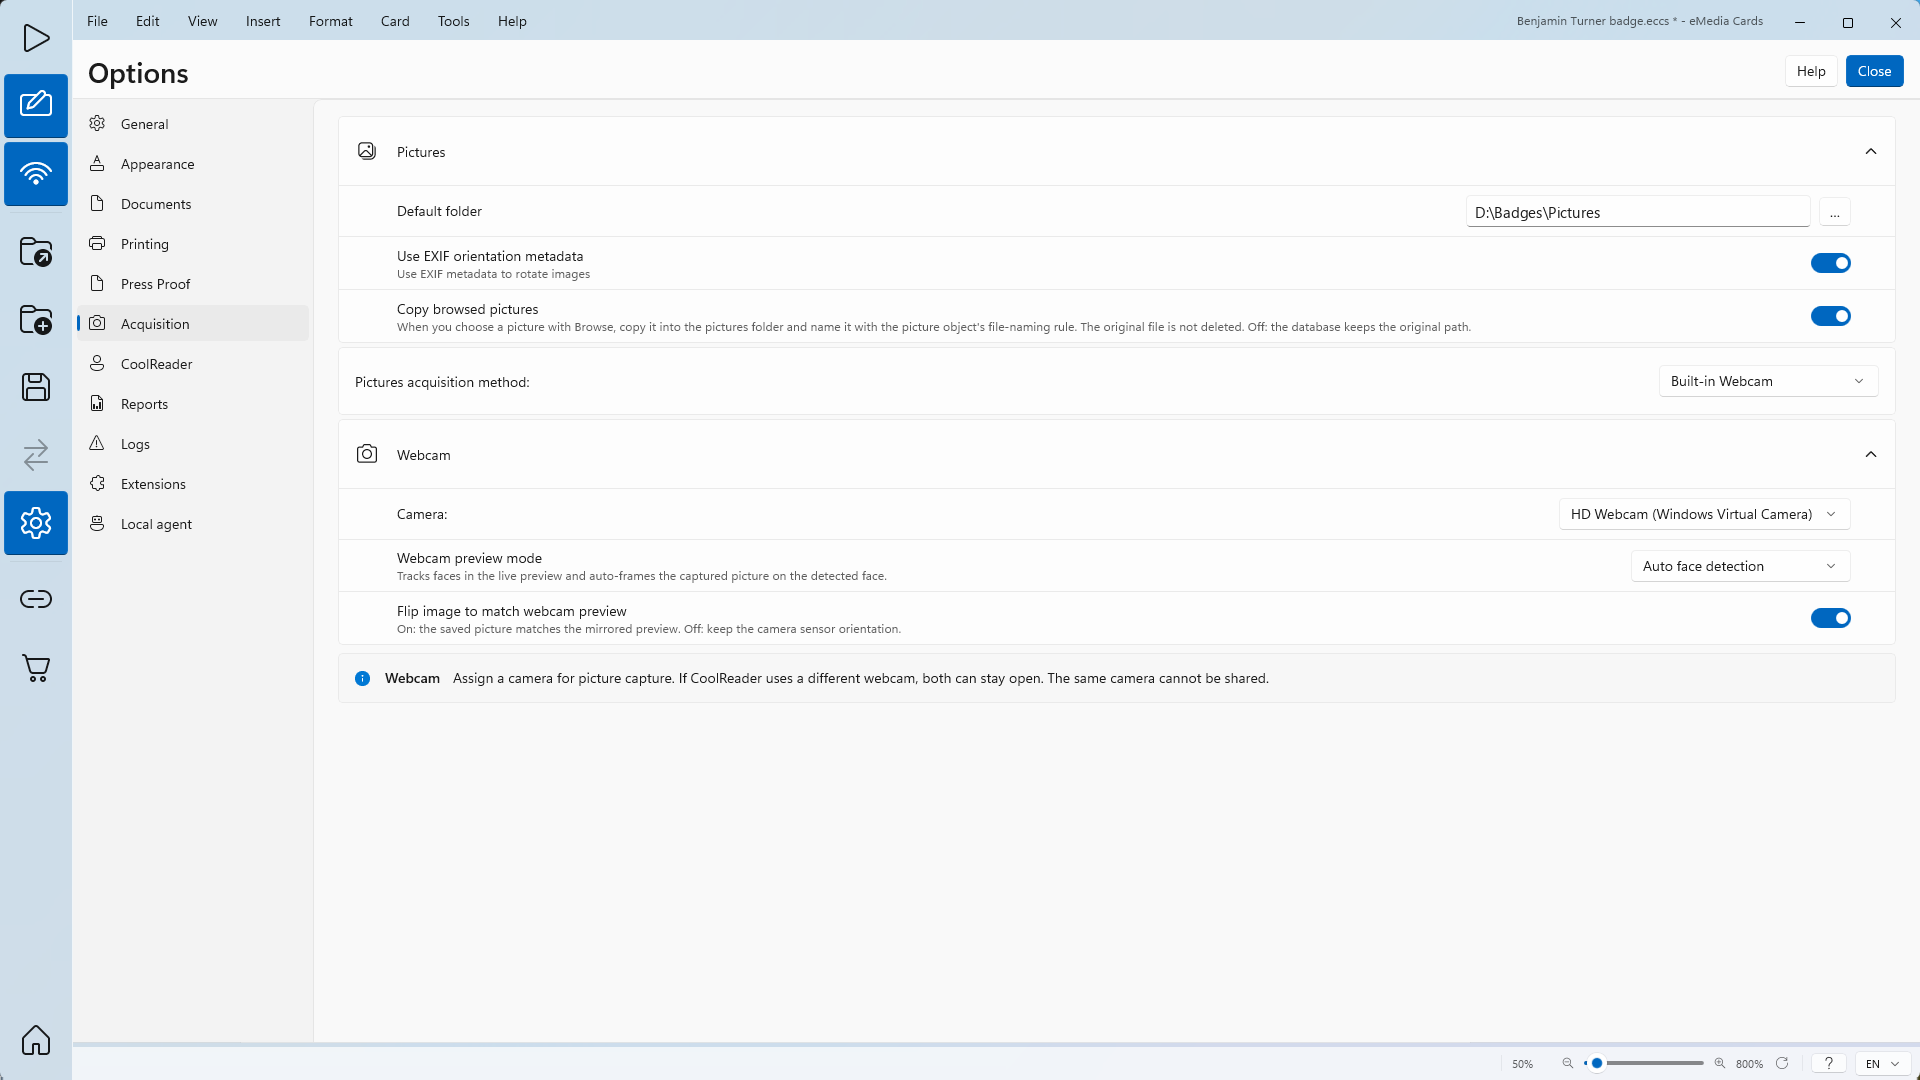
The note under Webcam reminds you that CoolReader can use another webcam at the same time, but two features cannot share the same camera.
How to take the photo
-
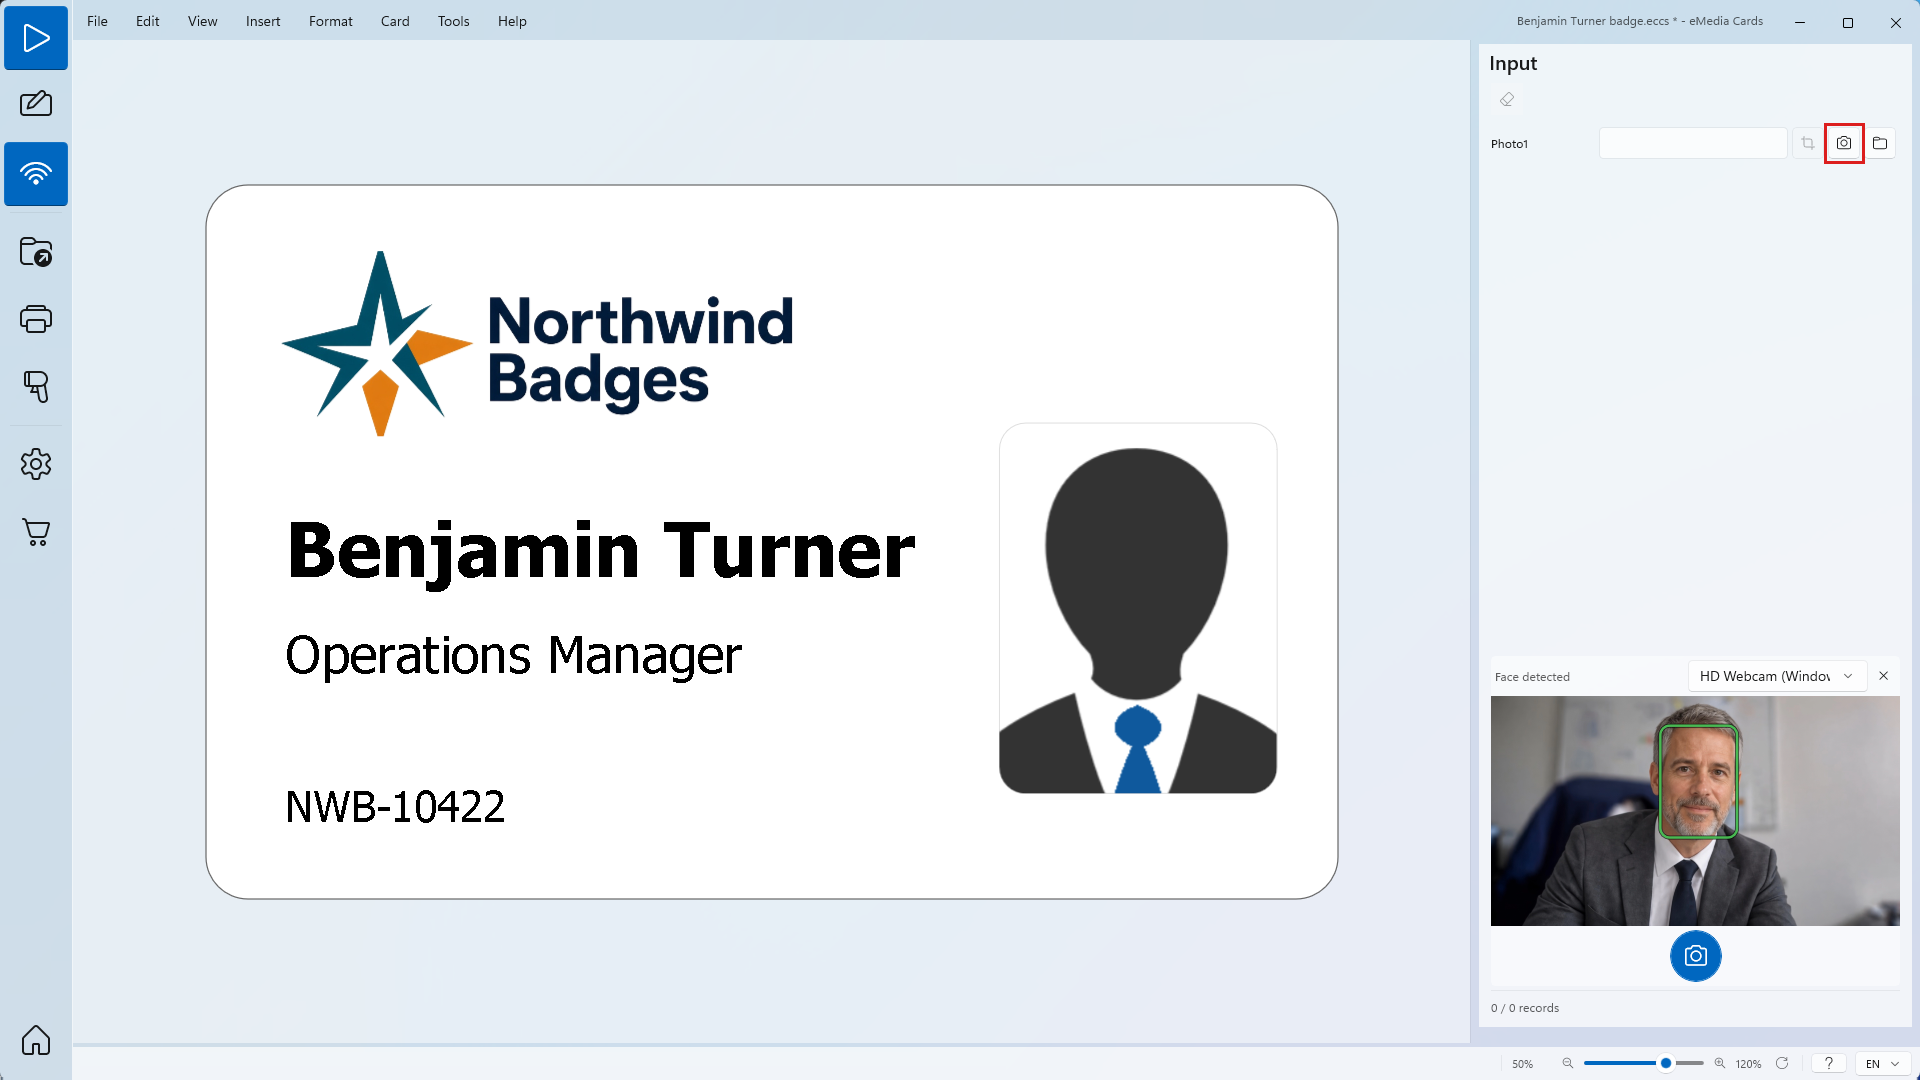
Click Operating to switch to Operating mode. The Input panel lists Photo1.
-
Next to Photo1, click Acquire picture, the camera button. The live preview opens at the bottom of the Input panel.
-
Ask the person to face the camera. A green box follows the face and the preview shows Face detected.
-
Click Take a picture, the round blue button under the preview.
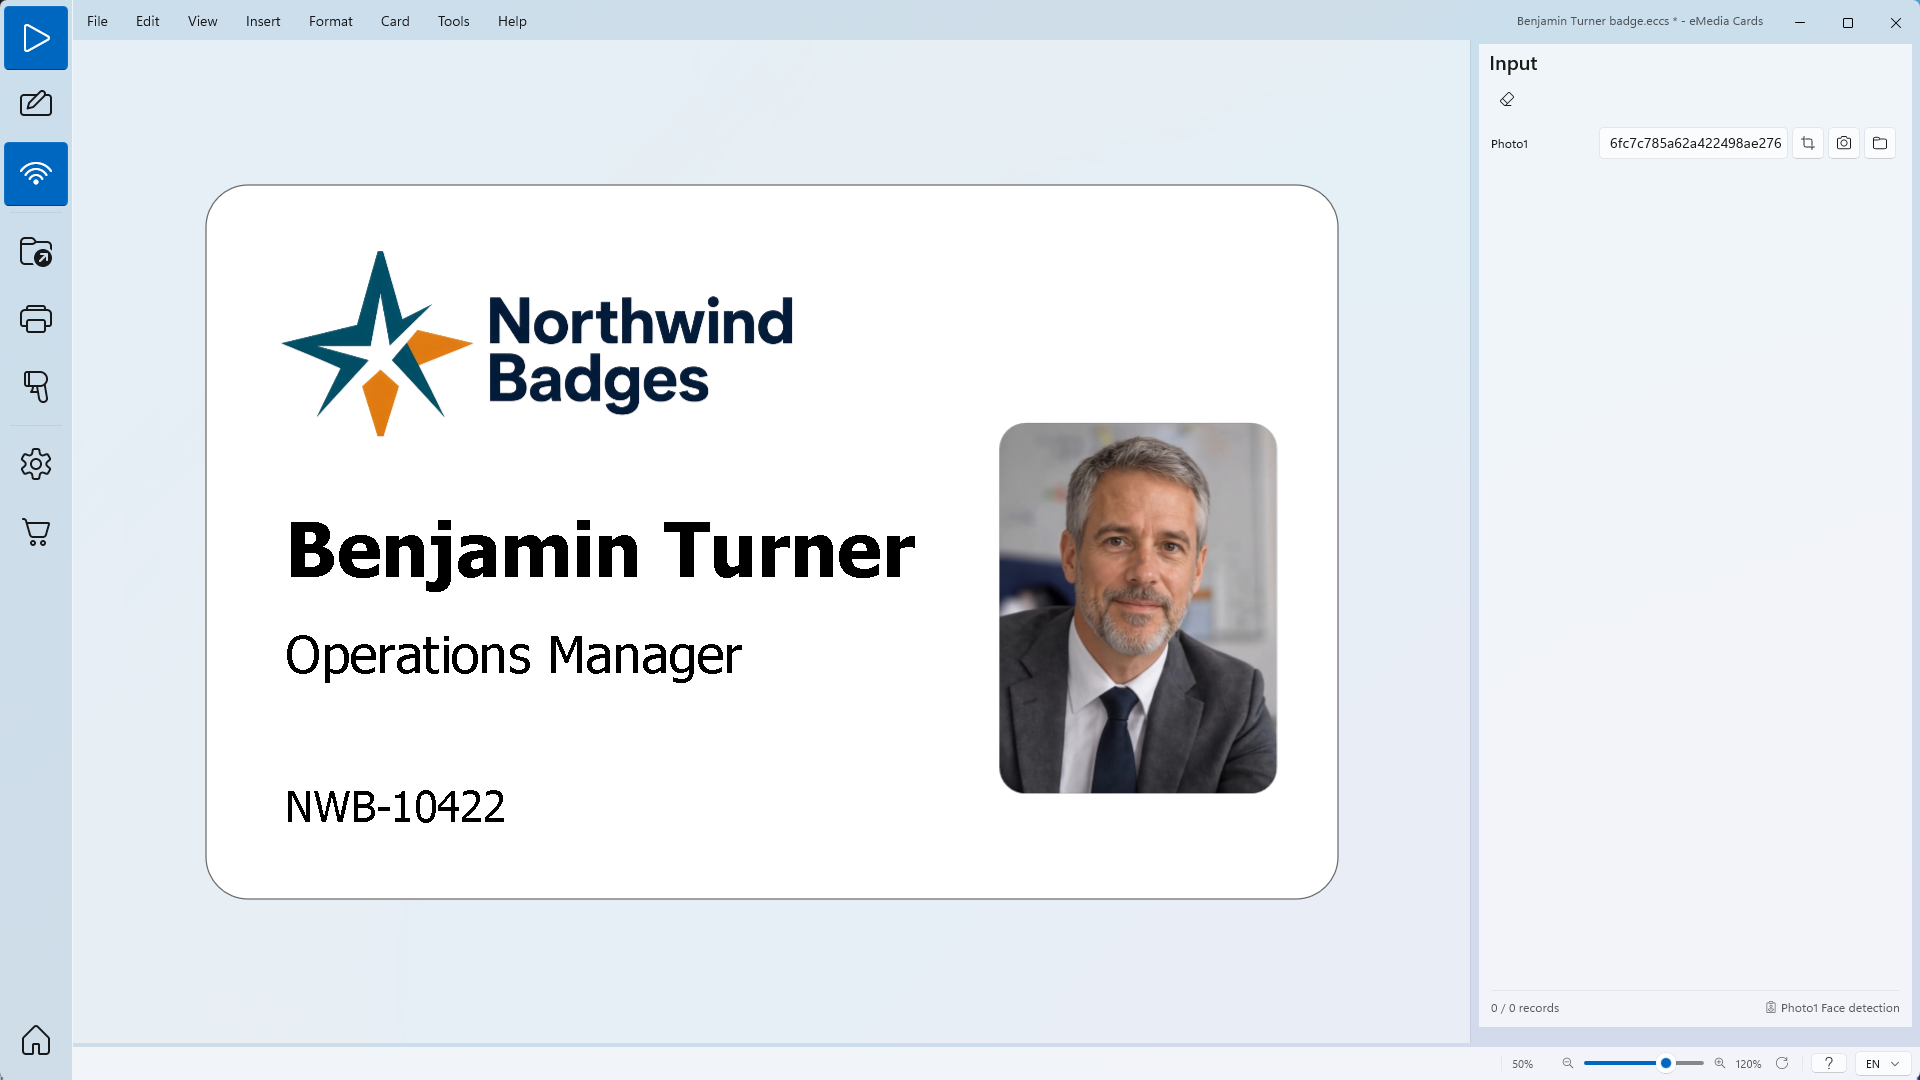
The preview closes and the photo appears on the card, framed on the face. The file name of the new picture shows next to Photo1, and Face detection shows at the bottom of the panel.
If your PC has more than one camera, a list above the preview lets you switch camera. To stop without taking a photo, click Close camera, the X in the top right corner of the preview.
After the photo
-
The photo is saved as a PNG file in the card's pictures folder if it has one, otherwise in the Default folder. It gets a new file name each time, unless the photo uses DB field as a path to a file with File naming on Database field or Formula: the name then comes from the record.
-
To change the framing, click Adjust picture next to Photo1.
-
To take it again, click Acquire picture again. To use a file instead, click Browse for a picture.
-
On a Mac, macOS asks once to allow camera access. If you said no, allow eMedia Cards in System Settings > Privacy & Security > Camera.
Tips
-
Light the face from the front and use a plain background. Face detection works best with the whole face in the picture.
-
Put the webcam at eye level, about one metre from the person.
-
With a database, take one photo per record and click OK to validate. Move to the next record with Next, click Edit, and click Acquire picture again. See How to connect a card template to an Excel file.
-
Keep one camera for photos and another for CoolReader QR scanning if you use both.
Common errors
| Symptom | Cause | Fix |
|---|---|---|
| No camera found | No webcam is plugged in, or Windows cannot see it. | Plug the webcam in, wait a few seconds and click Acquire picture again. |
| Camera access is denied. Please enable it in Windows Settings > Privacy > Camera. | Windows blocks apps from the camera. | In Settings > Privacy & security > Camera, turn on camera access for apps and for desktop apps. |
| This camera is in use by CoolReader QR scanning. Choose a different camera, or stop CoolReader first. | CoolReader already uses this webcam. | Choose another camera in Camera:, or stop CoolReader. |
| The preview shows the wrong camera. | Camera: is on Default camera or another webcam. | Choose your webcam in Tools > Options... > Acquisition. |
| Face detected never shows. | The face is too dark, too small or turned away. | Add light in front of the face, move closer, and face the camera. |
| The photo is mirrored the wrong way. | Flip image to match webcam preview does not match what you expect. | Turn the option on or off in Tools > Options... > Acquisition. |