
How to connect a card template to an Excel file
What you'll learn
Connect an Excel workbook (.xlsx) to a card template with the Database Wizard, link its columns and photos to card objects, and show the records in Operating mode.
Before you start
-
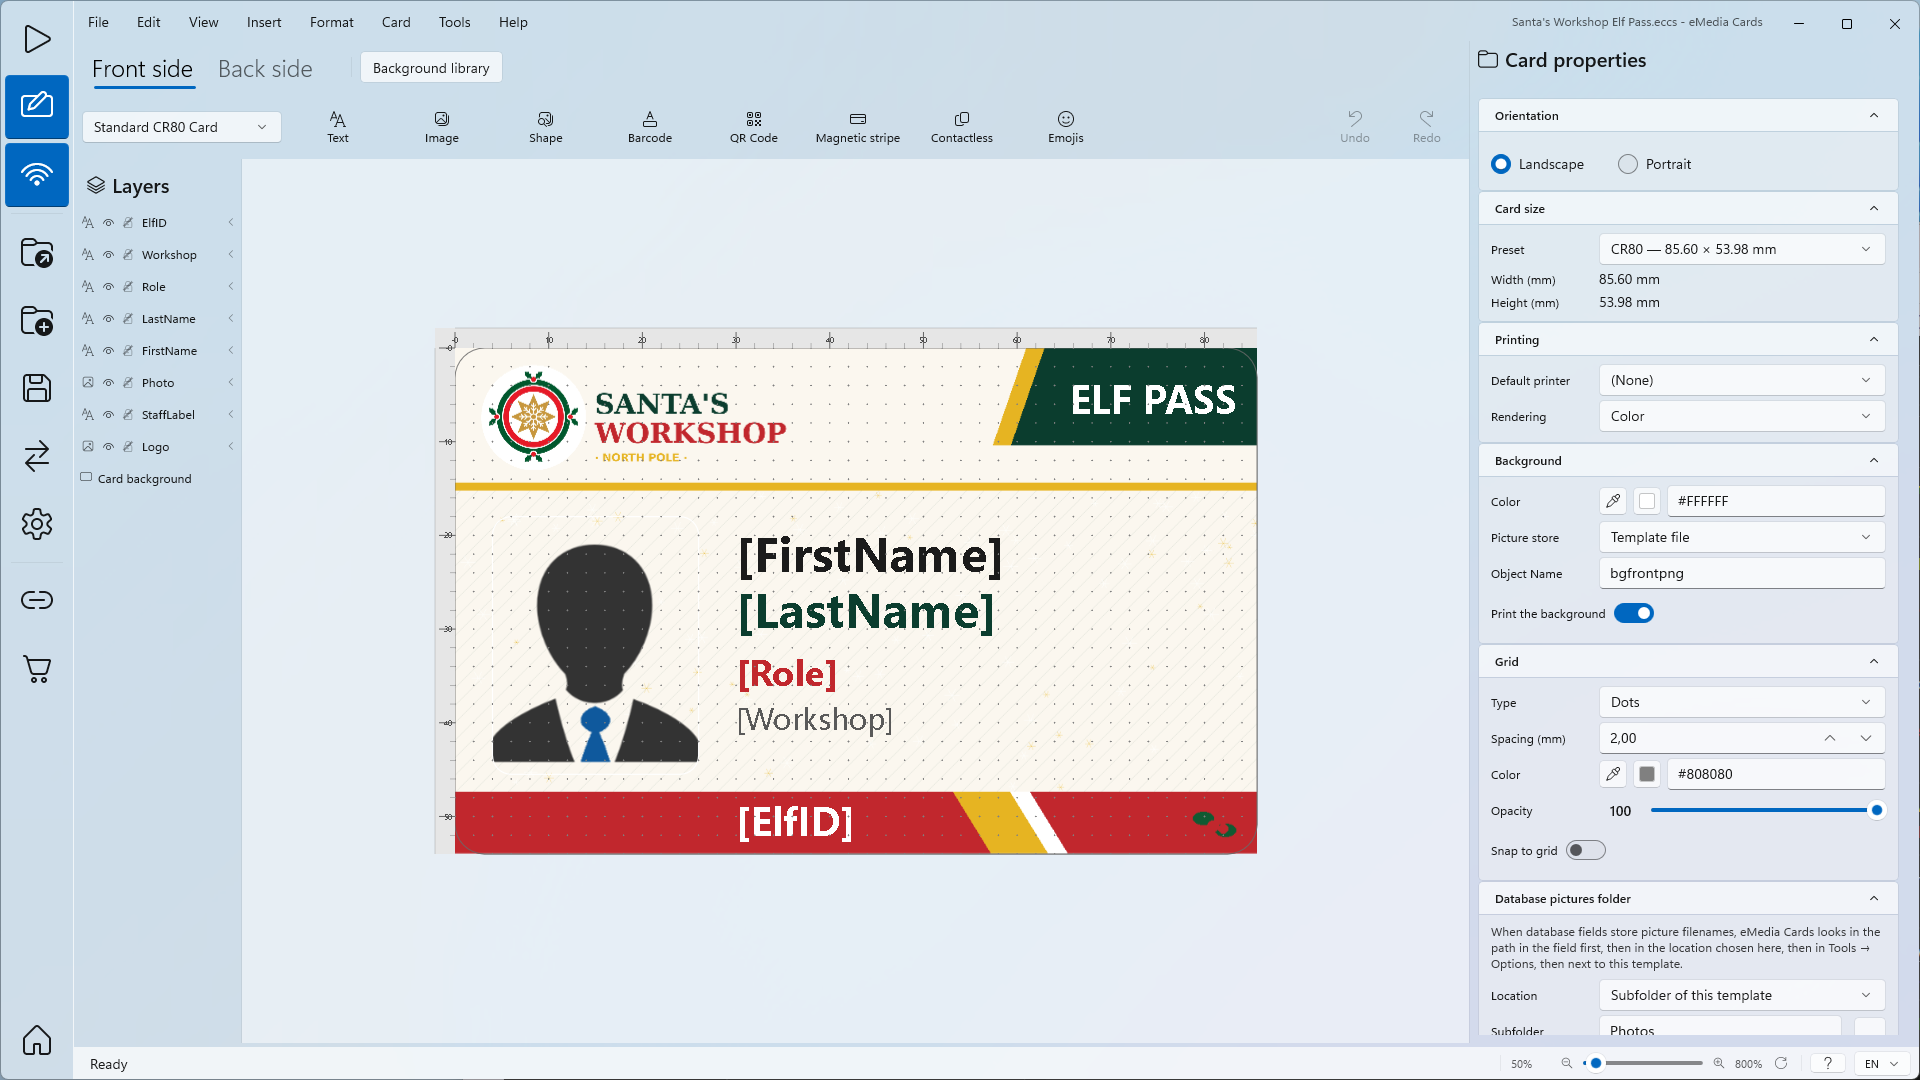
A card template. A template opens in Operating mode; you switch it to Design mode to connect a database. This example uses
Santa's Workshop Elf Pass.eccs, a CR80 staff pass that is not yet connected to a database, front and back. On the front, Photo is a picture object and ElfID, FirstName, LastName, Role and Workshop are text objects with a database field source. On the back, QRCode is a QR Code object. -
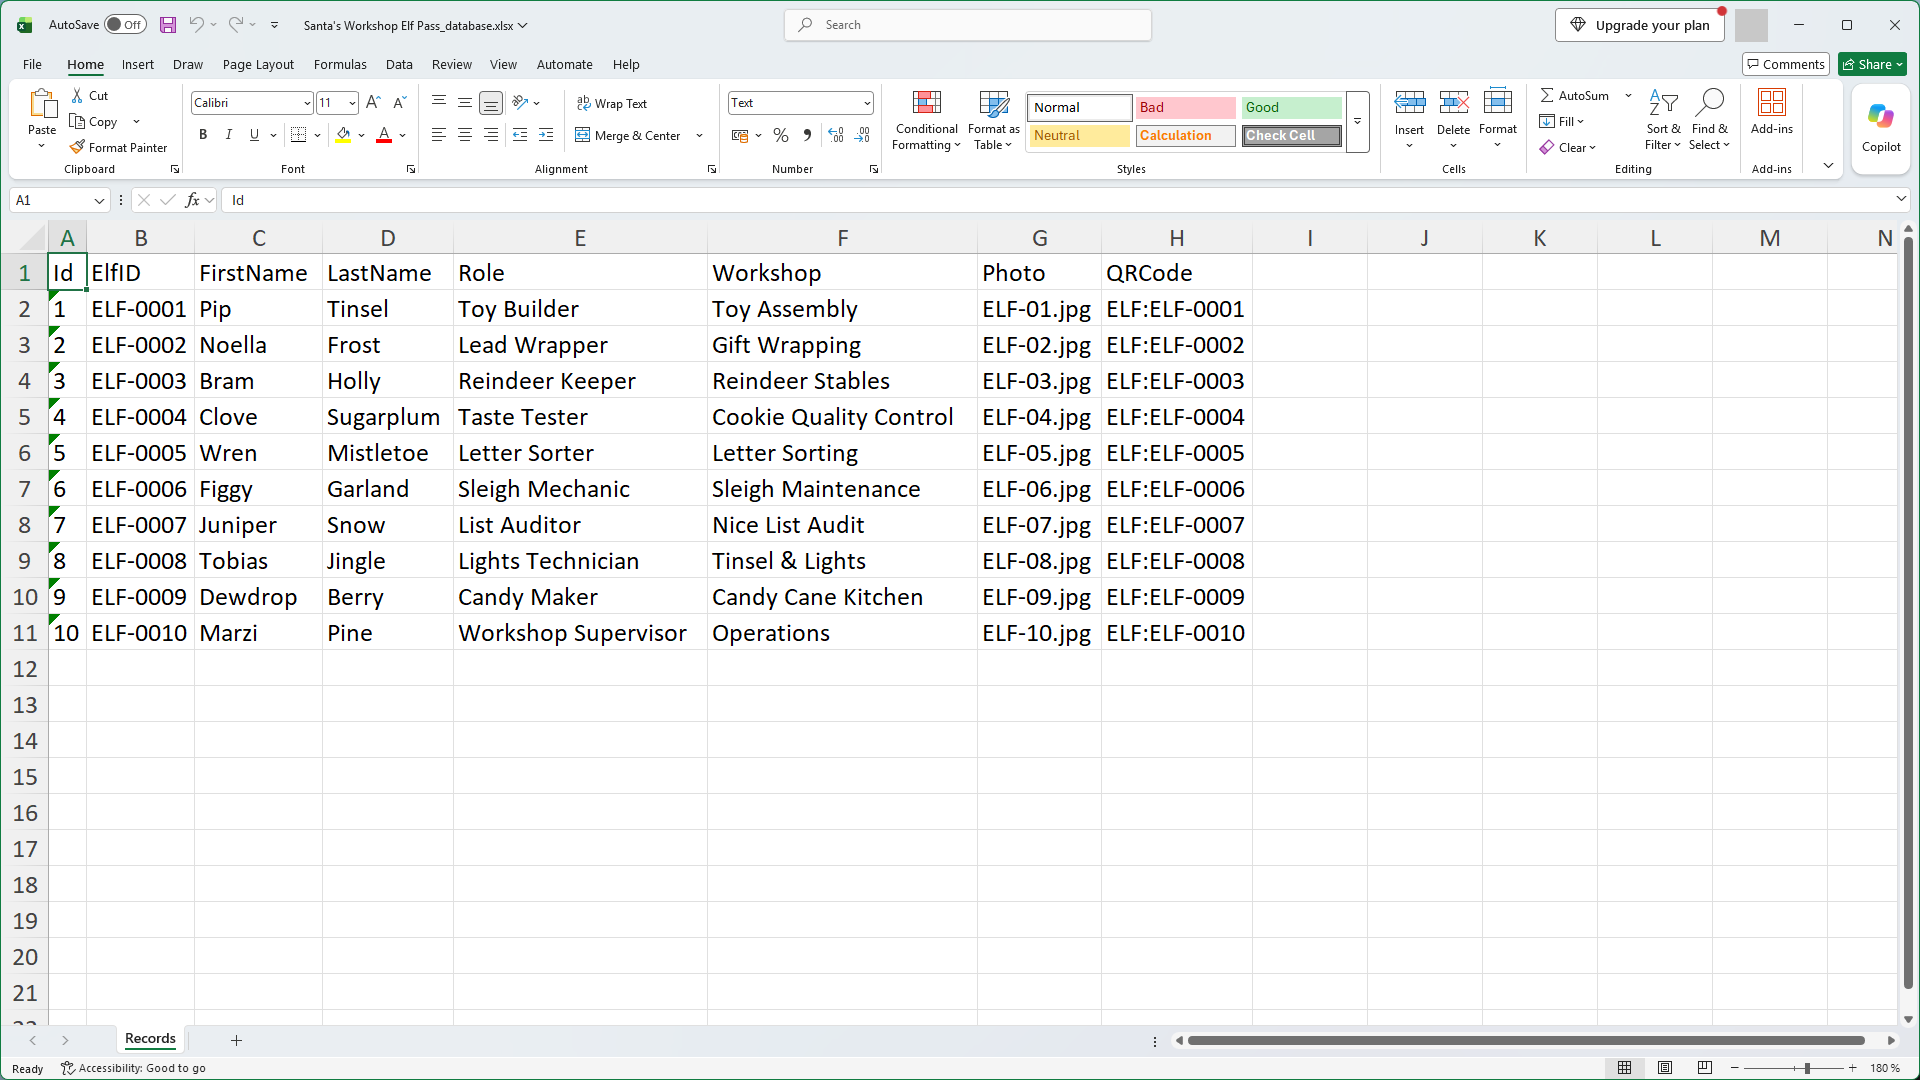
An Excel workbook with a header row: column names in row 1, one record per row. This example uses
Santa's Workshop Elf Pass_database.xlsx: sheetRecords, 10 rows, columnsId,ElfID,FirstName,LastName,Role,Workshop,Photo,QRCode. -
For photos: a
Photosfolder next to the template, used as the pictures folder. Each cell of thePhotocolumn holds a file name from that folder:ELF-01.jpgtoELF-10.jpg. -
Keep the template, the workbook and the
Photosfolder in the same folder. The data is fictitious. -
The template, the workbook and the
Photosfolder are in the sample files ZIP, with aREADME.txt. Unzip it to keep this layout. -
Close the workbook in Excel. eMedia Cards needs exclusive access to the file.
-
Starter Edition uses only the first 50 rows of an Excel file. Standard Edition uses all rows.
How to connect an Excel file to a template
-
Unzip the sample files and open
Santa's Workshop Elf Pass.eccs. The template opens in Operating mode, not in Design mode. -
Click View > Design mode. The card layout opens for editing.
-
Click Tools > Connect to database.... The Database Wizard opens on step 1, Connection.
-
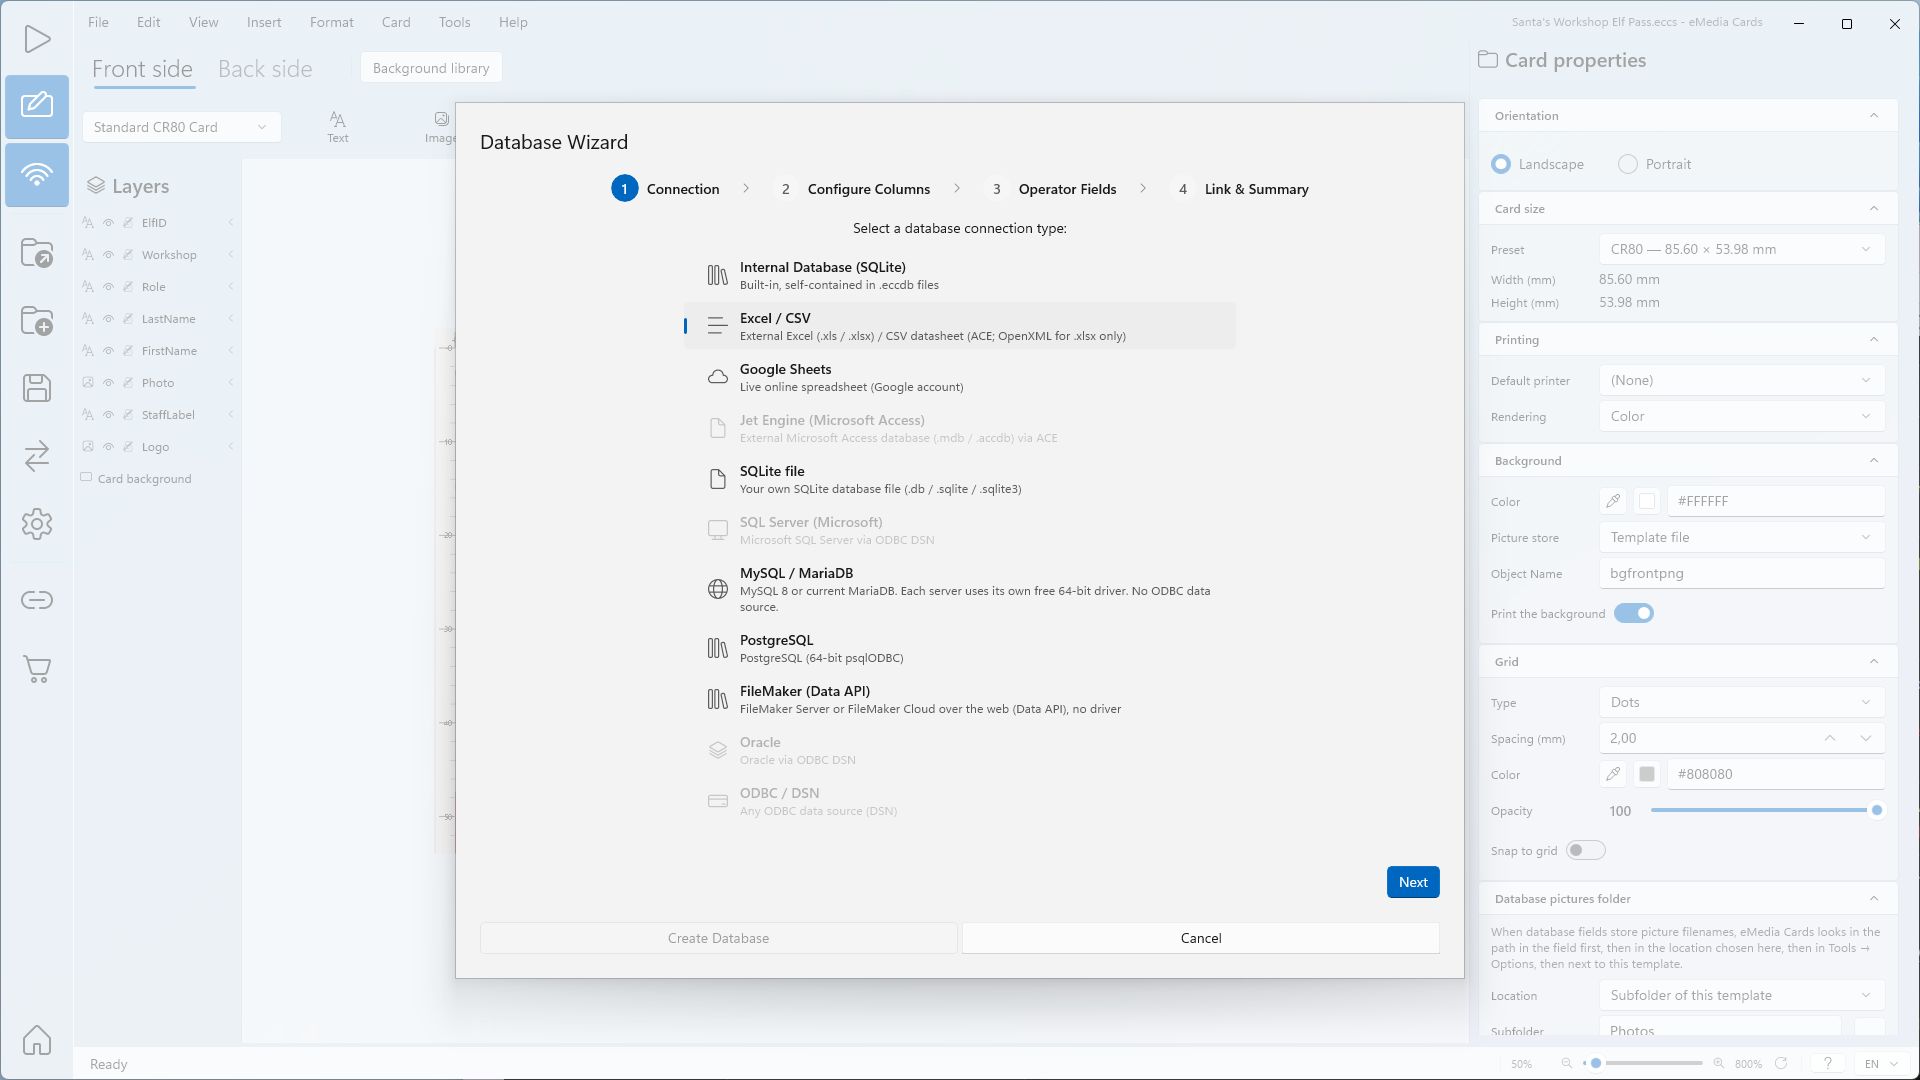
Under Select a database connection type:, click Excel / CSV.
-
Click Next. Step 2, Configure Columns, opens.
-
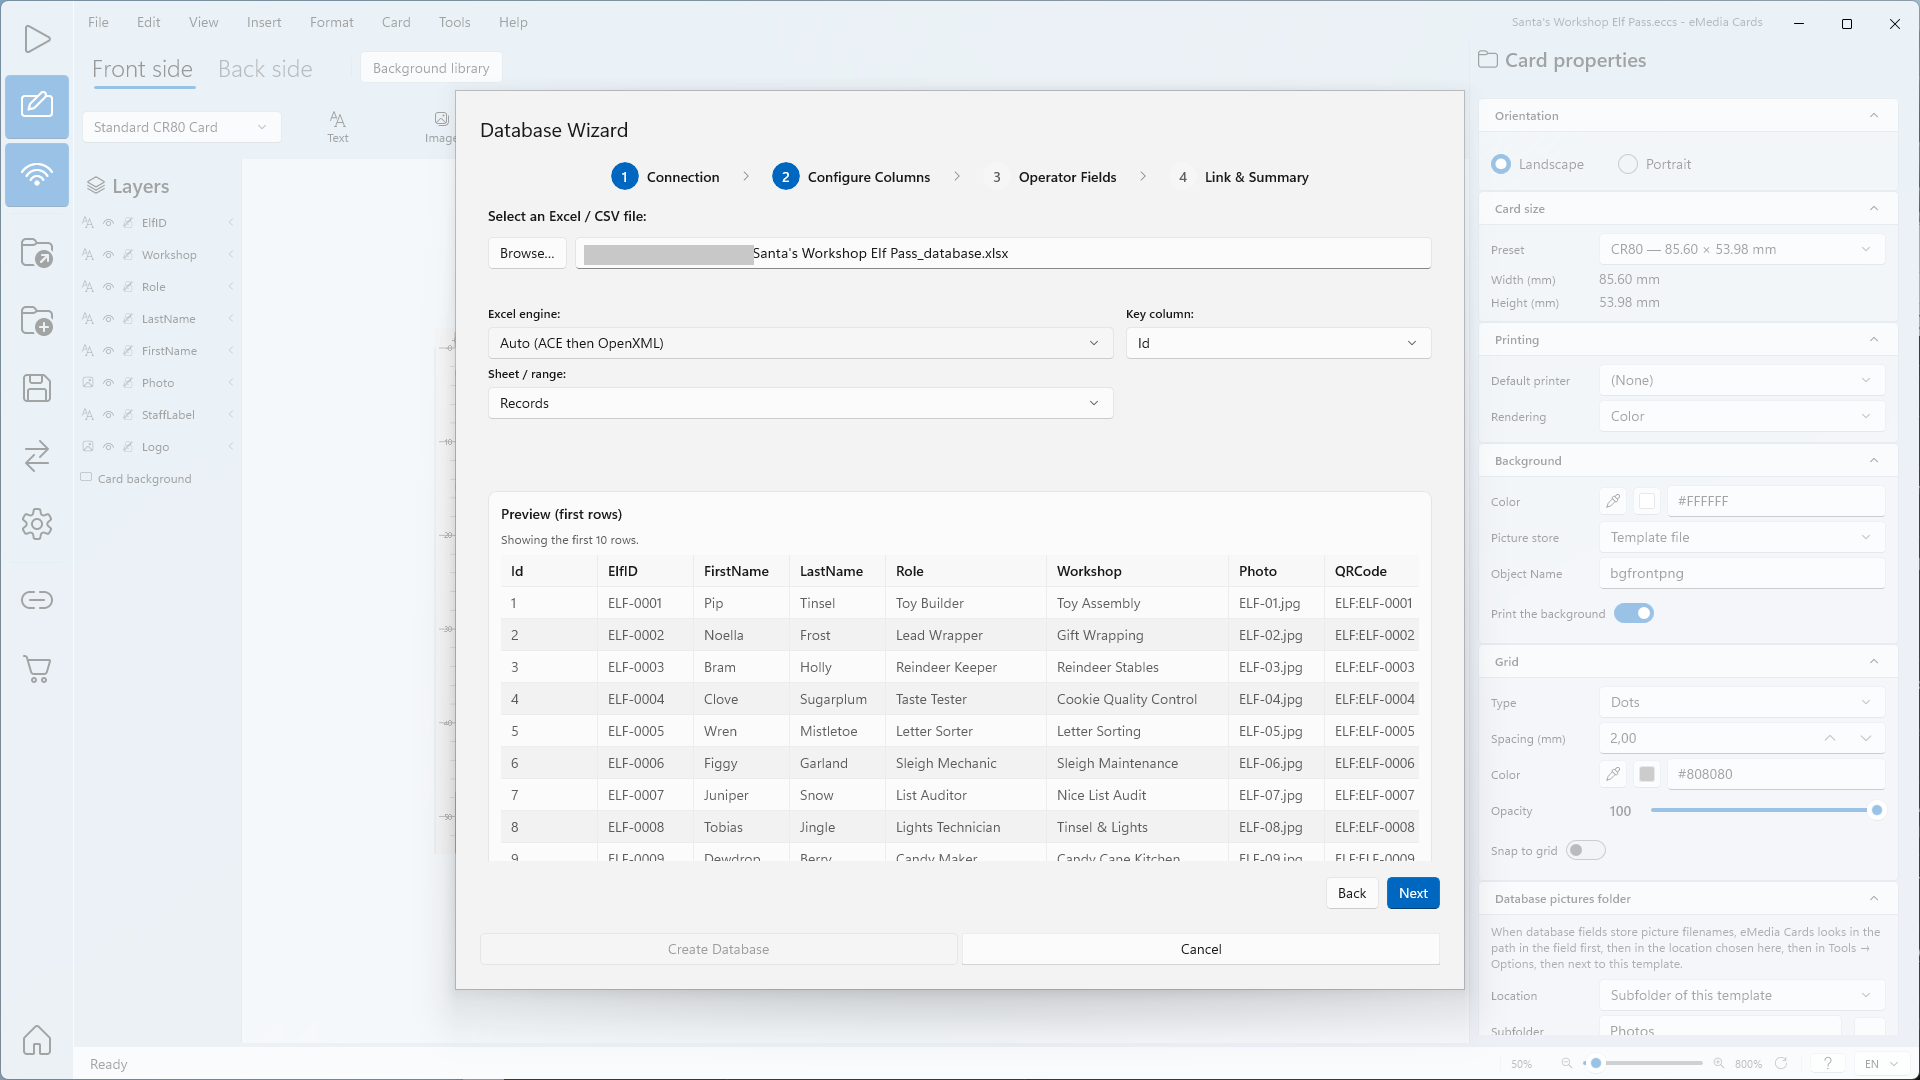
Under Select an Excel / CSV file:, click Browse… and open
Santa's Workshop Elf Pass_database.xlsx. -
Leave Excel engine: on Auto (ACE then OpenXML).
-
In Sheet / range:, choose Records. The list shows every sheet of the workbook: pick the one that holds the records. A workbook with one sheet selects it automatically.
-
Check the Preview (first rows) table. It shows the column names from row 1 and the first rows of the sheet.
-
In Key column:, choose a column with a unique value in every row (key column). Here: Id.
-
Click Next. Step 3, Operator Fields, opens.
-
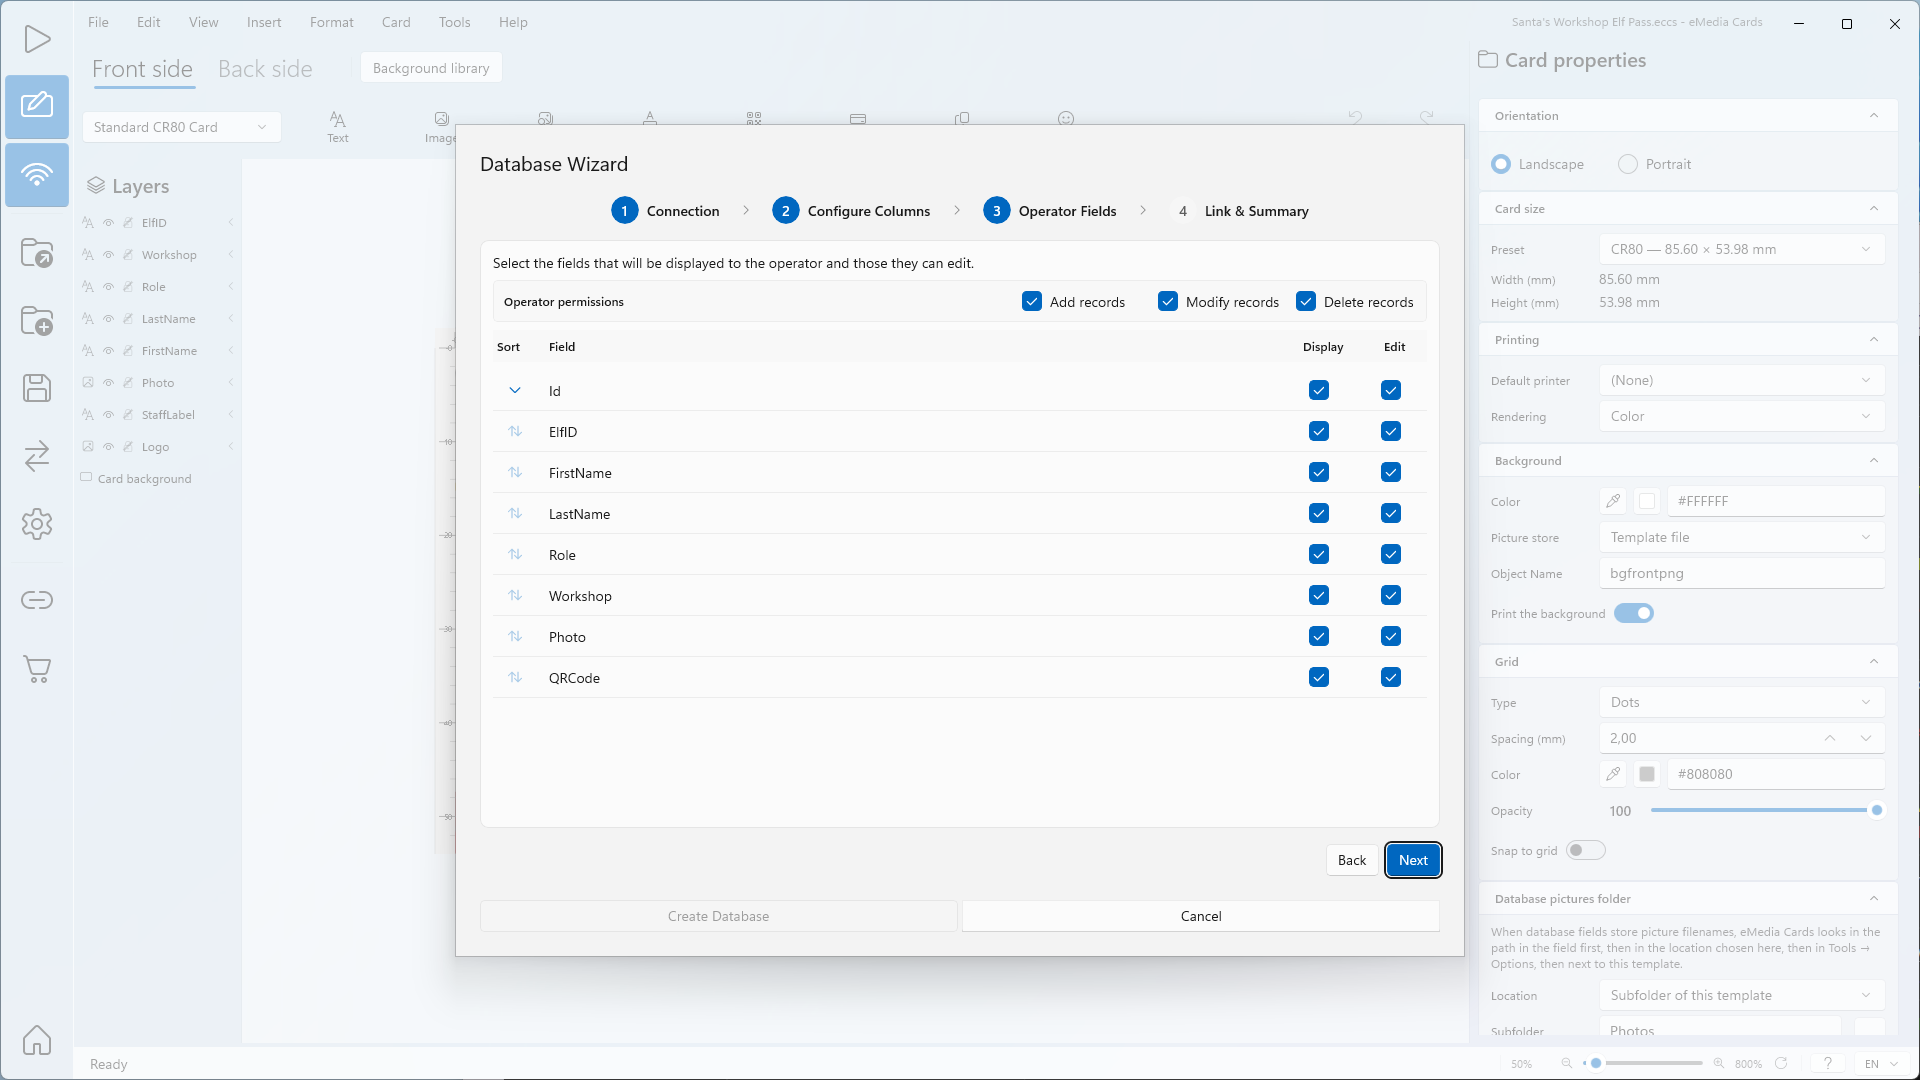
Operator Fields opens. It sets which fields the operator sees and can change, with an Operator permissions row (Add records, Modify records, Delete records) on by default.
-
Click Next. Step 4, Link & Summary, opens.
-
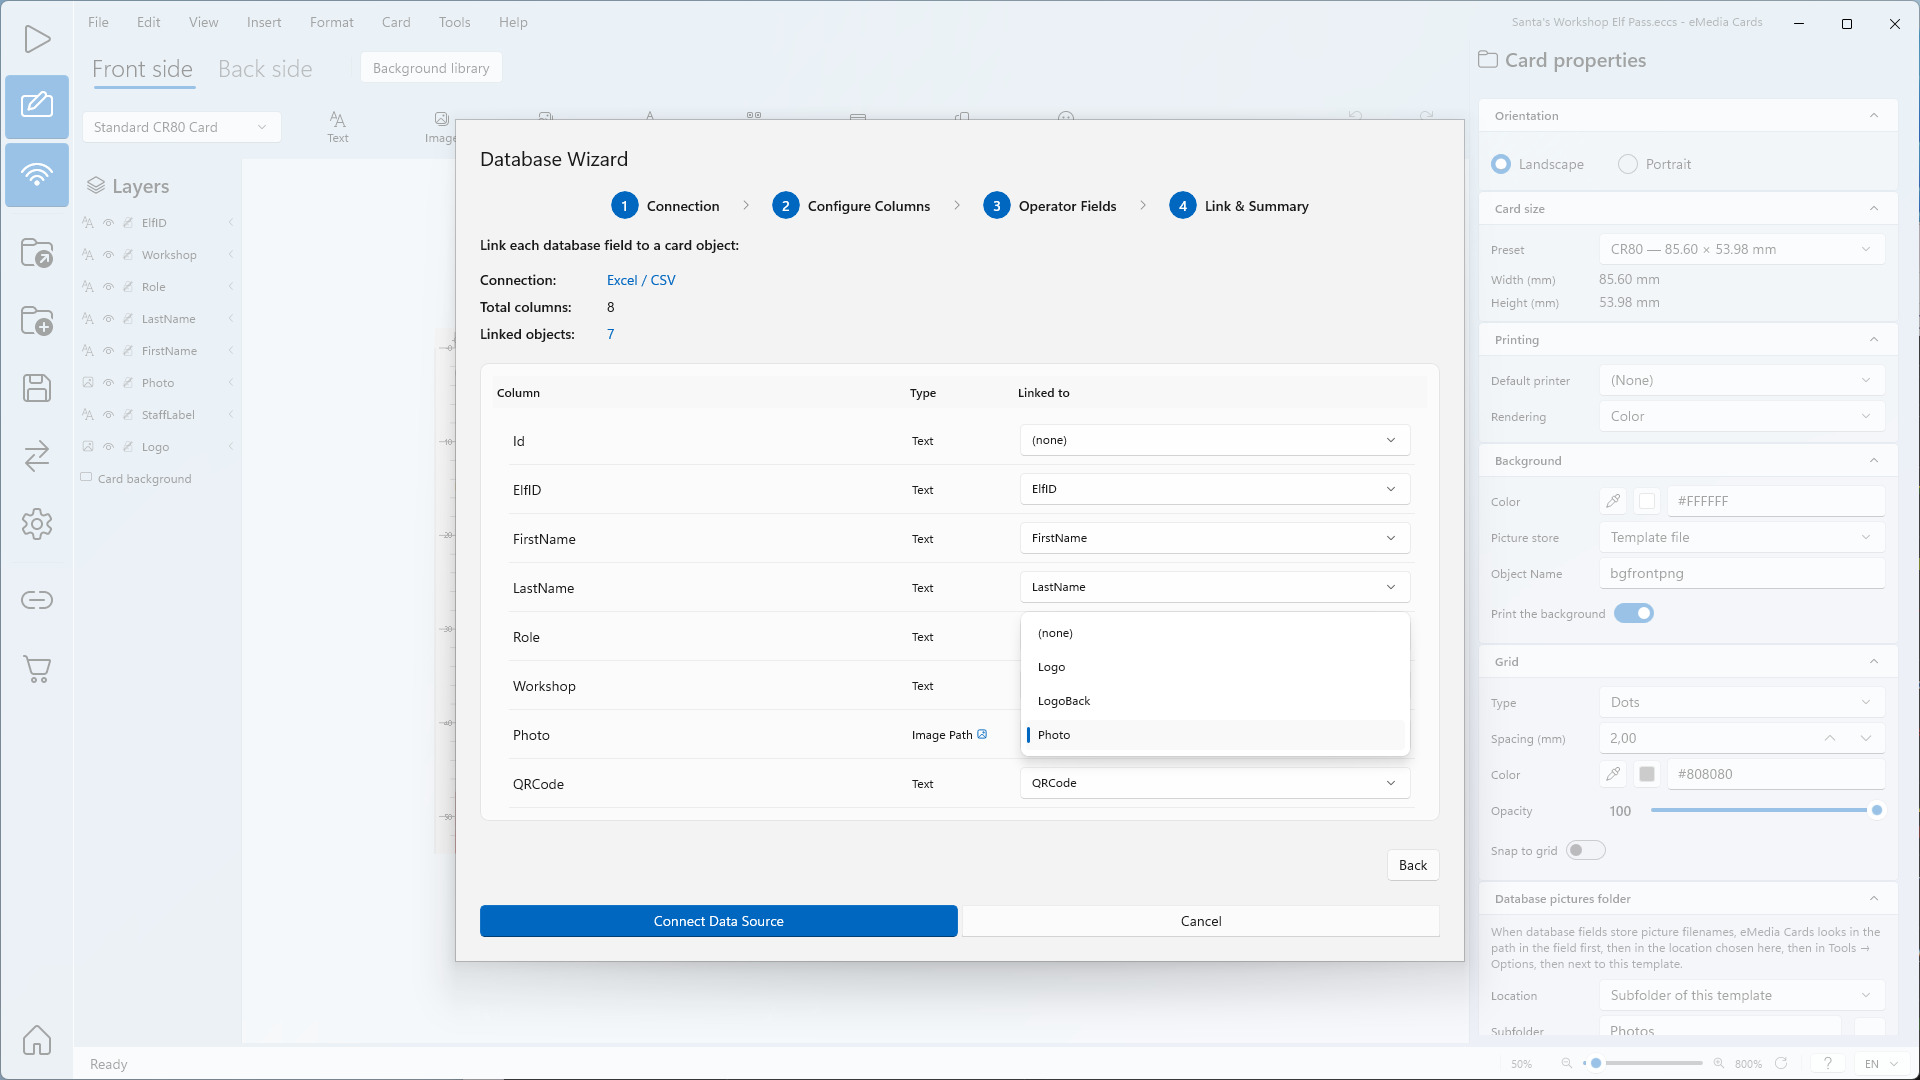
Check Connection:, Total columns: and Linked objects:. A column whose name matches a card object is linked automatically: here ElfID, FirstName, LastName, Role, Workshop, Photo and QRCode.
-
Check that Photo is linked to the Photo picture object. The Linked to list of a photo column shows picture objects only.
-
Leave Id on (none). A column on (none) is not shown on the card.
-
Click Connect Data Source.
Show the photos from the Photo column
-
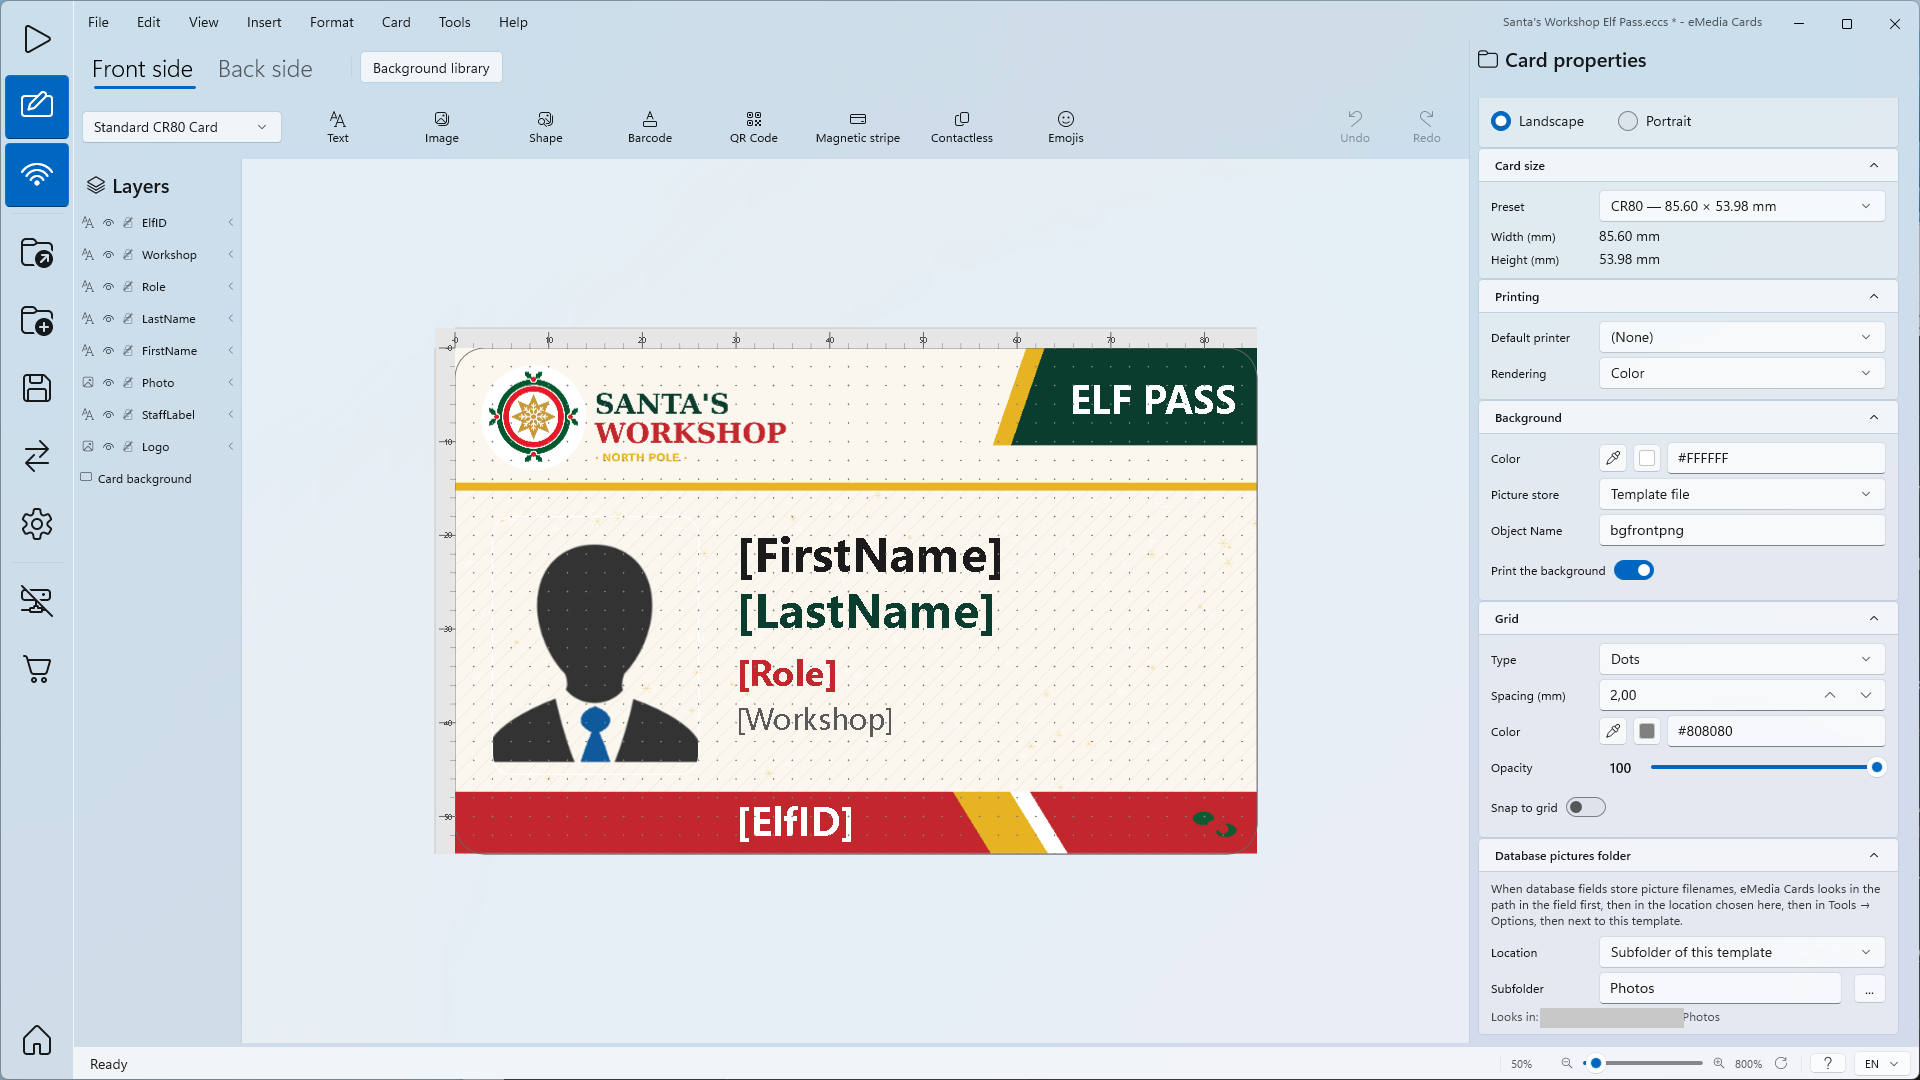
In Design mode with nothing selected, the Card properties panel is already open on the right.
-
Under Database pictures folder, in Location, choose Subfolder of this template.
-
In Subfolder, type
Photos. Looks in: shows the folder eMedia Cards uses. -
Click File > Save... to save the template with the link and the pictures folder.
eMedia Cards looks for the file named in the Photo cell in this order: the path in the cell, then the Database pictures folder (here Photos), then the pictures folder in Tools > Options, then the template's own folder. A cell can also hold a public https link to a picture.
Show the records
-
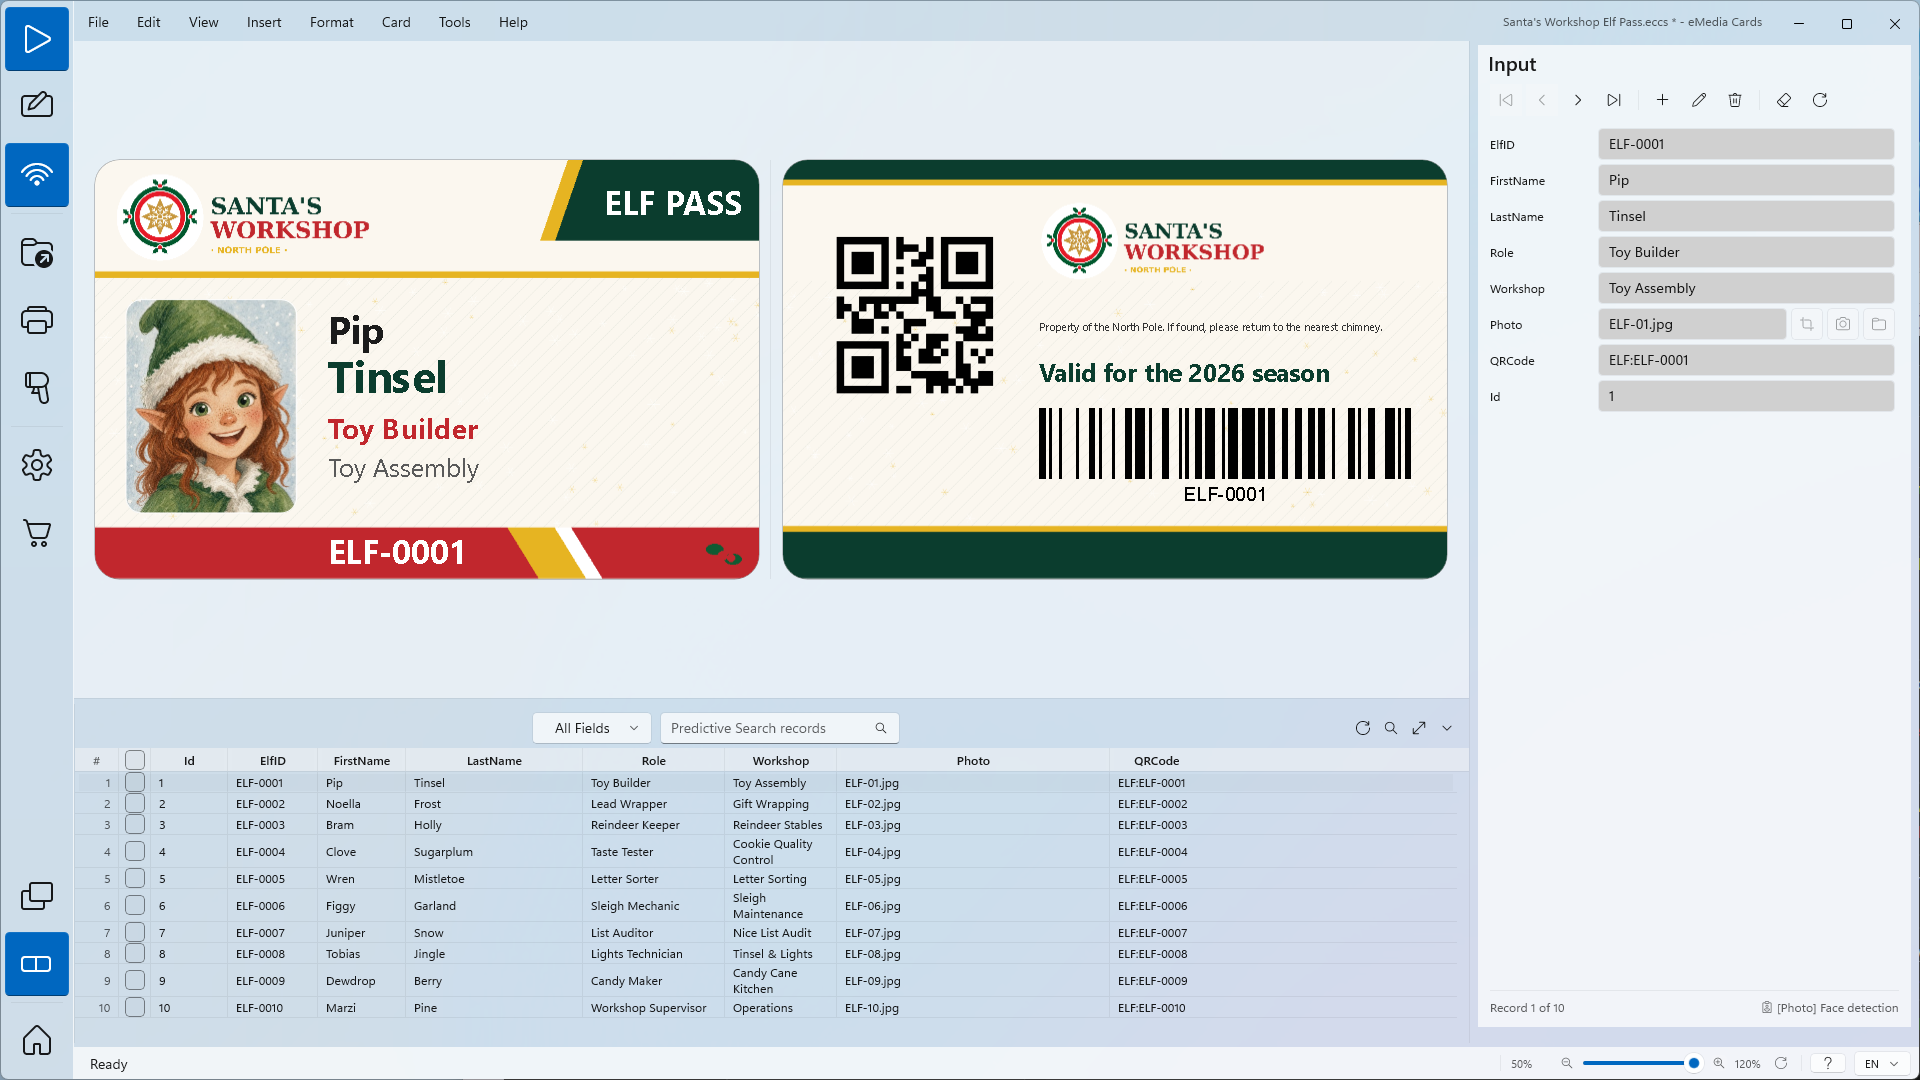
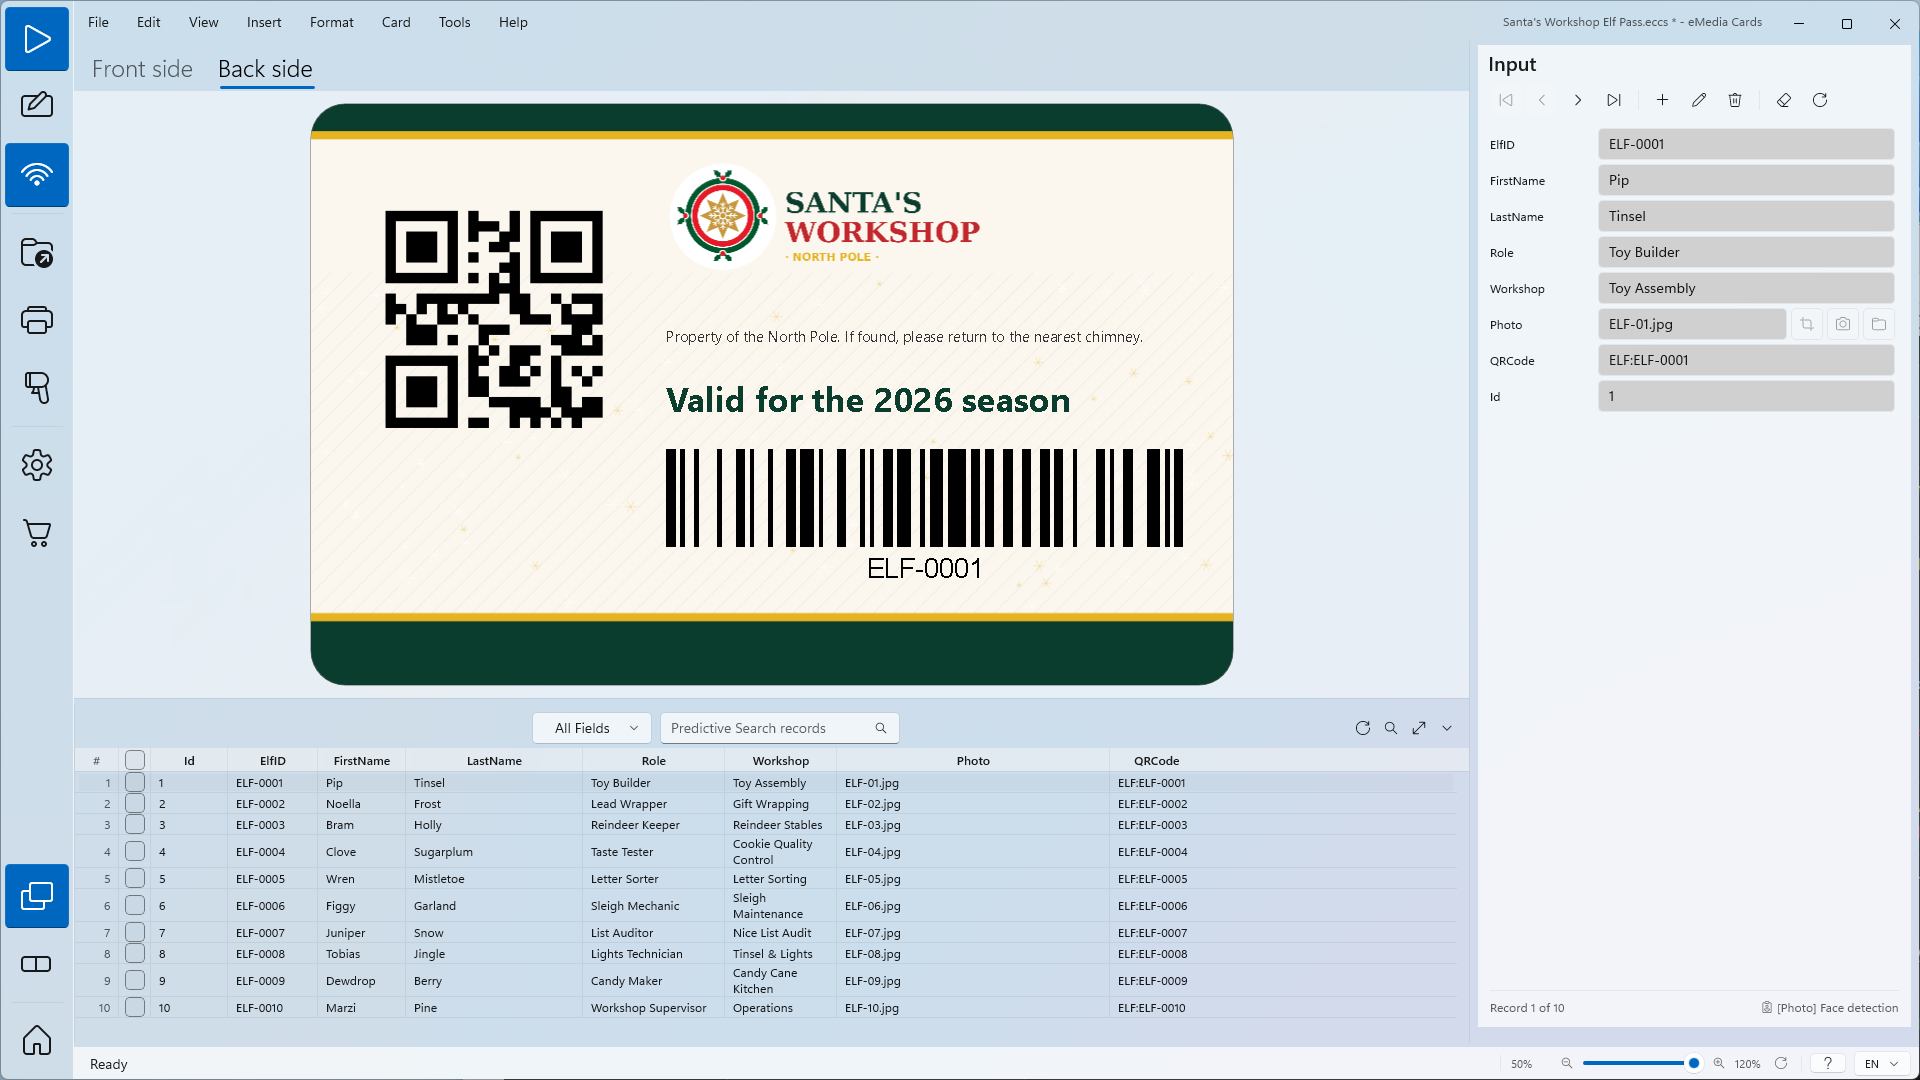
Click View > Operating mode. Connecting does not switch the mode. The card shows the first record of the sheet.
Tips
-
The Excel file stays the live database. Adding, changing or deleting a record in Operating mode writes to the workbook.
-
Keep the template, the workbook and the
Photosfolder together when you move or copy them. Then the photos and the link still work on another computer. -
For better portability, use File > Export > As full backup.... It saves the template, the database and the pictures in one portable file. See How to back up a template with Export > As full backup.
Common errors
| Symptom | Cause | Fix |
|---|---|---|
| Please select a worksheet. | No sheet is chosen in Sheet / range:. | Choose the sheet with the records in Sheet / range:. |
| The Preview (first rows) table shows other columns, or Linked objects: is 0. | The wrong sheet is selected. | In Sheet / range:, choose Records. |
| The column names in the preview are data, for example ELF-0001 and Pip. | The sheet has no header row. eMedia Cards reads row 1 as the column names. | Insert a row 1 with the column names in Excel. Save, close Excel, then click Browse… and select the file again. |
| The Excel file "Santa's Workshop Elf Pass_database.xlsx" is open in another program, so eMedia Cards can't read it. Close the file in that program, then click Browse… and select it again. | The workbook is open in Excel. eMedia Cards needs exclusive access. | Close the file in Excel. Click Browse… and select the file again. |
| The Excel file "Santa's Workshop Elf Pass_database.xlsx" is open in another program or is still syncing, so eMedia Cards can't read its records right now. Close the file in that program, or wait for the sync to finish, then choose Requery. | The workbook was opened in Excel after connecting, or a cloud sync is still running. | Close the file in Excel or wait for the sync. Click Requery. |
| The photo frame stays empty in Operating mode. | The Photos folder is not next to the template, Database pictures folder points elsewhere, or the file name in the Photo cell does not match a file. |
Put the Photos folder next to the template. Set Location to Subfolder of this template and Subfolder to Photos. Check the file name and extension in the cell. |
| The Excel columns linked in this card template no longer match the datasheet. | A column header was renamed or removed in Excel after the template was saved. | Restore the column name in Excel, or open Tools > Connect to database..., update the link, and save the template. |
| eMedia Cards cannot find the Excel file linked to this card template. | The workbook was moved, renamed or deleted. | Put the workbook back next to the template, or open Tools > Connect to database..., choose the file, and save the template. |
| This database appears to have been created by another tool and may not update reliably through Excel's standard engine. | The workbook was saved by another program, not by Excel. | Open it in Microsoft Excel, choose Save As (.xlsx), and link it again. |