
How to connect a card template to PostgreSQL
What you'll learn
Connect a card template to a table on a PostgreSQL server with the Database Wizard, link its columns to card objects, and show the records in Operating mode. The records stay on the server: eMedia Cards reads and writes them live.
Before you start
-
Standard Edition or higher. In Starter Edition, Next shows an upgrade note and the wizard does not continue.
-
Your own PostgreSQL server, with a database and a table that holds your card data. We can't provide a sample database: PostgreSQL is a server, not a file.
-
A PostgreSQL login: user name and password, with read rights on the table, and write rights to add, change or delete records.
-
The 64-bit psqlODBC driver on each PC that runs eMedia Cards. Download
psqlodbc_x64.msifrom odbc.postgresql.org and install it. You don't need to create an ODBC data source (DSN).
The screenshots use the Northwind Badges template, Northwind Badges.eccbak from How to export a full backup, and our test server on the same PC: Server: localhost, Database: emc_test, User ID: emc_rw. Use your own server, database, user name and password.
How to connect a PostgreSQL table to a template
-
Open your template and switch to Design mode. Here: the Northwind Badges template, still connected to its Excel file.
-
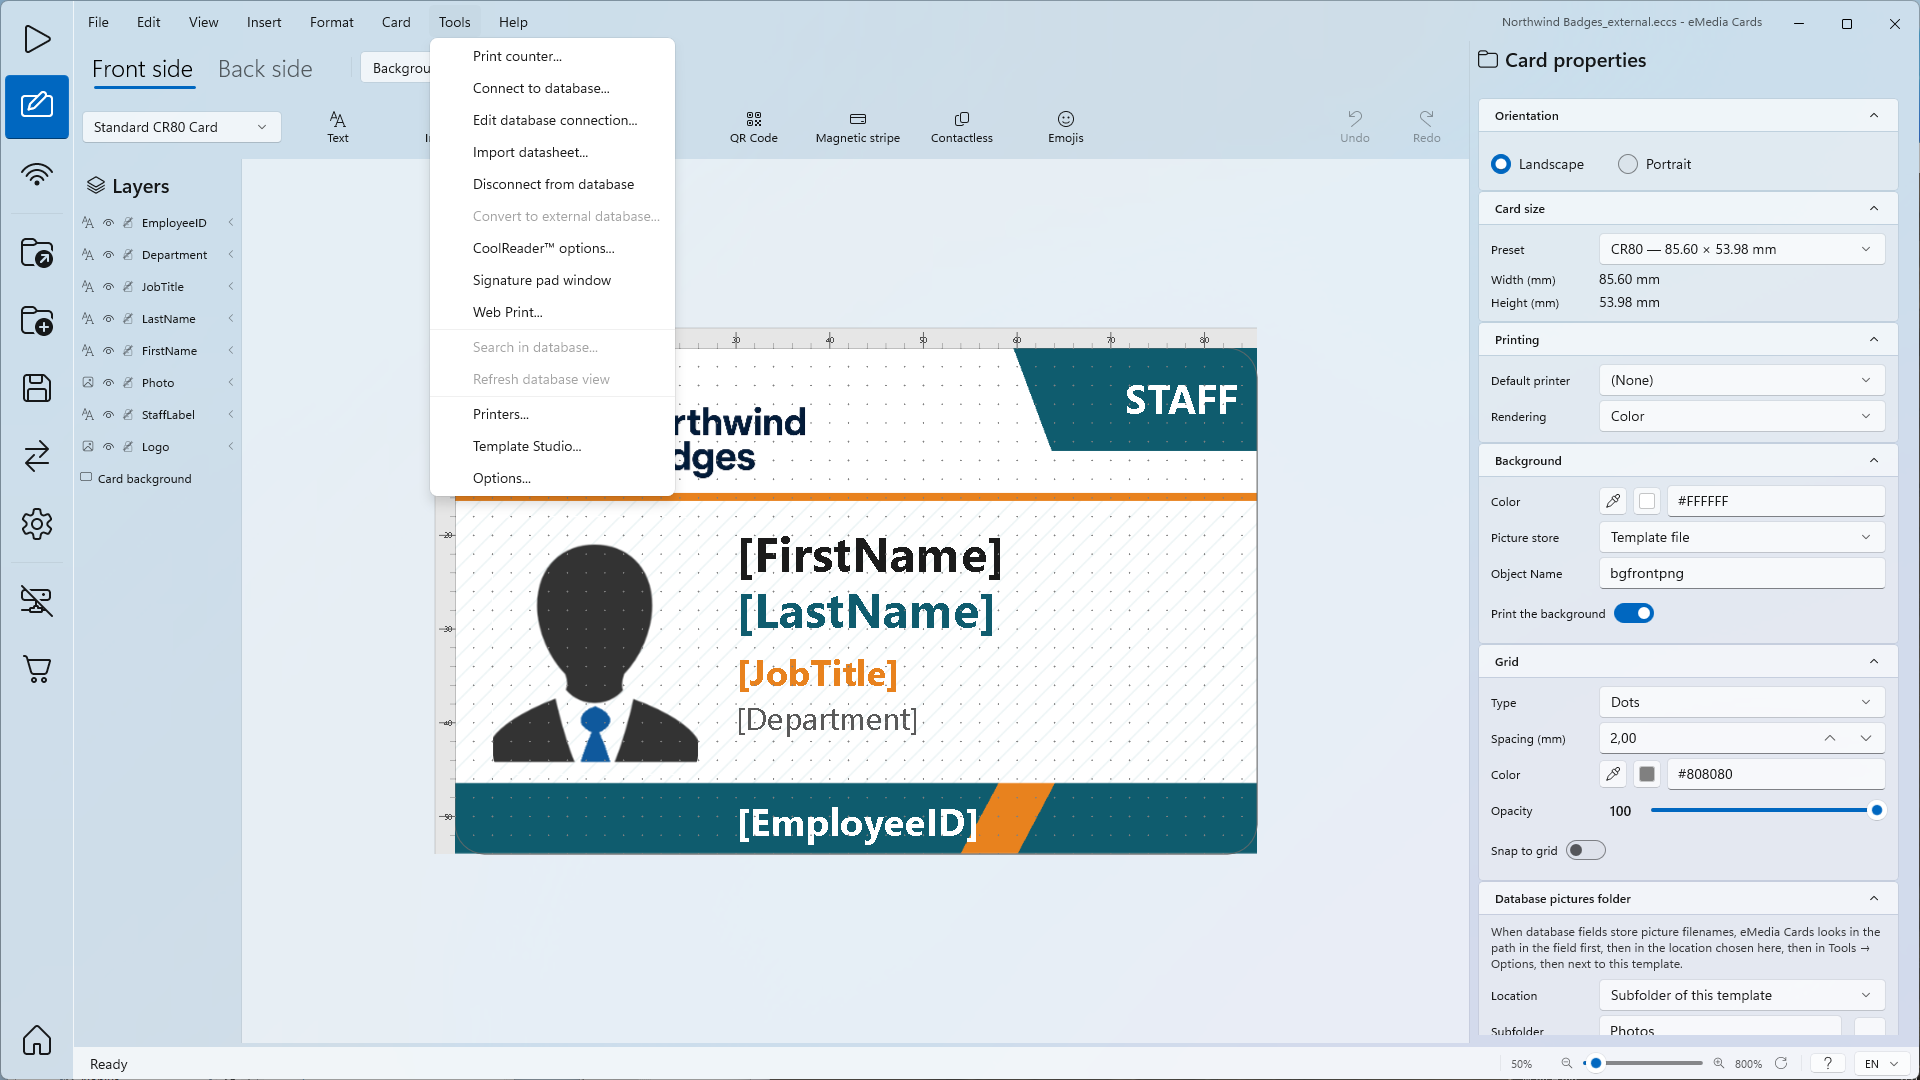
Click Tools > Connect to database.... If the message Database Connected appears, click Disconnect & Continue. The Database Wizard opens on step 1, Connection.
-
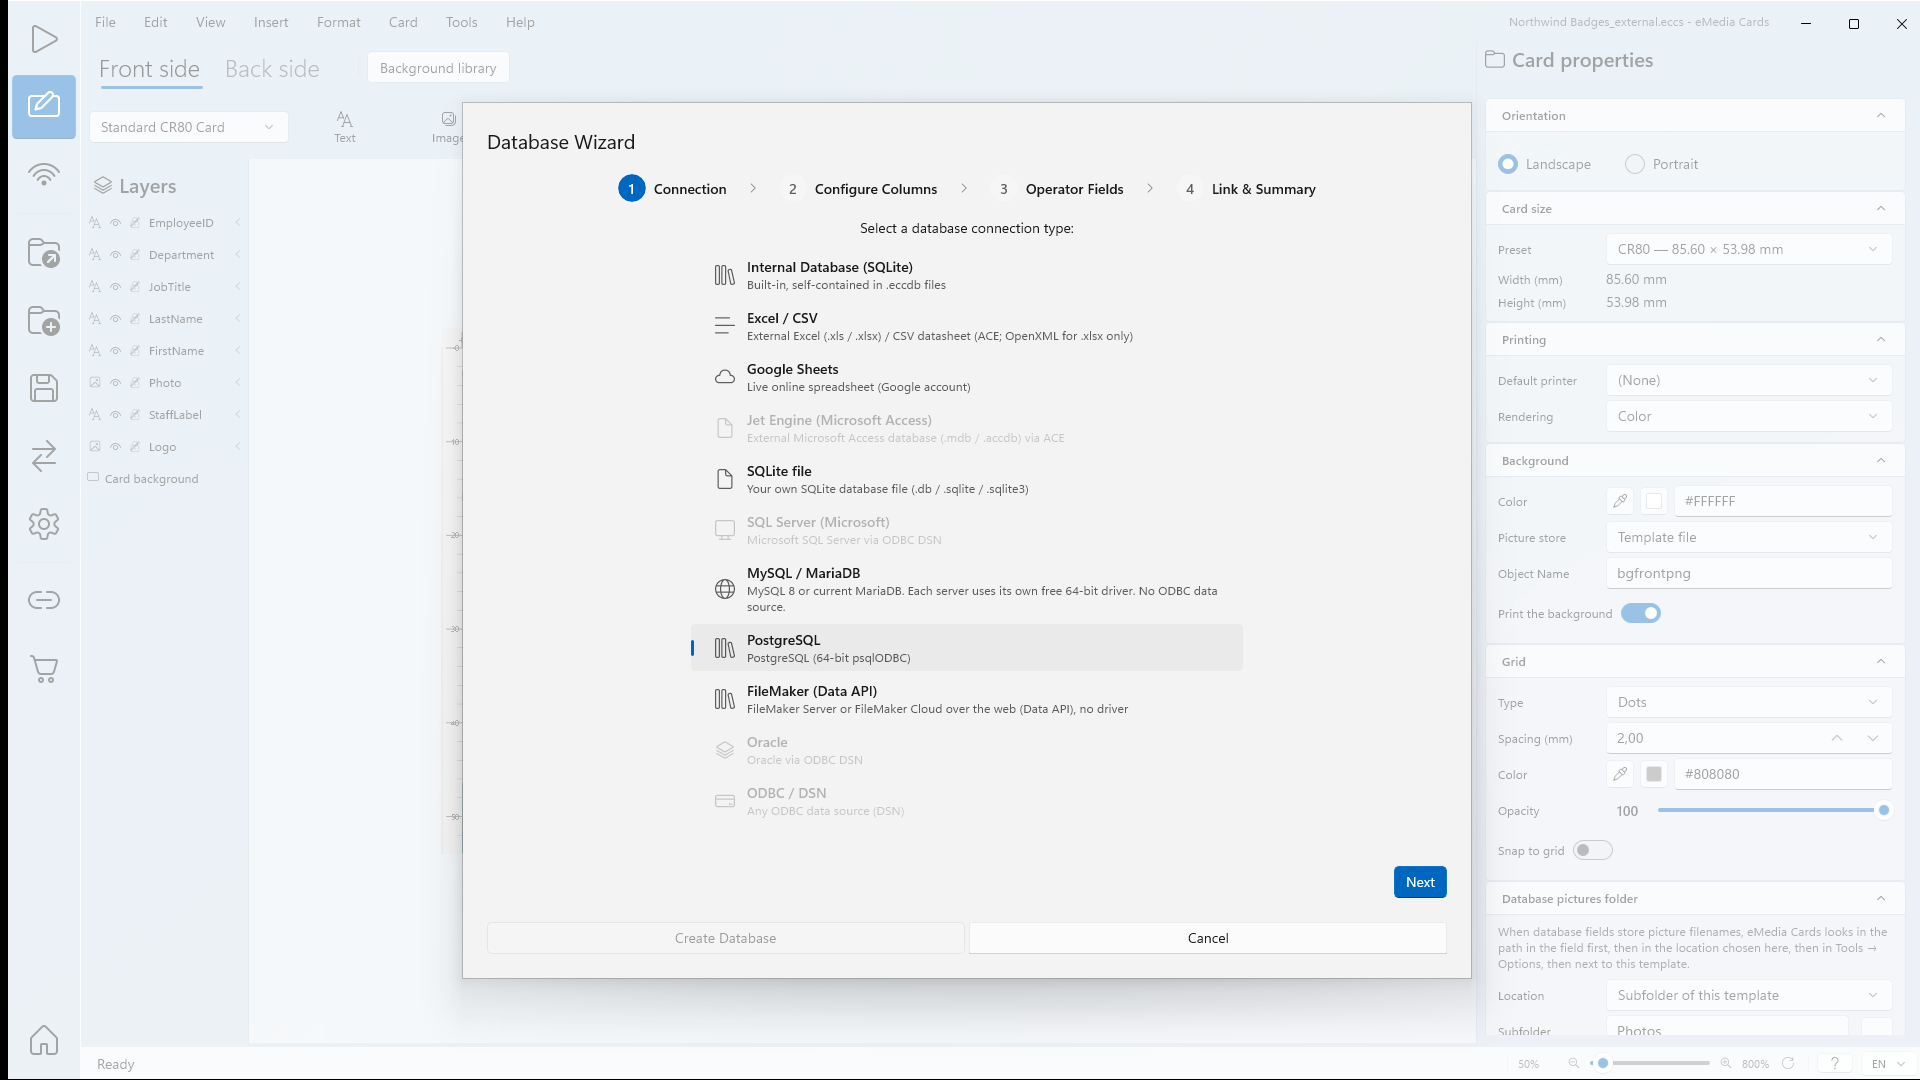
Under Select a database connection type:, click PostgreSQL.
-
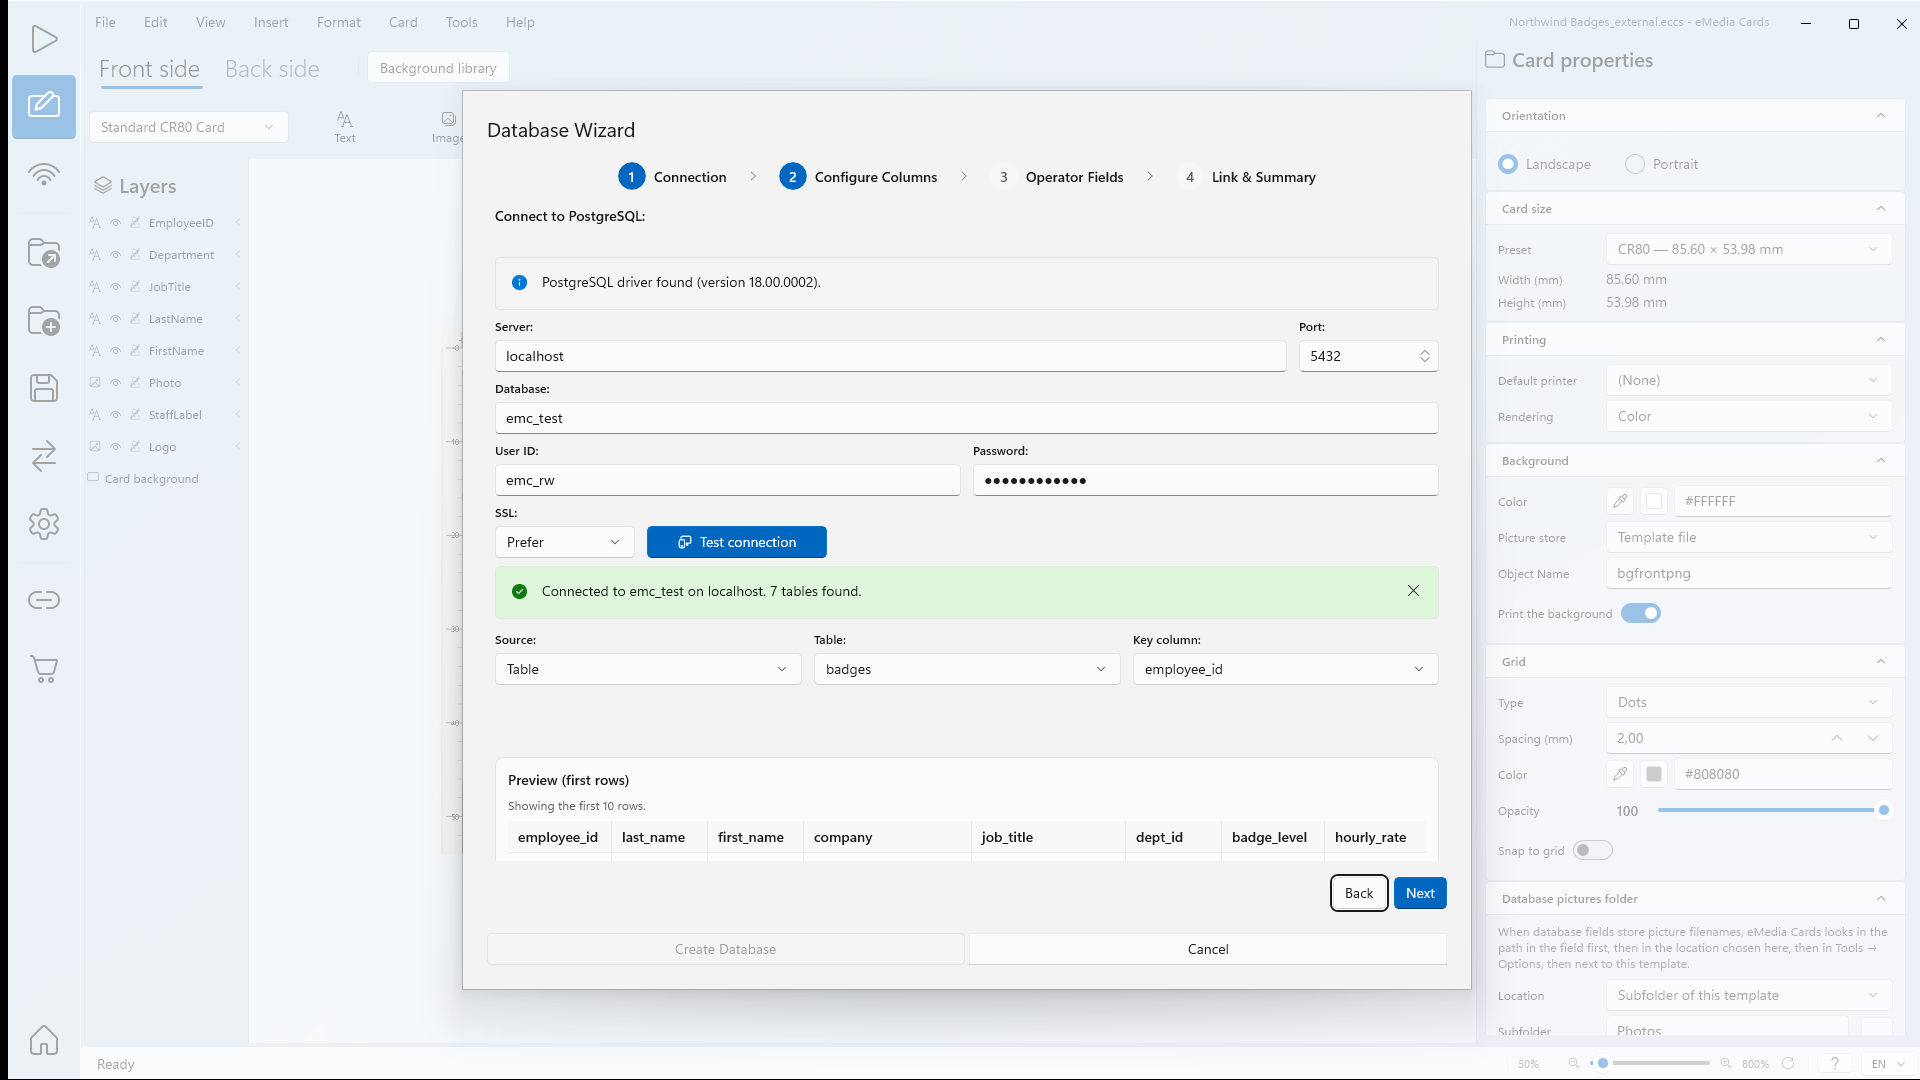
Click Next. Step 2, Configure Columns, opens on Connect to PostgreSQL:. The message PostgreSQL driver found shows the driver version.
-
In Server:, type the name or IP address of the PostgreSQL server, for example
badge-server. Here:localhost, because the server runs on the same PC. -
In Port:, keep
5432unless your server uses another port. -
In Database:, type the database name. Here:
emc_test. -
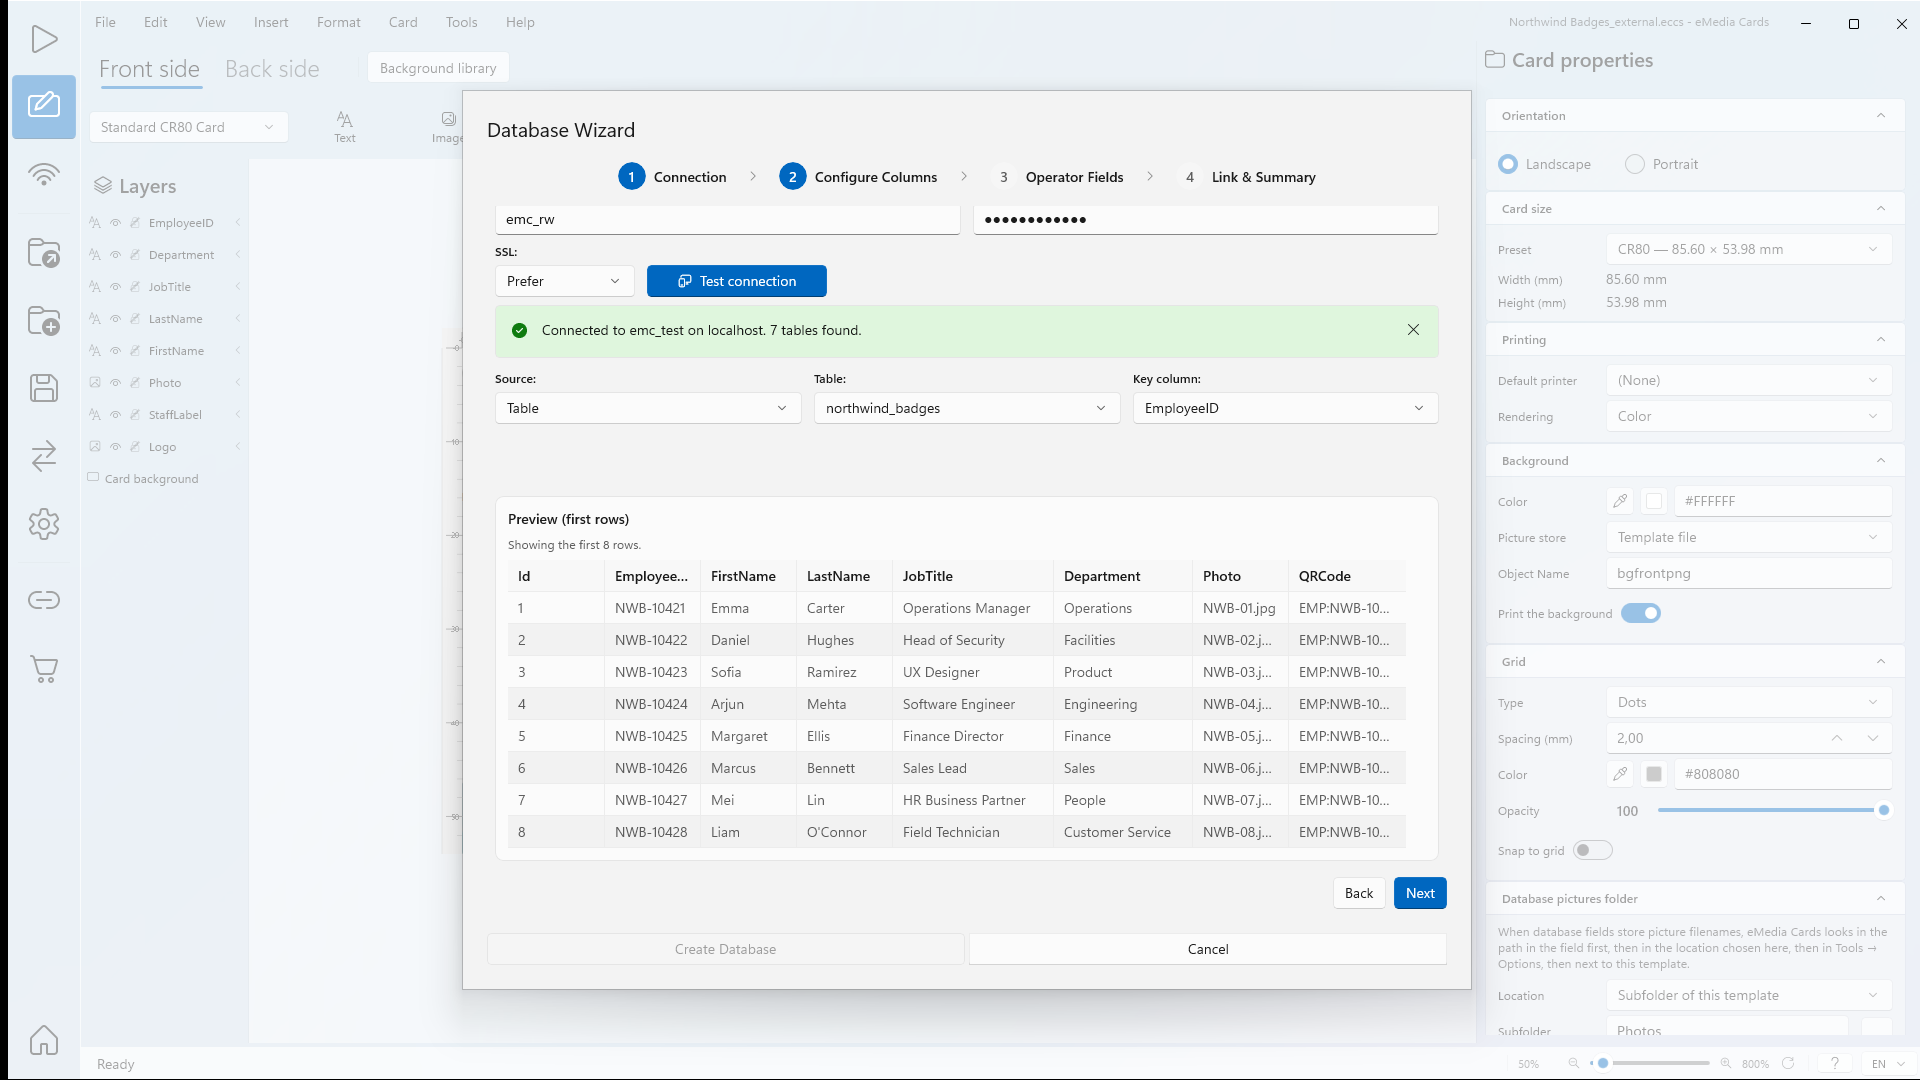
In User ID:, type your PostgreSQL user name. Here:
emc_rw. -
In Password:, type your password. It shows as dots.
-
In SSL:, keep Prefer. Choose Require if your server accepts encrypted connections only, or Off if it has no SSL.
-
Click Test connection. The message shows the database, the server and the number of tables: here Connected to emc_test on localhost. 7 tables found.
-
In Source:, keep Table. The list also offers View and SQL.
-
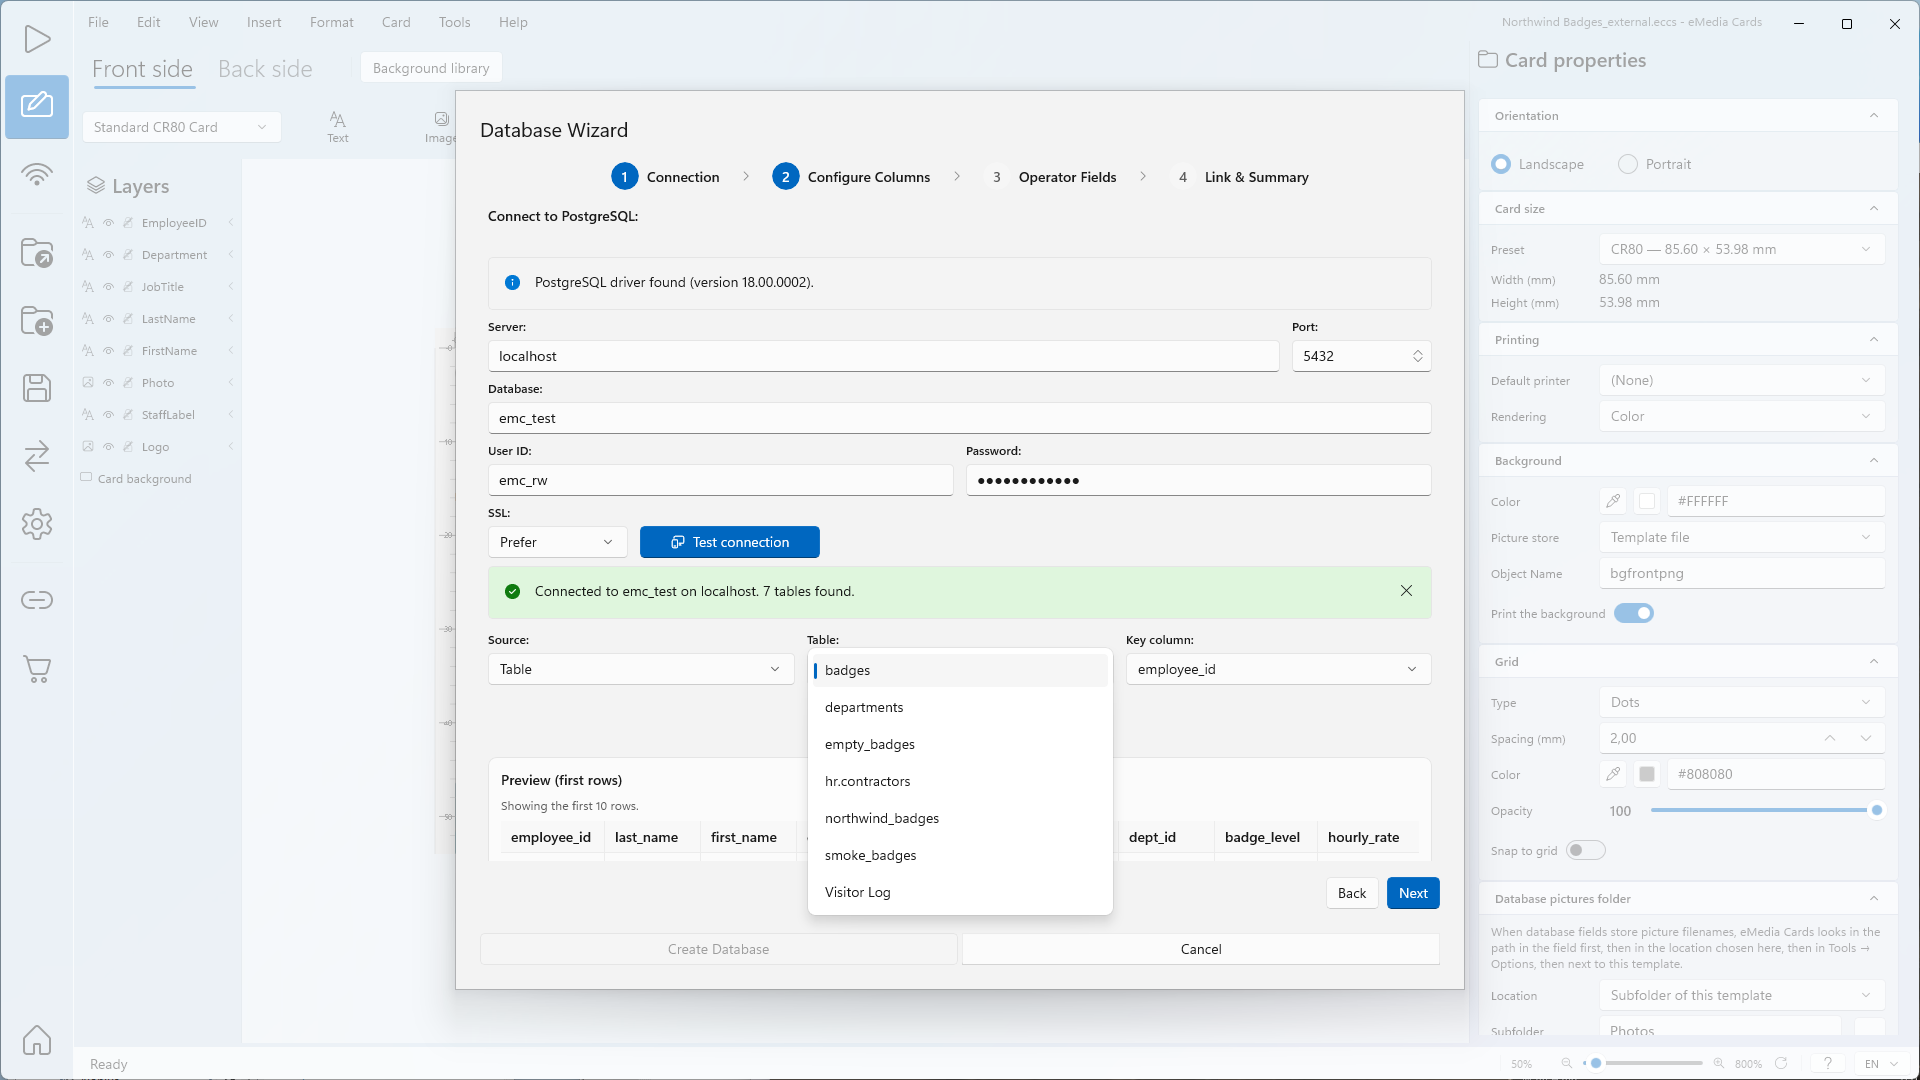
In Table:, choose your table. Here: northwind_badges. Tables of the
publicschema show their name only. Tables of another schema showschema.table, for example hr.contractors.
-
In Key column:, choose the primary key of the table. Here: EmployeeID. Check this list: the wizard can propose another column, here Id.
-
Check the Preview (first rows) table. It shows the first 10 rows, here the 8 Northwind badges.
-
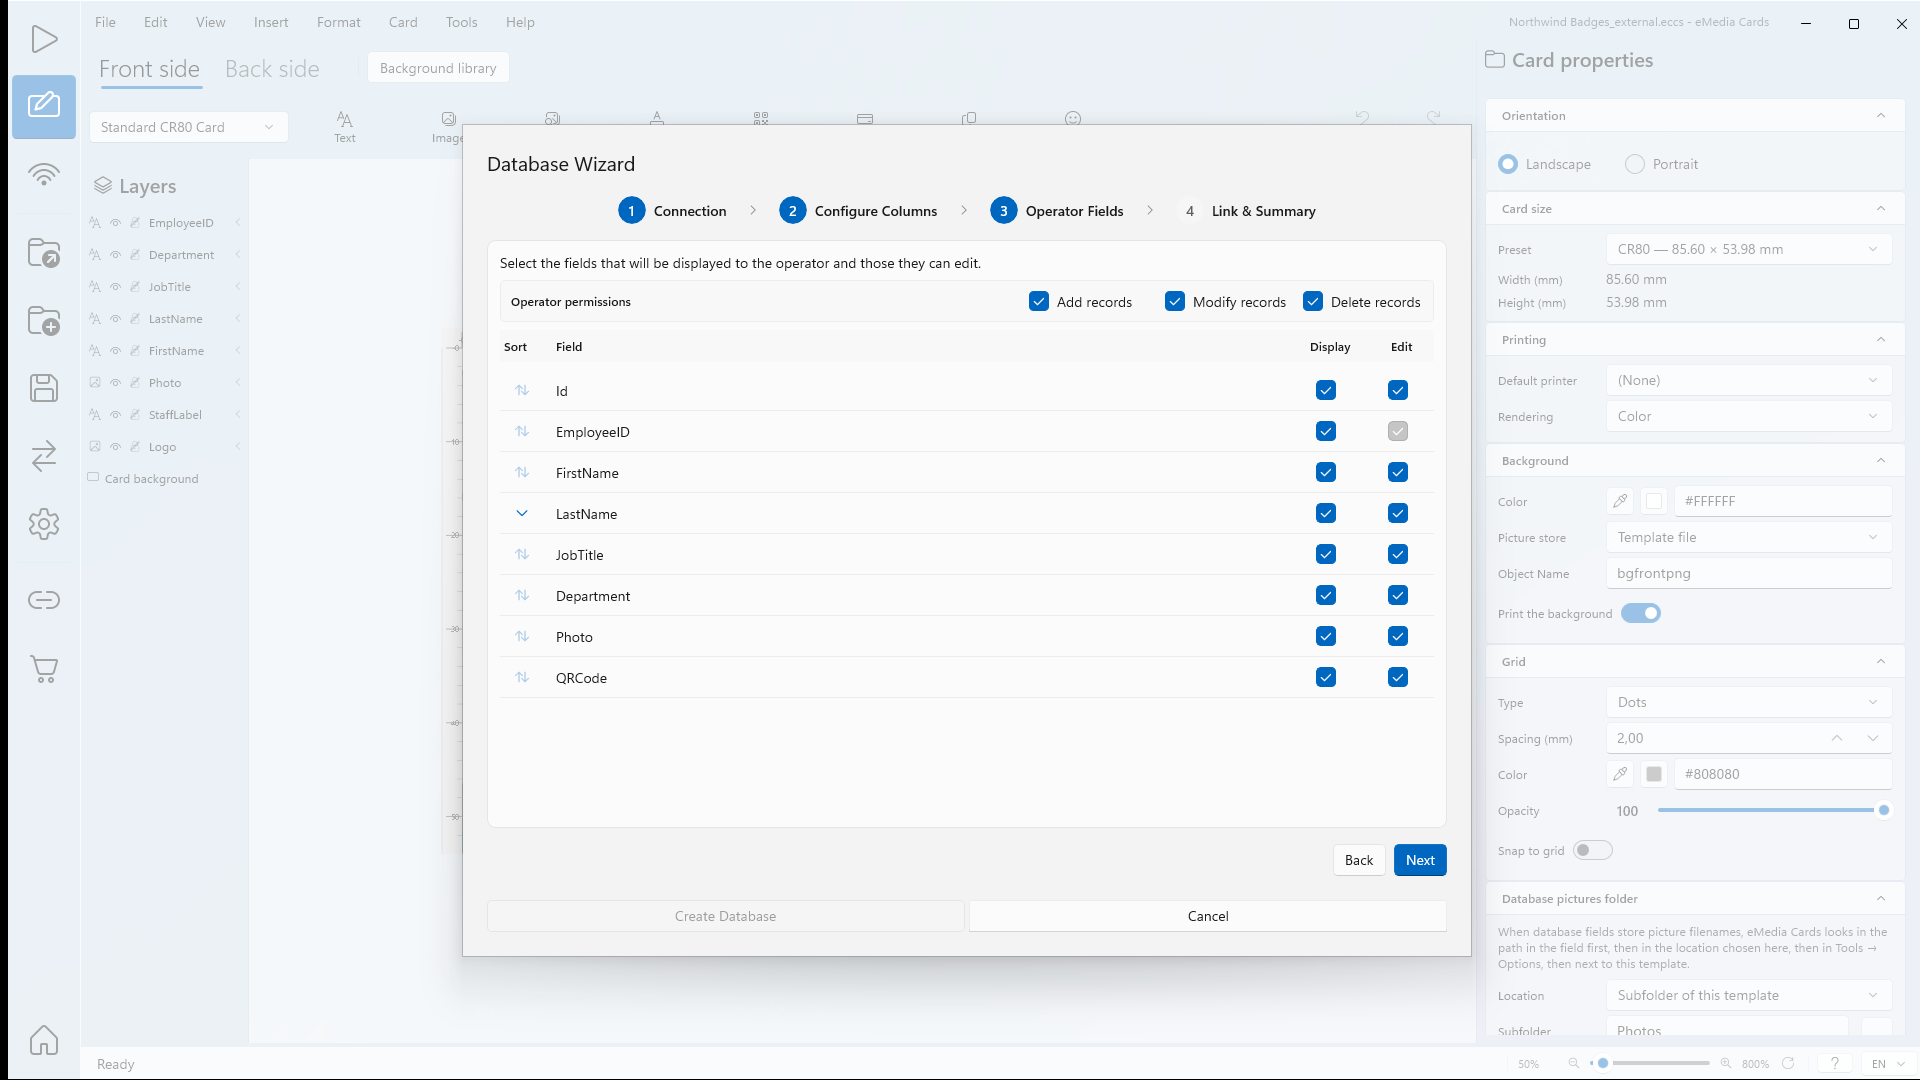
Click Next. Step 3, Operator Fields, opens.
-
In the Display and Edit columns, untick the fields the operator must not see or change. Optional: under Operator permissions, untick Add records, Modify records or Delete records.
-
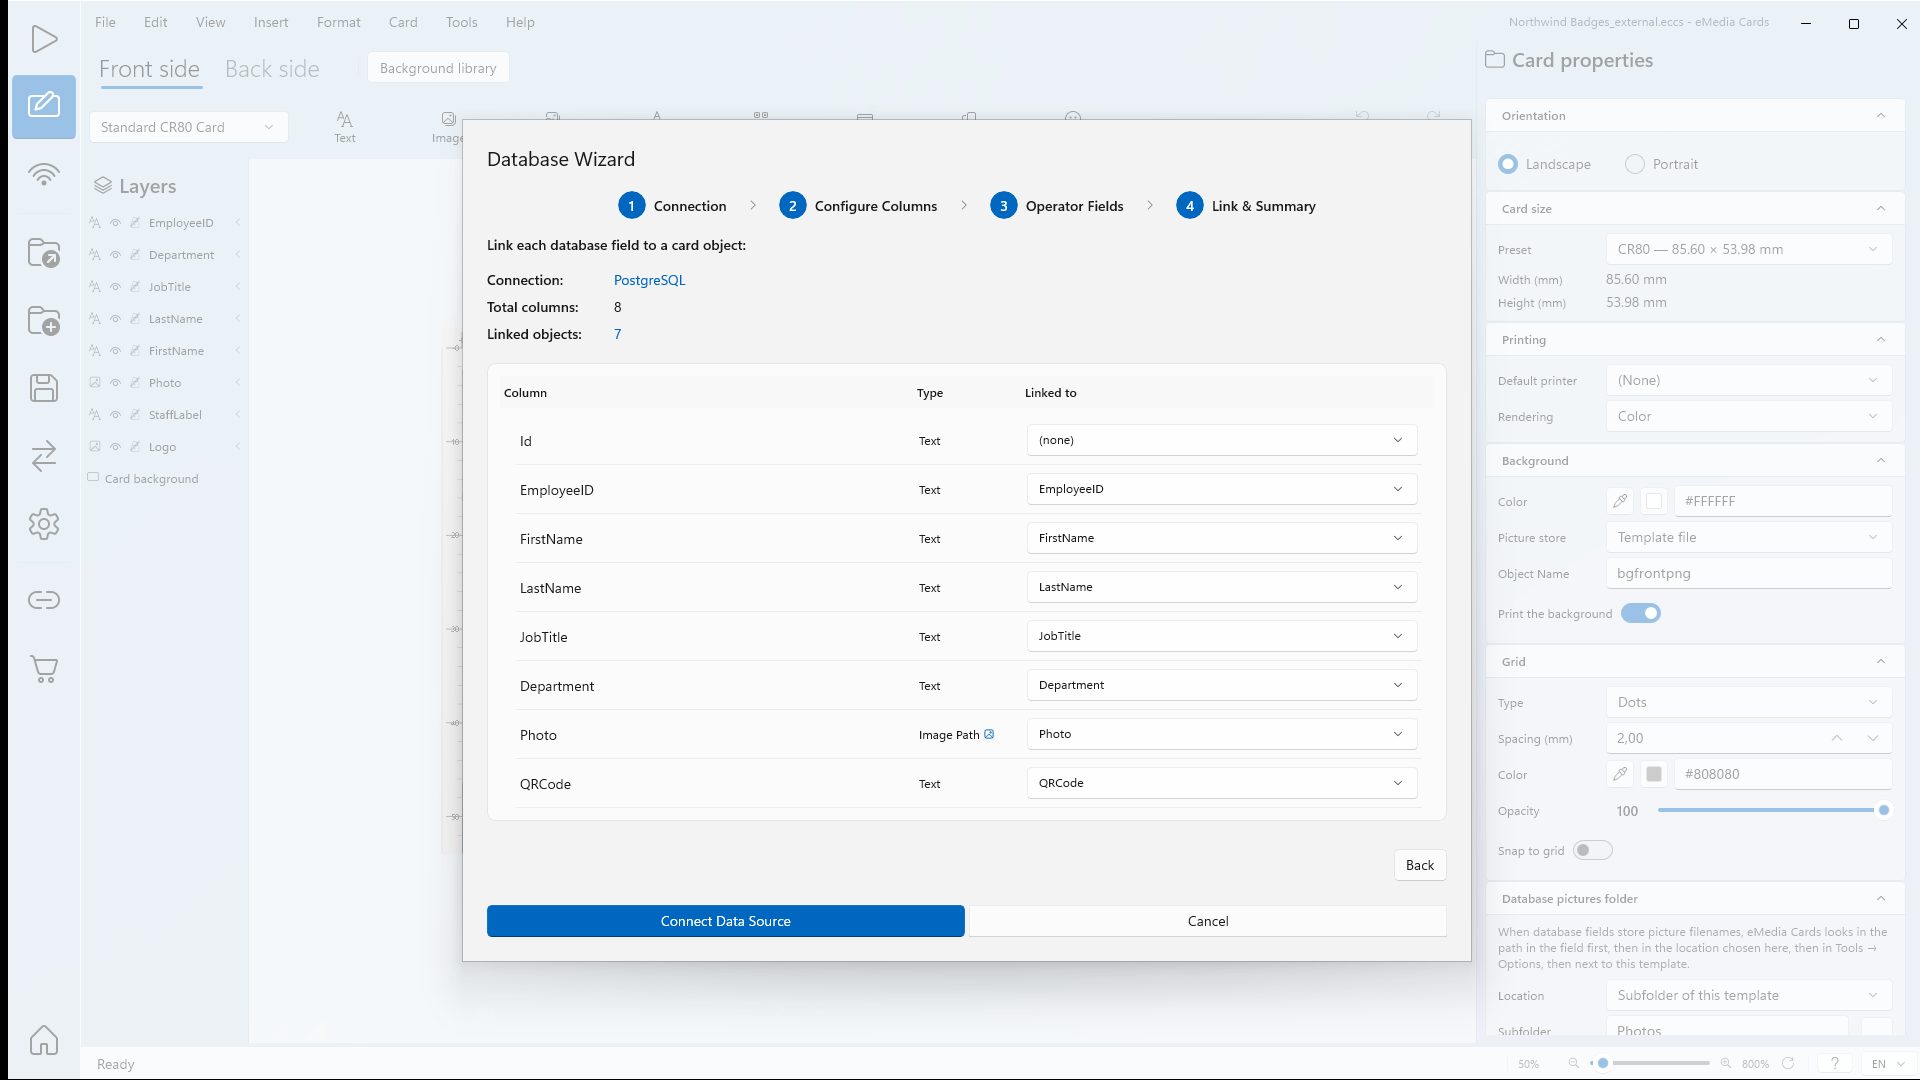
Click Next. Step 4, Link & Summary, opens.
-
Check Connection:, Total columns: and Linked objects:. Here: PostgreSQL, 8 and 7. Each column whose name matches a card object is linked automatically. Id stays on (none): it is not shown on the card.
-
Click Connect Data Source.
-
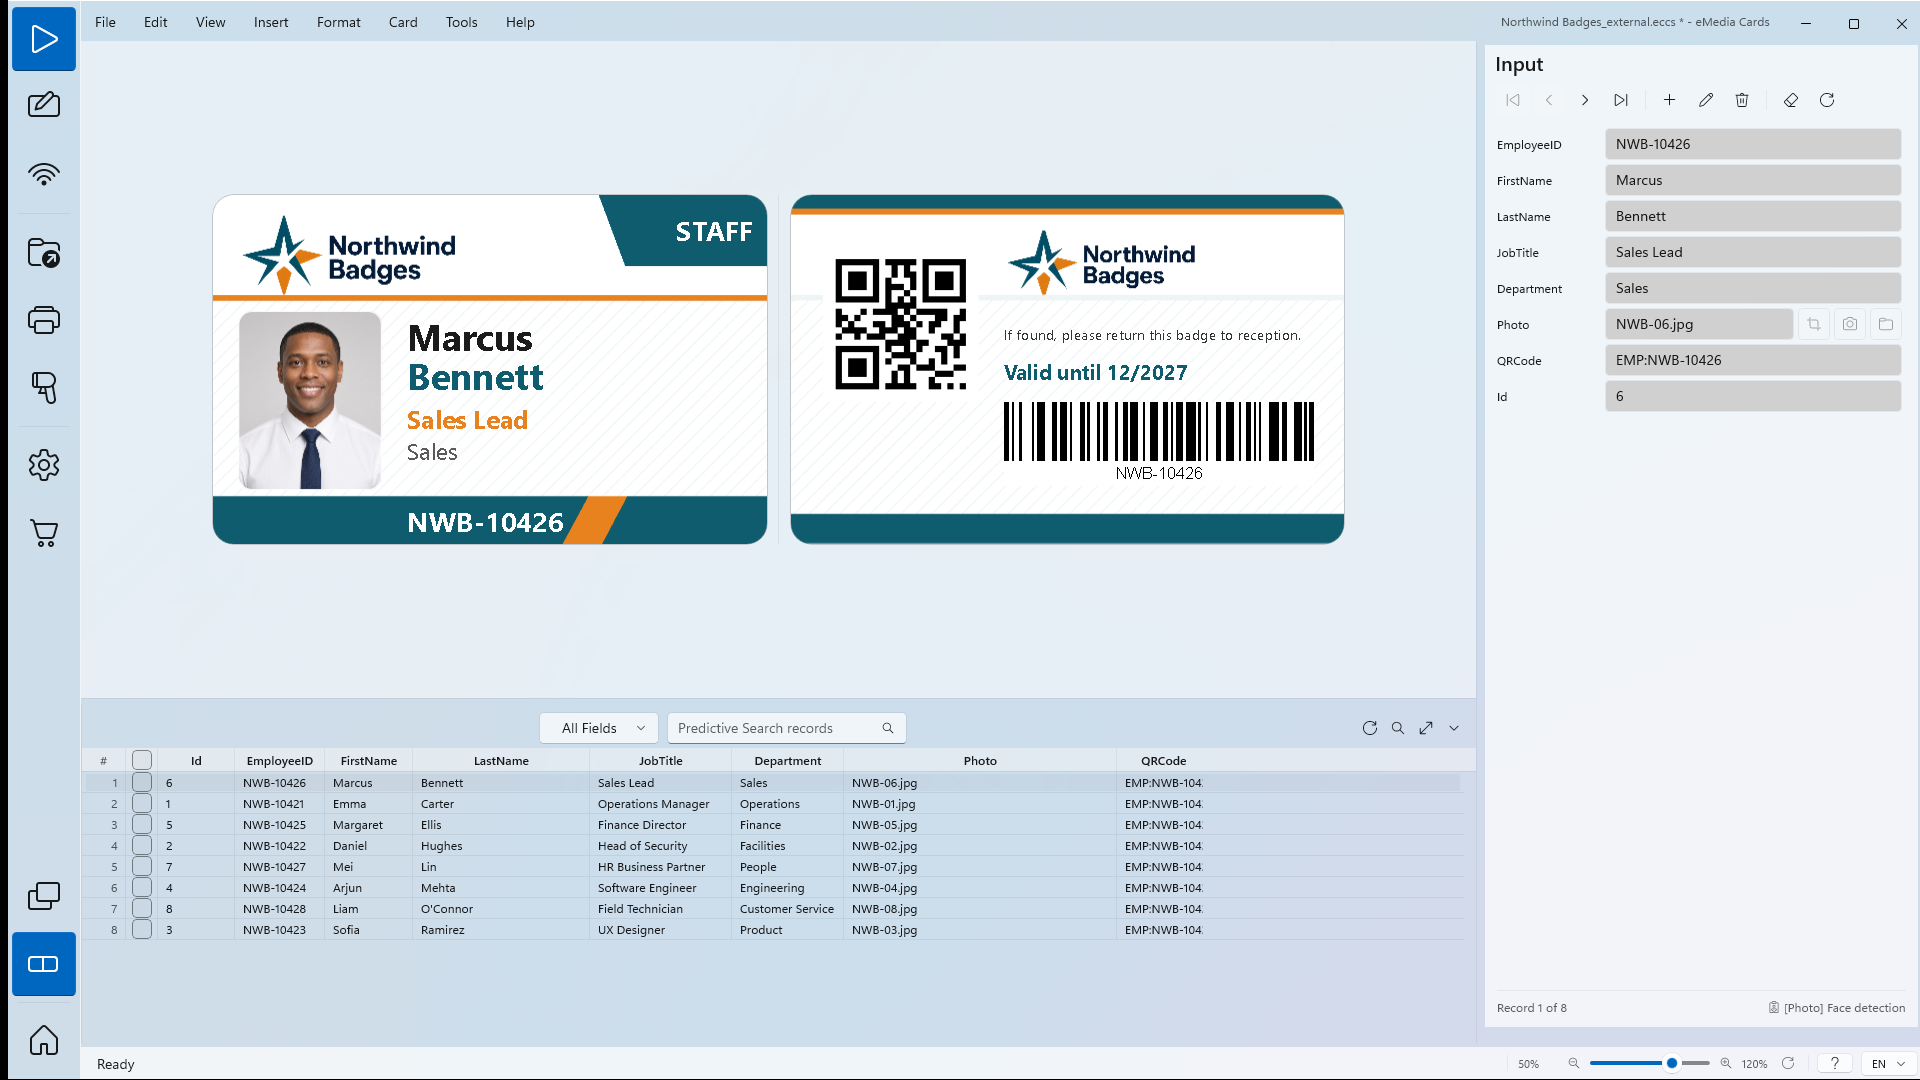
Click View > Operating mode. The card and the records grid show the rows of the PostgreSQL table.
Tips
-
The PostgreSQL table is the live database. Changes made in Operating mode are written to the server. Click Requery to read changes made by other users.
-
Columns named like the card objects are linked automatically.
-
Picture columns hold file names, such as
NWB-01.jpg. eMedia Cards finds the files in the template's pictures folder. -
The password is saved with the template's connection details.
-
The text after Could not connect: comes from the server or the driver. It can be in the server's language.
Common errors
| Symptom | Cause | Fix |
|---|---|---|
| PostgreSQL ODBC driver not installed | The psqlODBC driver is not installed on this PC. | Click Download psqlODBC, install psqlodbc_x64.msi, then click Check again. |
| Only the 32-bit PostgreSQL driver is installed. eMedia Cards is a 64-bit app and needs the 64-bit psqlODBC driver (psqlodbc_x64.msi). Install it, then click Check again. | Only the 32-bit driver is installed. | Install psqlodbc_x64.msi, then click Check again. |
| Only the ANSI PostgreSQL driver is installed. eMedia Cards needs the Unicode driver, PostgreSQL Unicode(x64), from the same 64-bit psqlODBC package. Install it, then click Check again. | The Unicode driver is missing. | Install the full 64-bit psqlODBC package, then click Check again. |
| Could not connect: Connection refused. Is the server running on that host and accepting TCP/IP connections? | Wrong Port:, or the PostgreSQL server is stopped or doesn't accept network connections. | Check Port:, usually 5432. Ask your administrator to check the server. |
| Could not connect: timeout expired | Wrong Server: address, or a firewall blocks the port. | Check the server name or IP address. Ask your administrator to open the port in the firewall. |
| Could not connect: The user name or password is incorrect. Check them and try again. | Wrong User ID: or Password:. | Type the user name and your password again. User names are case-sensitive. |
| Could not connect:, followed by a message that the server refuses this PC or this user | The server does not accept connections from this PC. | Ask your administrator to allow this PC to connect. |
| Could not connect:, followed by a message about SSL | The SSL: choice doesn't match the server. | Choose Prefer. If the server accepts encrypted connections only, choose Require. |
| Could not connect:, followed by a message that the database does not exist | The Database: name is wrong. | Check the name and the case of the database. |
| Connected, but user emc_rw cannot see any tables in this database. | Wrong database, or your login has no rights on its tables. | Check Database:. Ask your administrator for read rights on the table. |