
How to crop and zoom a photo on a card
What you'll learn
Frame a photo yourself in Design mode: zoom in, move the picture inside its frame in the Adjust picture window, then fine-tune it with Zoom level, left and Top. You'll also see how to adjust the photo of a single card in Operating mode.
Before you start
-
eMedia Cards installed and activated, any edition.
-
A card with a photo object. This example uses
Benjamin Turner badge.eccs, the badge from How to add a photo to a card: its photo object Photo1 already showsBenjamin Turner.jpg, a computer-generated portrait. -
The badge, the photo and the logo are in the download above, with a
README.txt. Keep the files in the same folder.
How automatic framing works
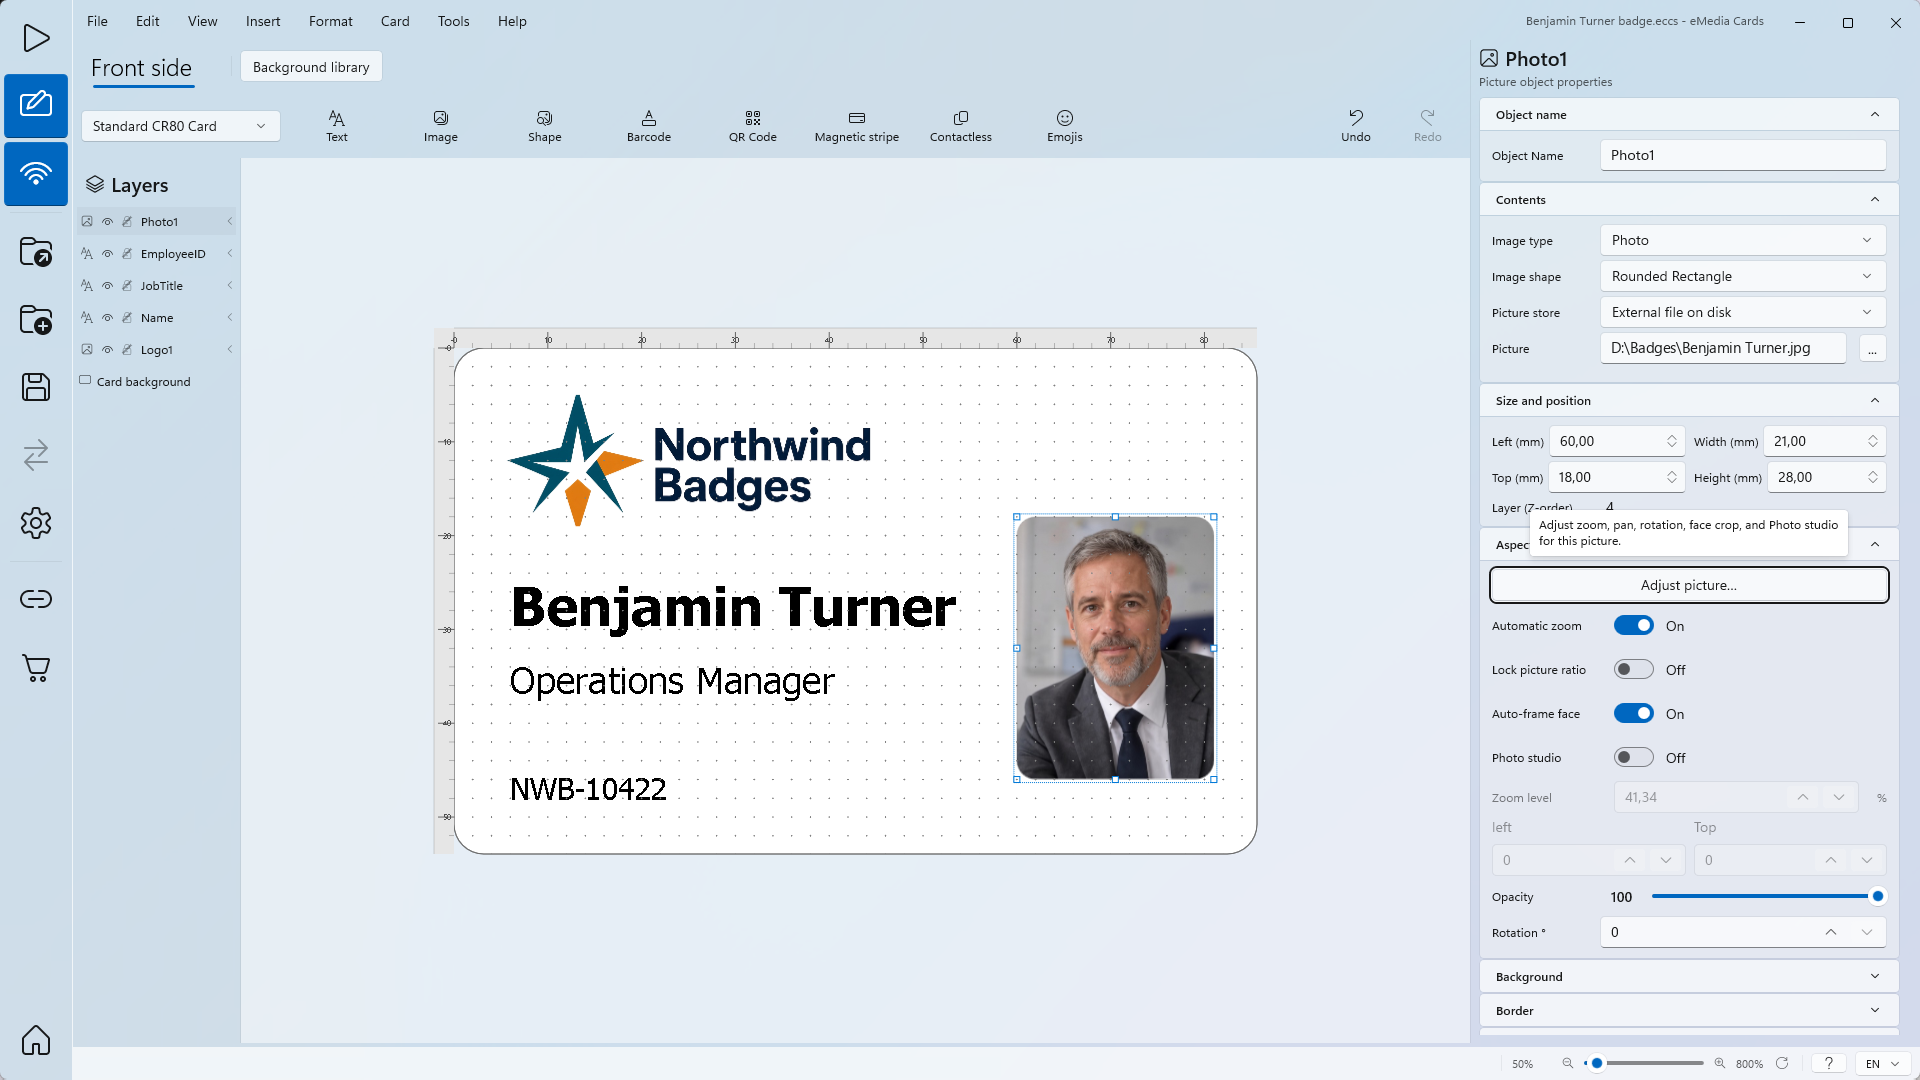
A new photo object starts with Automatic zoom on: the picture fills its frame. With Auto-frame face on, eMedia Cards also crops it around the face, like an ID photo. While Automatic zoom is on, Zoom level, left and Top are greyed out. To frame the photo yourself, use the Adjust picture window, or turn Automatic zoom off.
How to zoom and move the photo
-
Open
Benjamin Turner badge.eccsand switch to Design mode. -
Click the photo on the card, or Photo1 in Layers. Picture object properties opens.
-
Under Aspect, click Adjust picture….
-
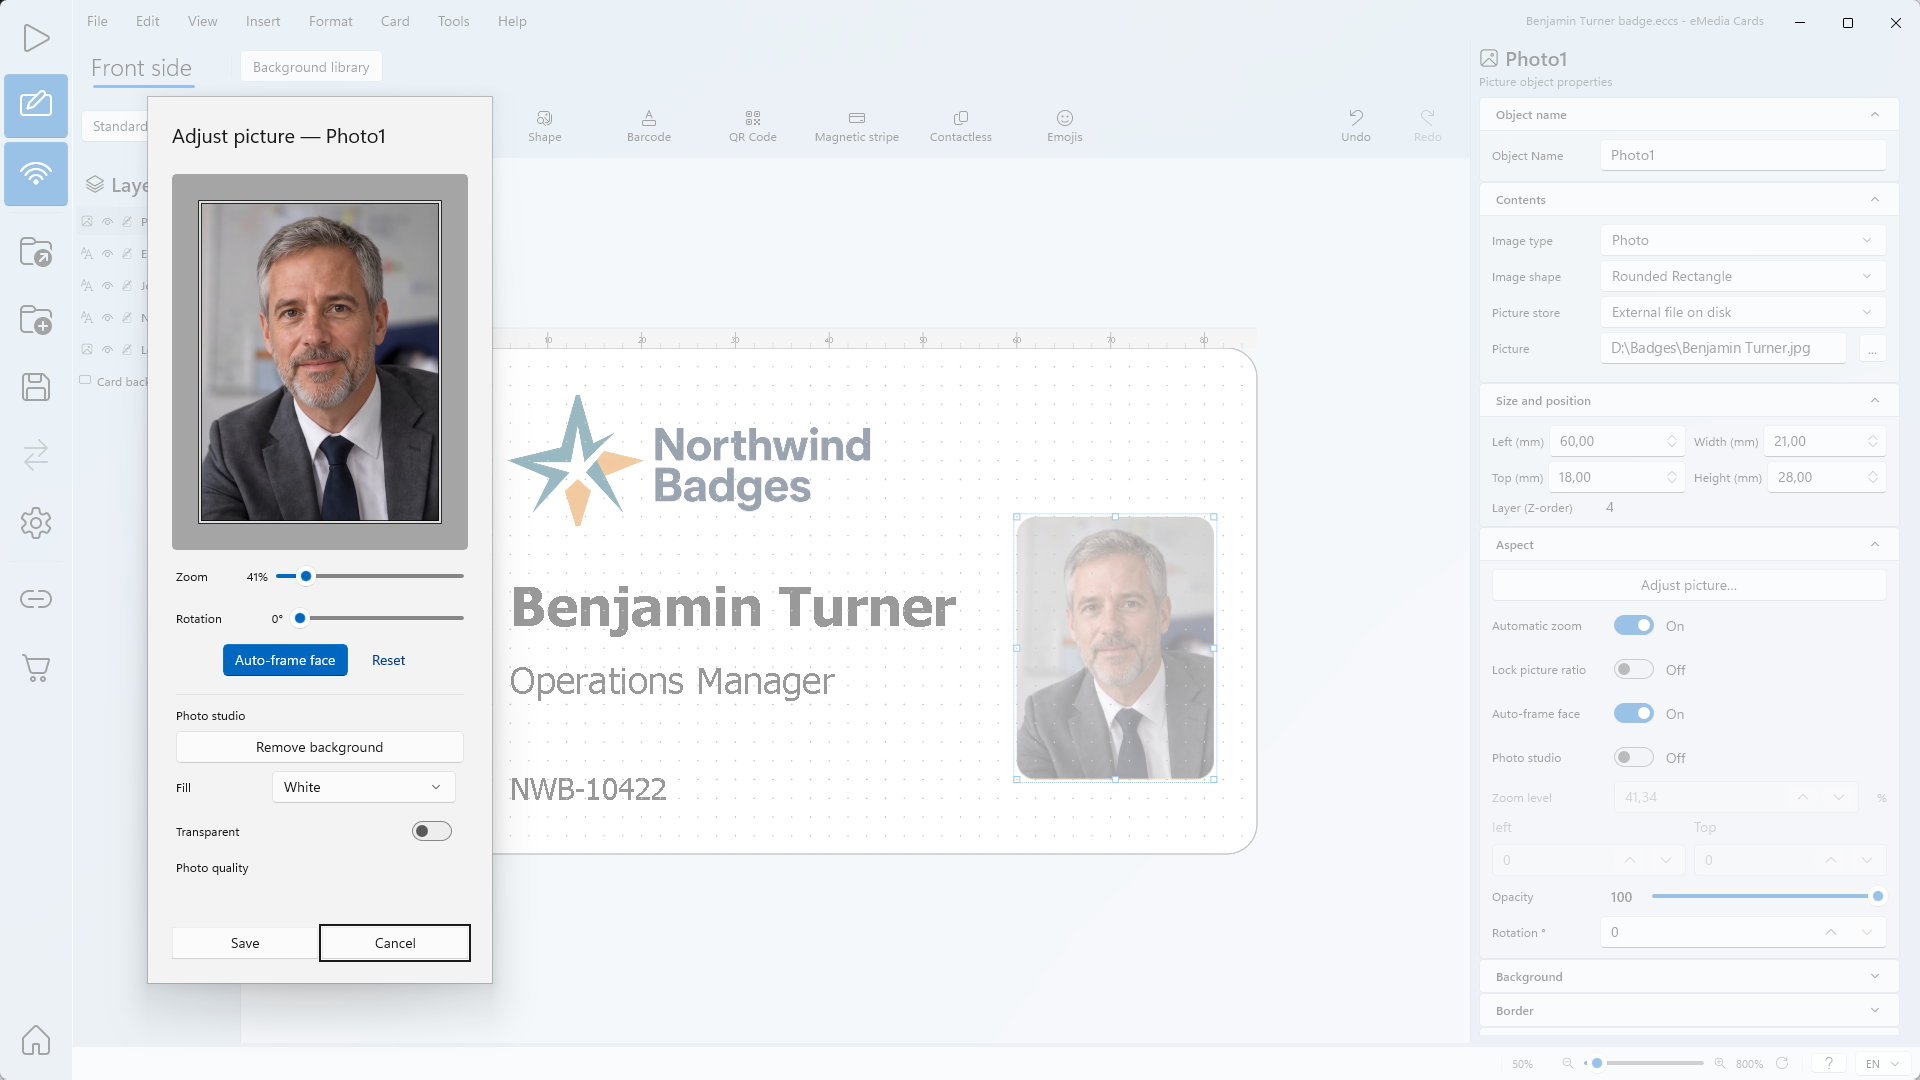
The window Adjust picture — Photo1 opens. The preview shows the picture and the frame of the photo object.
-
Drag the Zoom slider to the right to zoom in, or to the left to zoom out. You can also turn the mouse wheel over the preview.
-
Drag the picture in the preview to move it inside the frame of Photo1.
-
Optional: Rotation turns the picture inside the frame. Rotation ° in the properties turns the whole object.
-
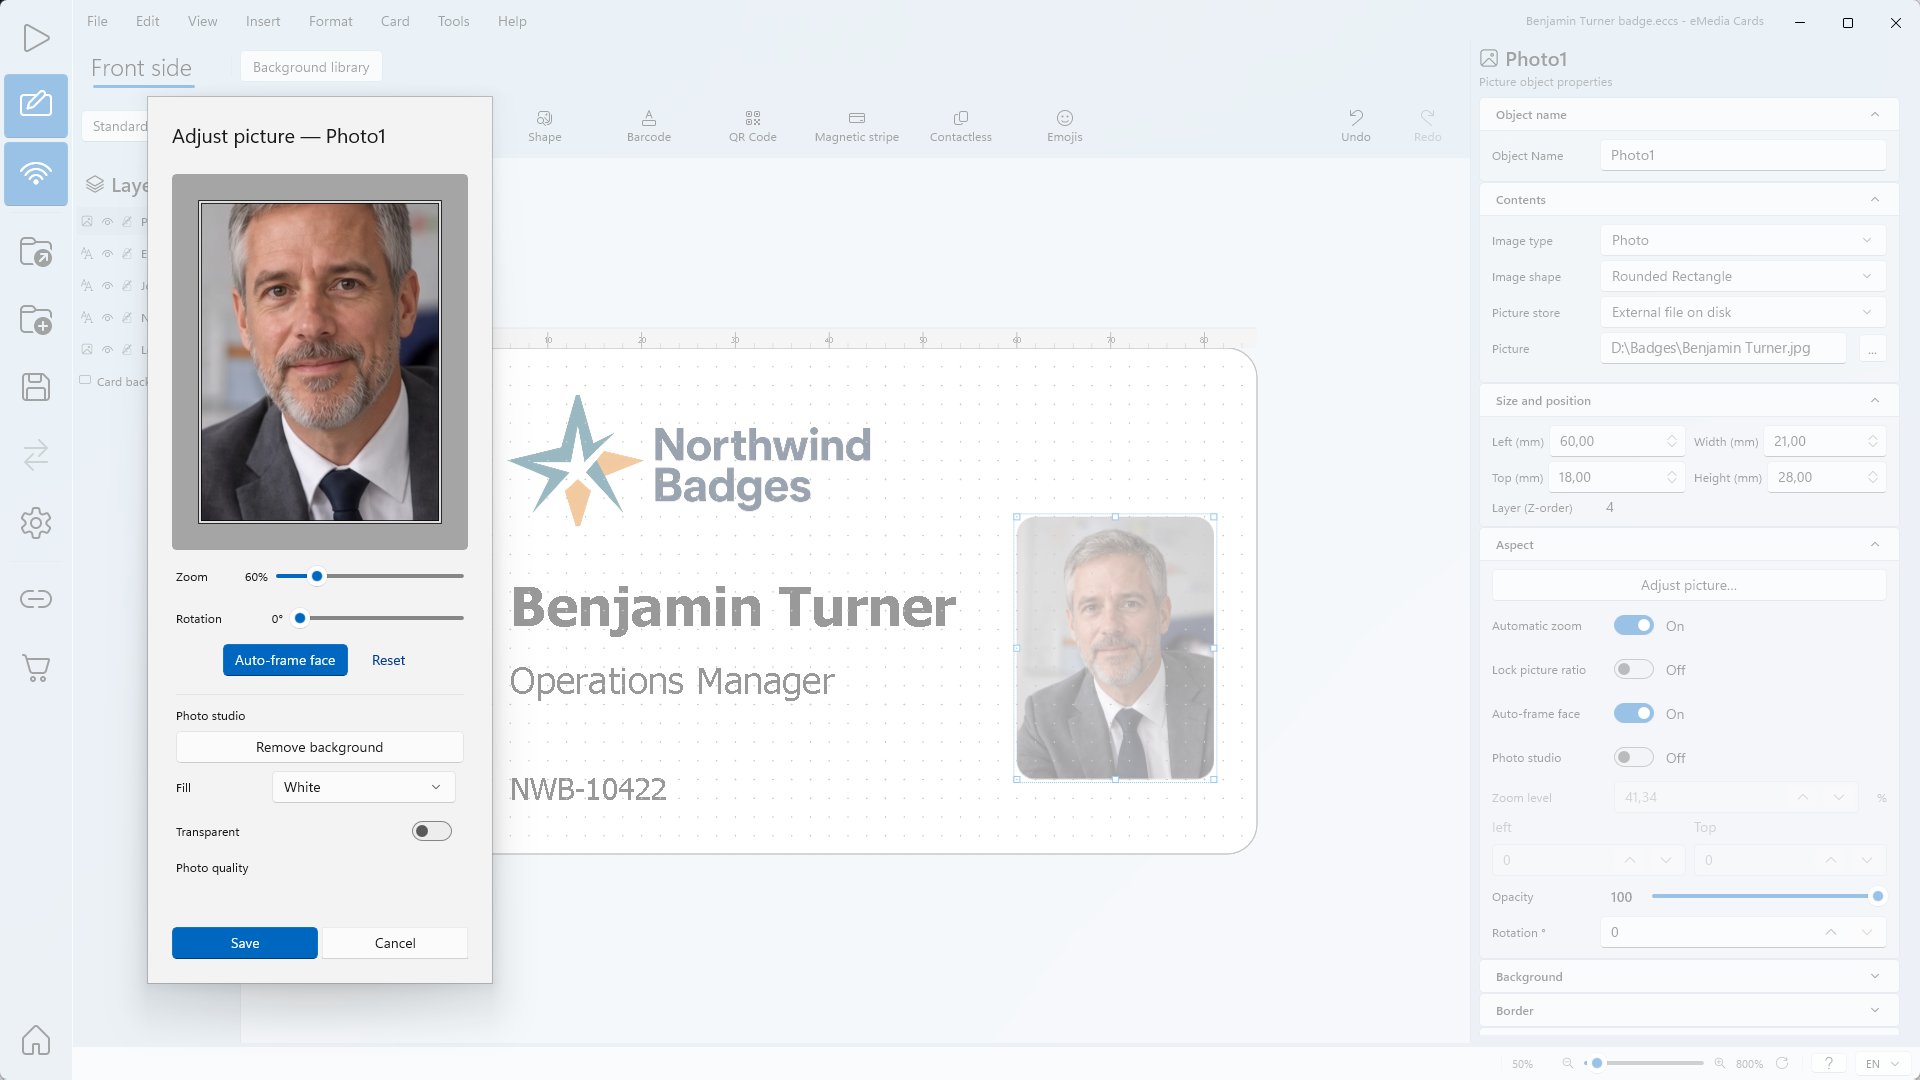
Click Save. Automatic zoom turns off, and Zoom level, left and Top show your framing. Cancel closes the window without changes.
-
If Auto-frame face is on, the card keeps the face framing. Under Aspect, turn Auto-frame face off: the card shows your framing.
In the window, Reset brings back the framing the picture had when you opened the window. Auto-frame face crops the preview around the face again.
How to fine-tune with Zoom level, left and Top
With Automatic zoom off, type a value or use the arrows:
-
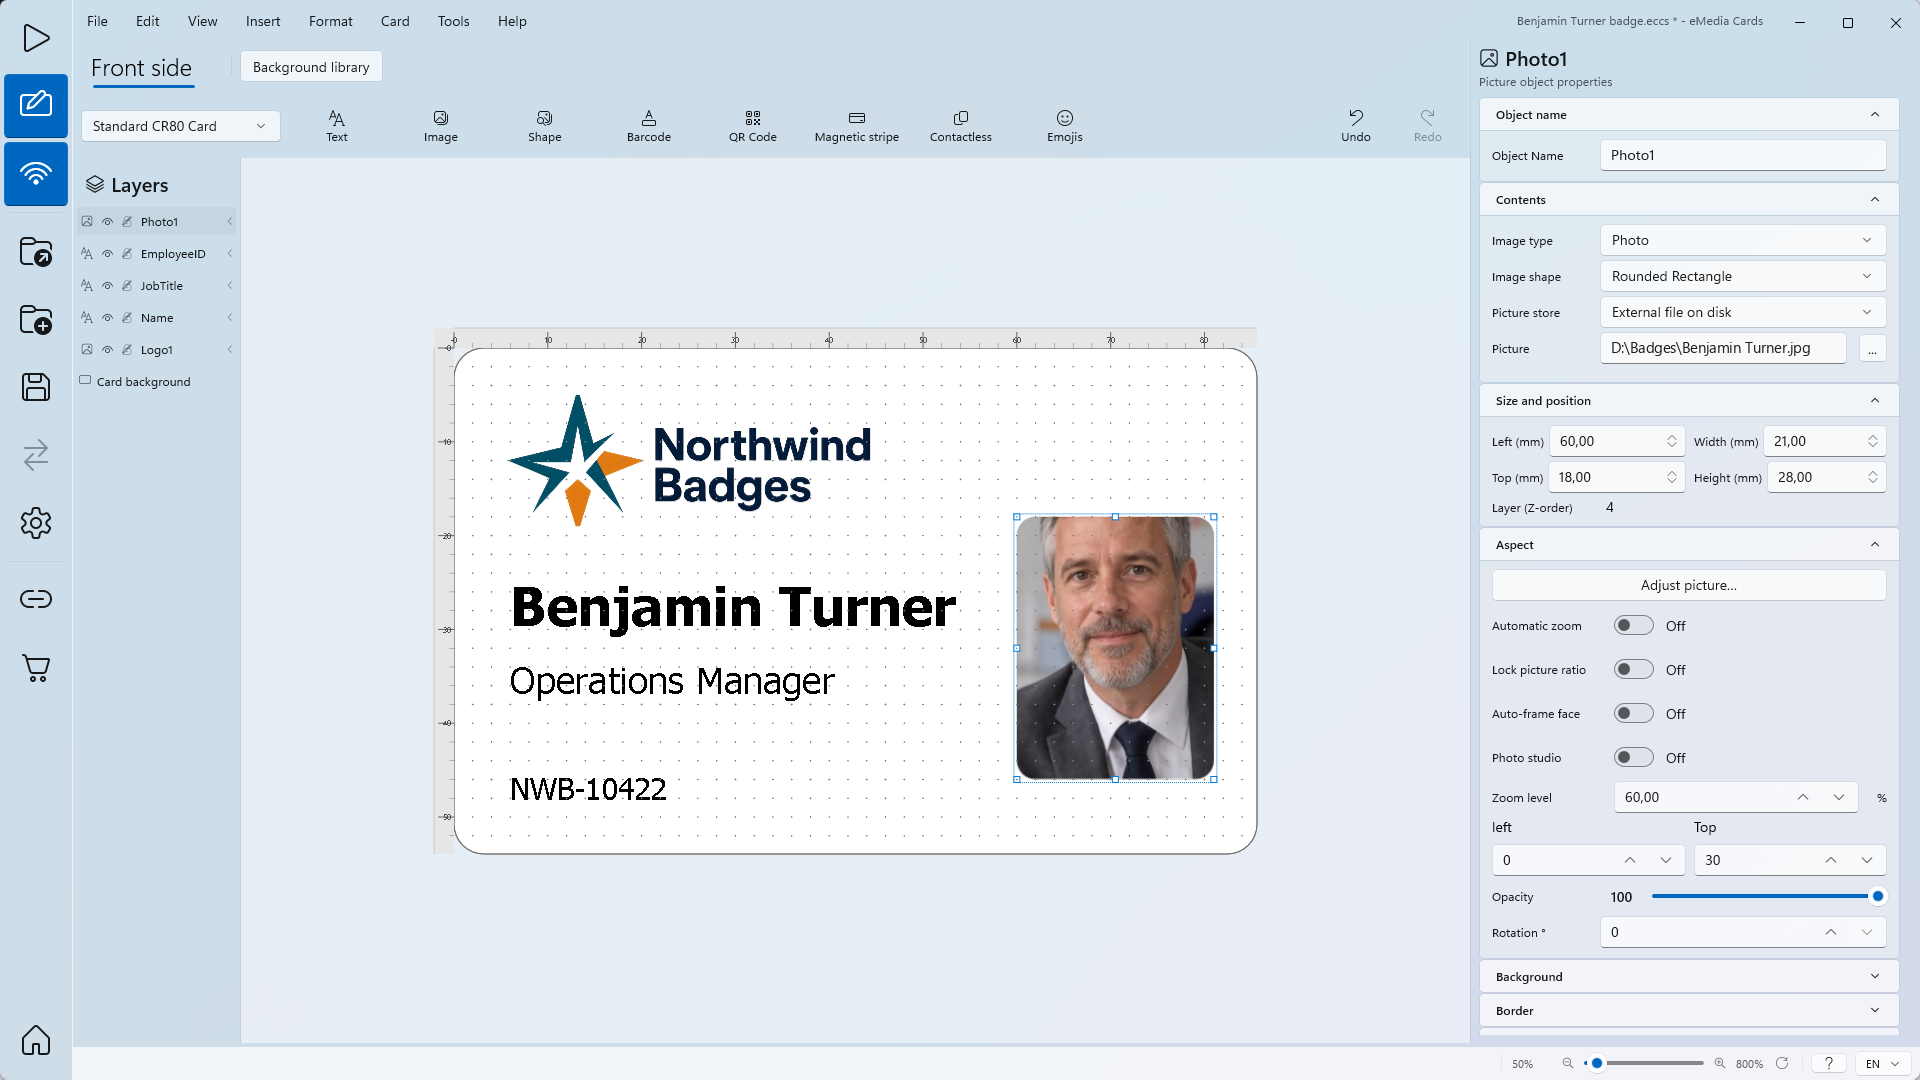
Zoom level: a higher value brings the picture closer.
-
left: a higher value moves the picture to the left inside the frame.
-
Top: a higher value moves the picture up inside the frame.
Here: Zoom level 60, left 0 and Top 30.
To go back to automatic framing, turn Automatic zoom on. When you turn it off again, your values come back.
How to adjust the photo of one card
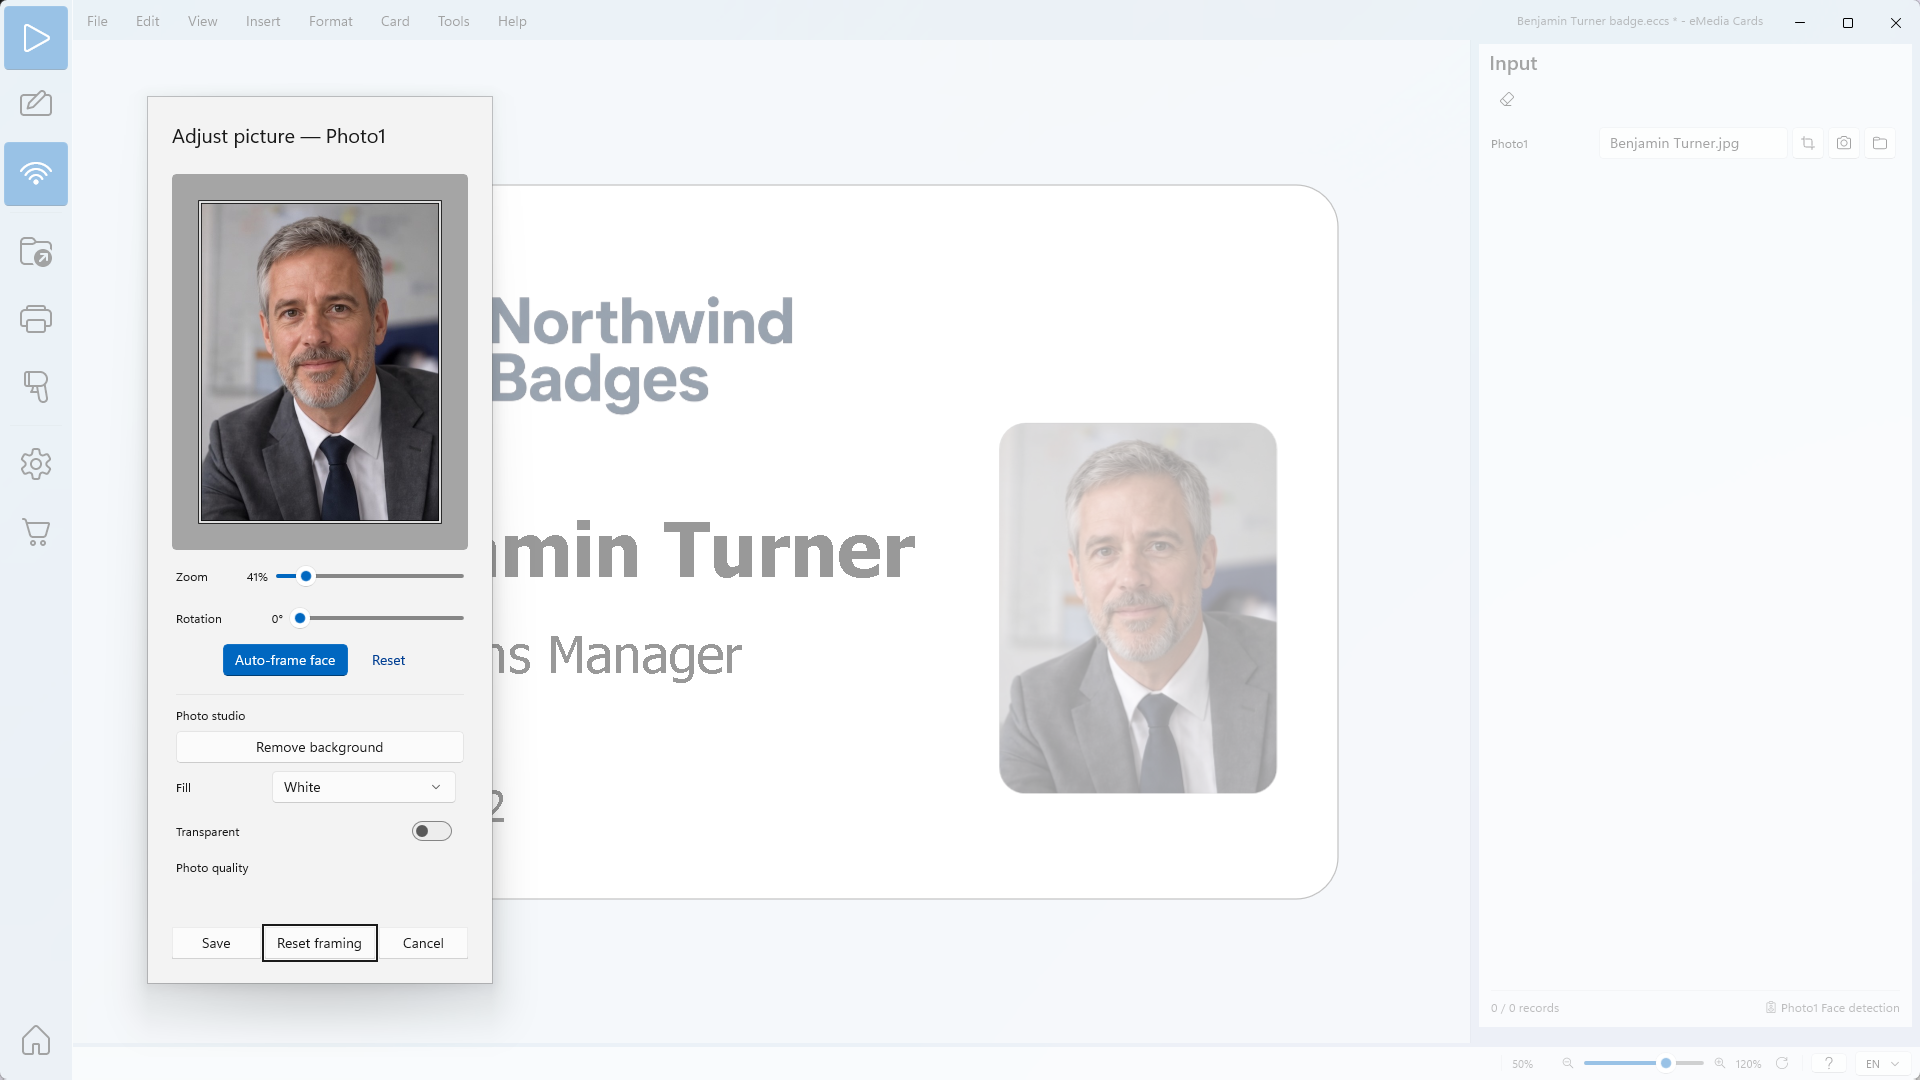
In Operating mode, the Input panel lists Photo1. After you load a picture with Browse for a picture or take one with Acquire picture, click Adjust picture next to Photo1. The same window opens, for this card only:
-
Save keeps your framing for this card.
-
Reset framing brings back the framing set in the template.
-
Cancel closes the window without changes.
Tips
-
The picture file is not changed: eMedia Cards keeps the framing in the card.
-
Frame one photo in Design mode for the template. Use Adjust picture in Operating mode for a photo that needs a different framing on one card.
-
Photo studio, in the same window, works on the background of the photo. You don't need it to crop or zoom.
-
Lock picture ratio, under Aspect, sizes the frame, not the crop: turned on, it sets the height of the photo object to the width-to-height ratio of the loaded picture, keeps the width, and keeps that ratio when you resize the object. It is off by default for a photo, and unavailable with the Circle, Heart and Shield shapes.
Common errors
| Symptom | Cause | Fix |
|---|---|---|
| Zoom level, left and Top are greyed out. | Automatic zoom is on. | Turn Automatic zoom off, or use Adjust picture…. |
| After Save, the card still shows the face framing. | Auto-frame face is on. | Under Aspect, turn Auto-frame face off. |
| No face was detected in this picture. | The face is turned away, too small or too dark. | Frame the photo by hand with Zoom and drag, or use a clearer photo. |
| Face detection is not available on this PC. | Windows face detection can't run on this PC. | Frame the photo by hand with Zoom and drag. |
| Adjust picture is greyed out in Operating mode: Load a picture before adjusting zoom and crop. | No picture is loaded for this card. | Click Browse for a picture or Acquire picture first. |
| Not available per record when the picture is stored in the field. Set it for every record in Design mode. | The picture is stored in the database field. | Set the framing in Design mode. |
| Could not load the picture for adjustment. Check the file path or try another image format. | The picture file was moved, renamed or can't be read. | Open the picture again with ... next to Picture, or use a JPG or PNG file. |