
How to print a different name on each card with User input
What you'll learn
Change the texts of a badge from Fixed data to User input, so that one template prints a different person on each card. You type the name, job title and ID in the Input panel in Operating mode, print, and type the next person. No database.
Before you start
-
The Emma Carter badge from How to create your first card, or
Emma Carter badge.eccsfrom the sample files of that article. Keep the logo file in the same folder as the template. -
The sample files of this article, in the download above, have the finished template,
Staff badge.eccs, and the logo. -
Optional: a card printer. Without one, follow the steps up to Print and check the card on screen.
How to make the texts User input
-
Click File > Open... and open
Emma Carter badge.eccs. It opens in Design mode. -
Click Name under Layers. Text object properties opens.
-
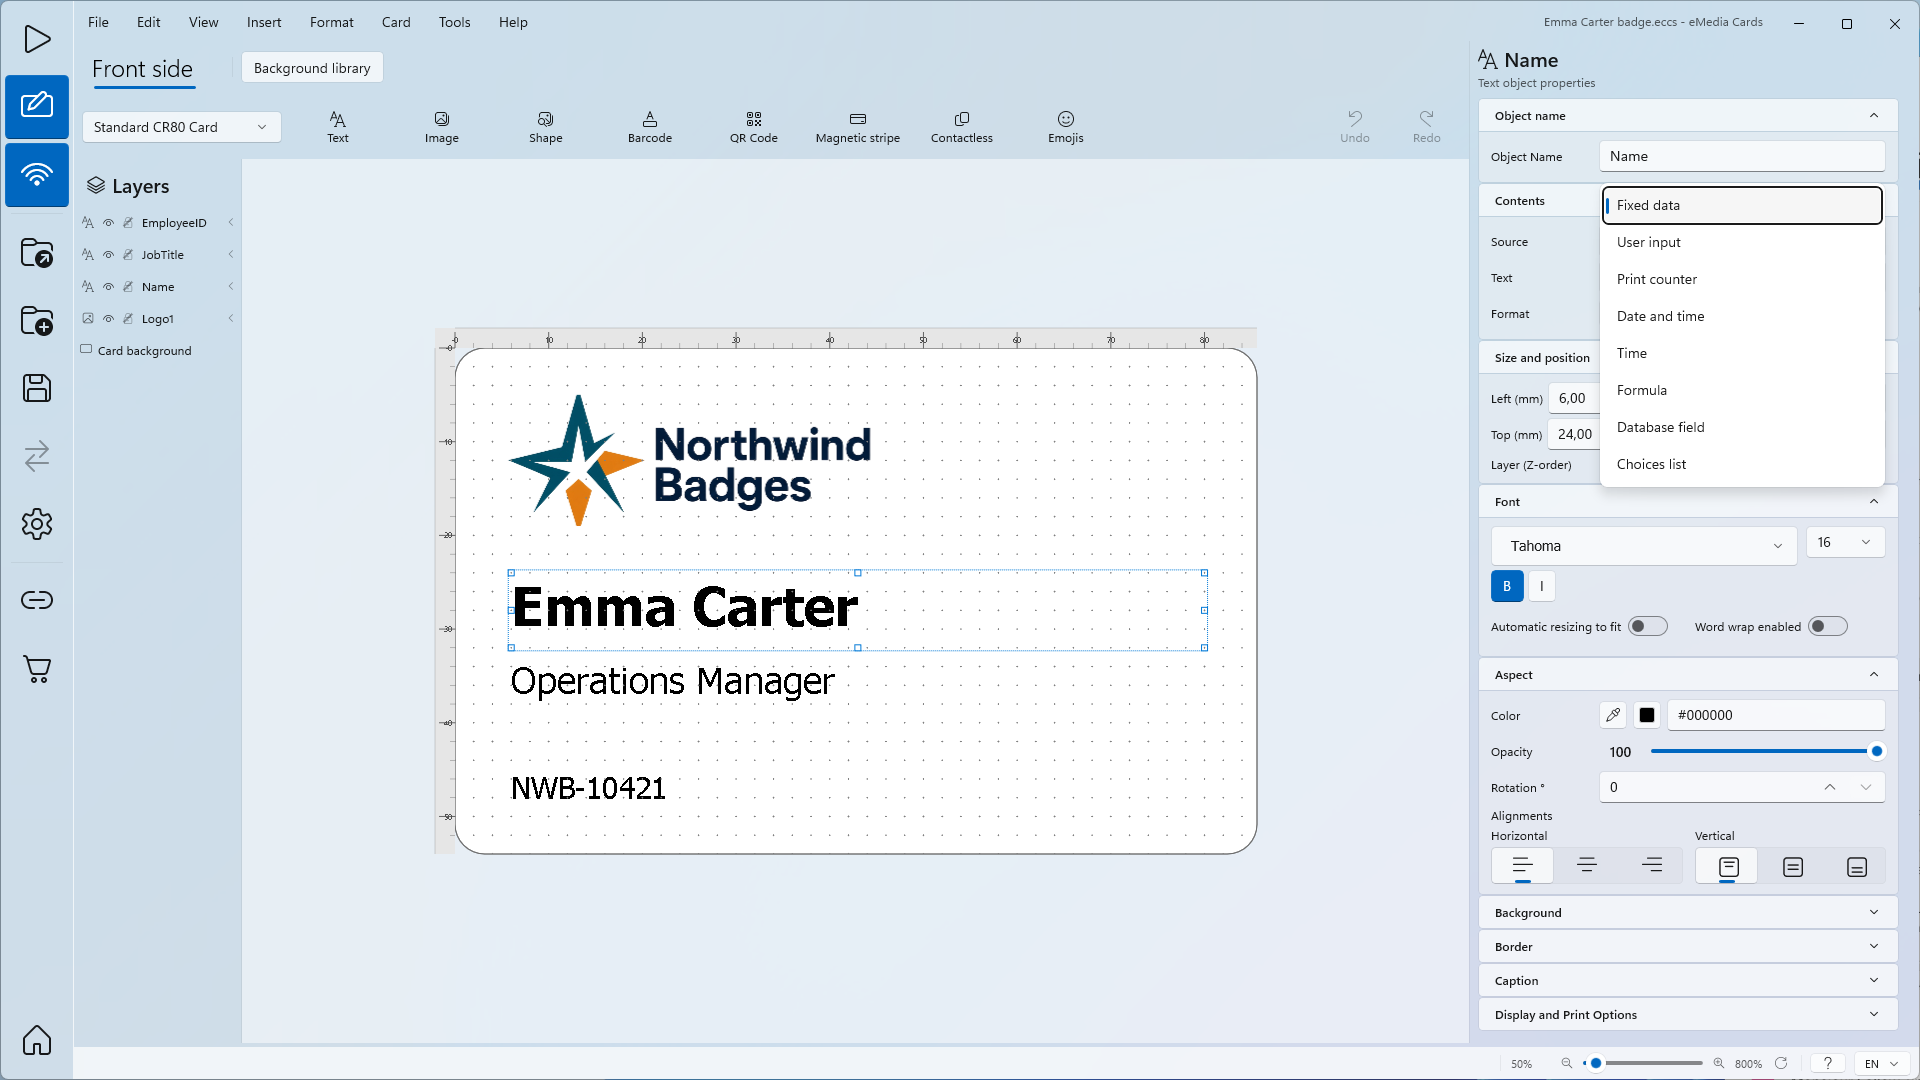
Under Contents, open the Source list and choose User input. Source was Fixed data.
-
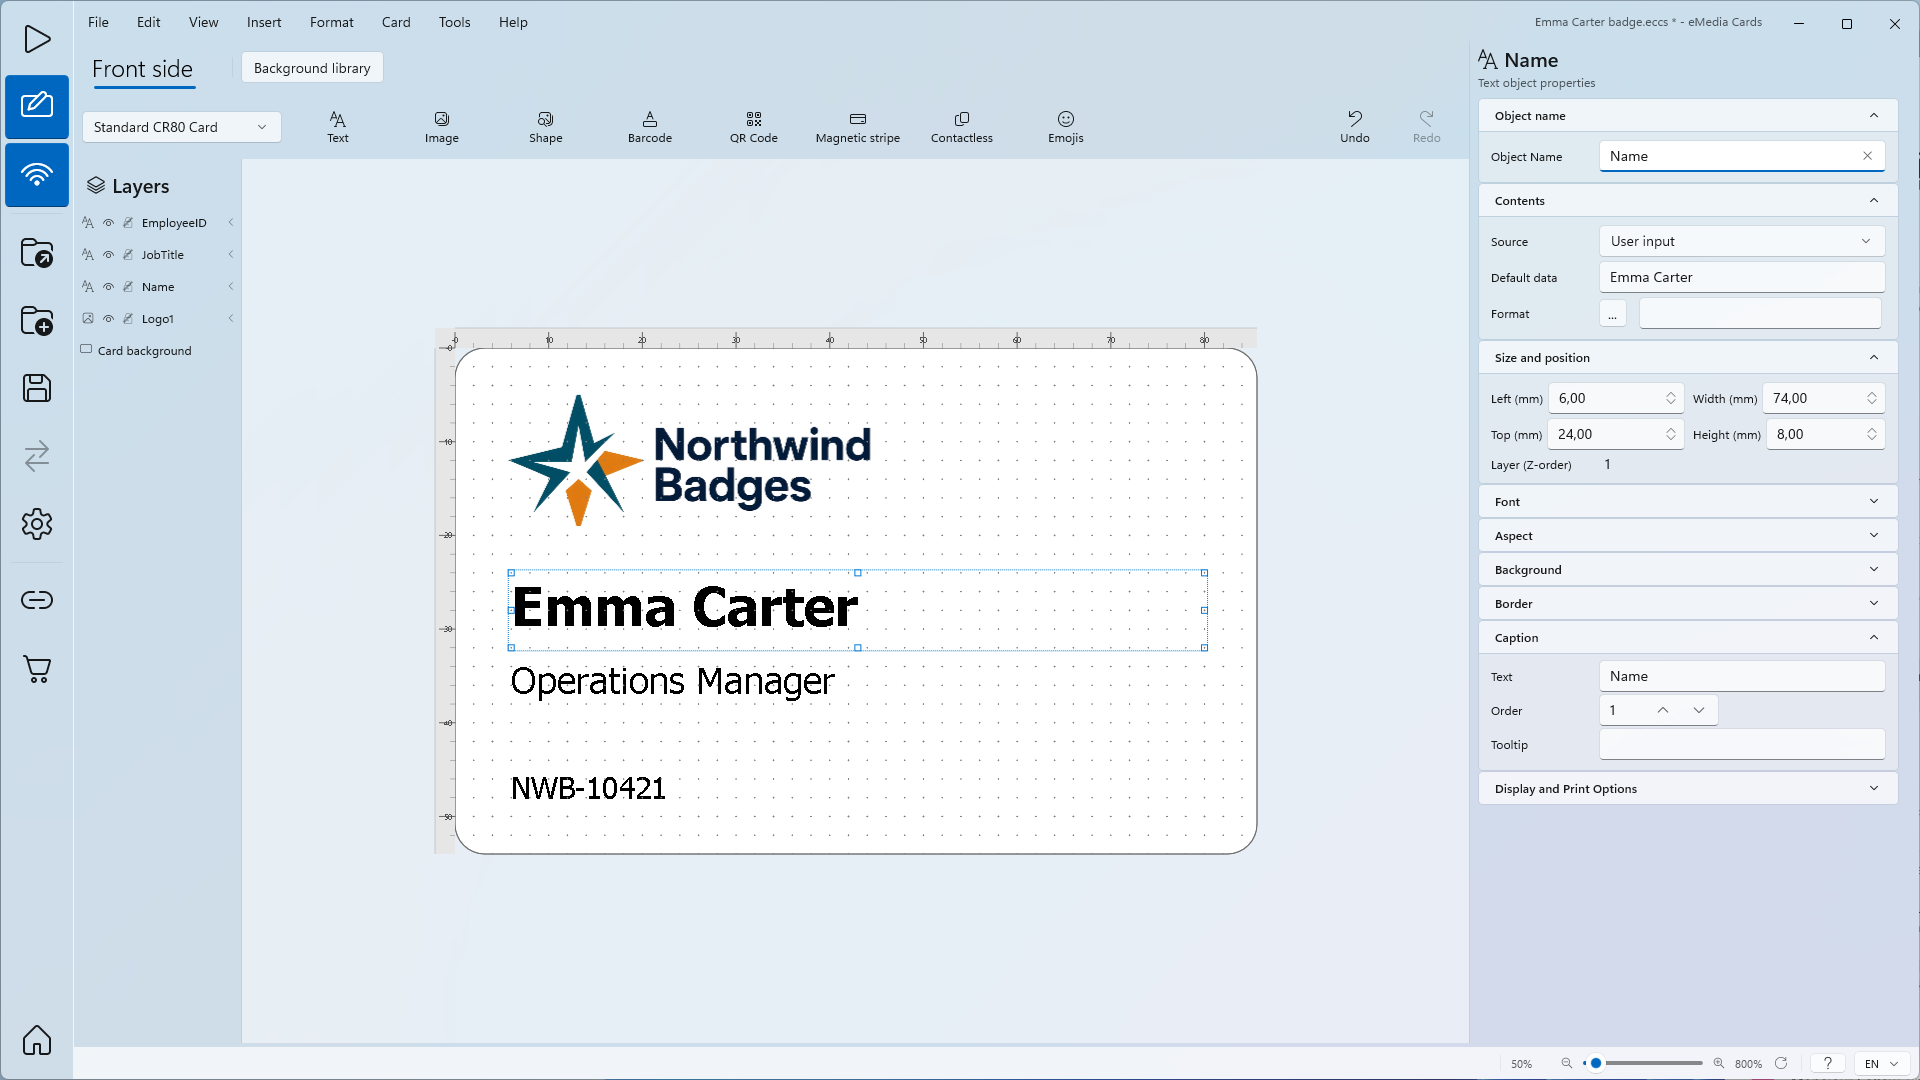
Check Default data. The box that was Text is now Default data and still holds
Emma Carter. The card shows the default data until you type a value in Operating mode. -
Click the Caption heading to open it. In Text, type
Name. This is the label next to the input box. -
In Order, type
1. Order sets the position of the box in the Input panel: 1 is at the top.
-
Repeat steps 2 to 6 for JobTitle: Source User input, Caption Text
Job title, Order2. -
Repeat steps 2 to 6 for EmployeeID: Source User input, Caption Text
Employee ID, Order3. -
Click File > Save as..., type a new file name, for example
Staff badge, and click Save. Save it in the folder that holds the logo.
How to print a card for each person
-
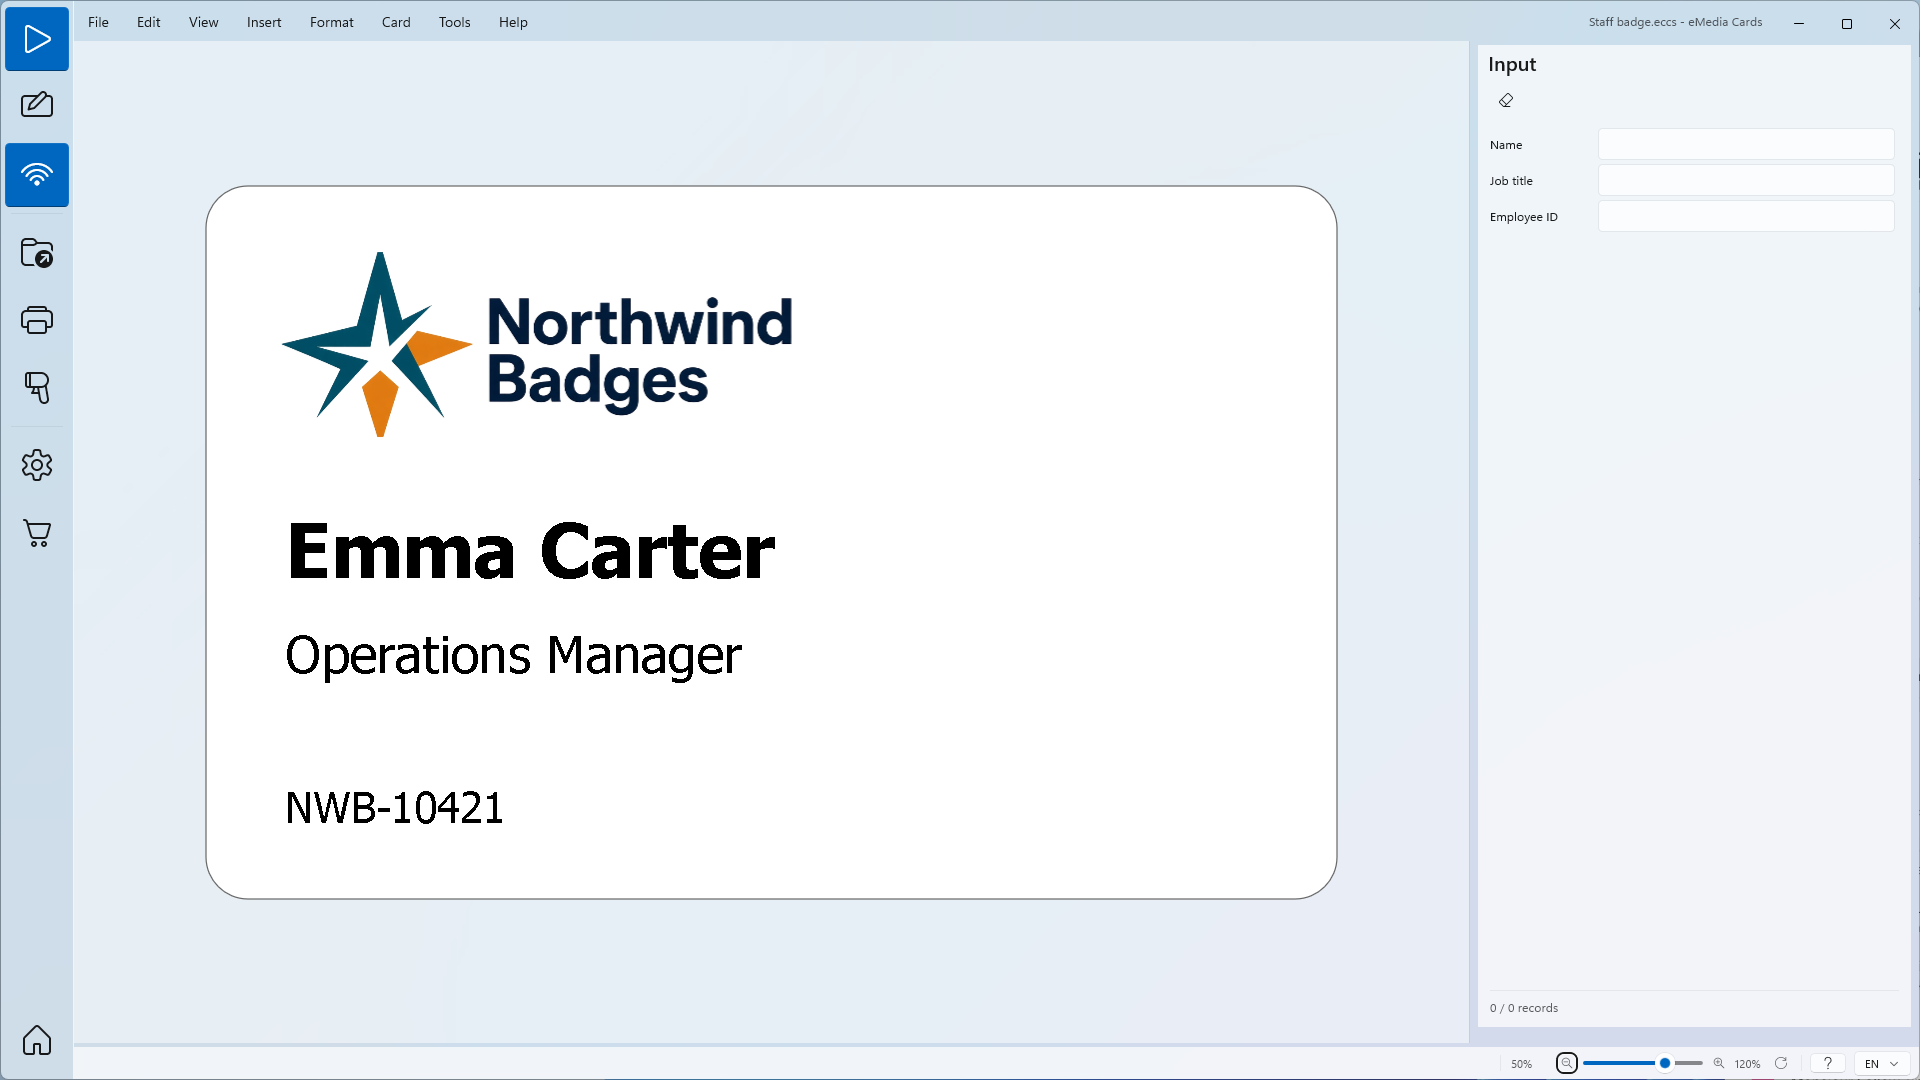
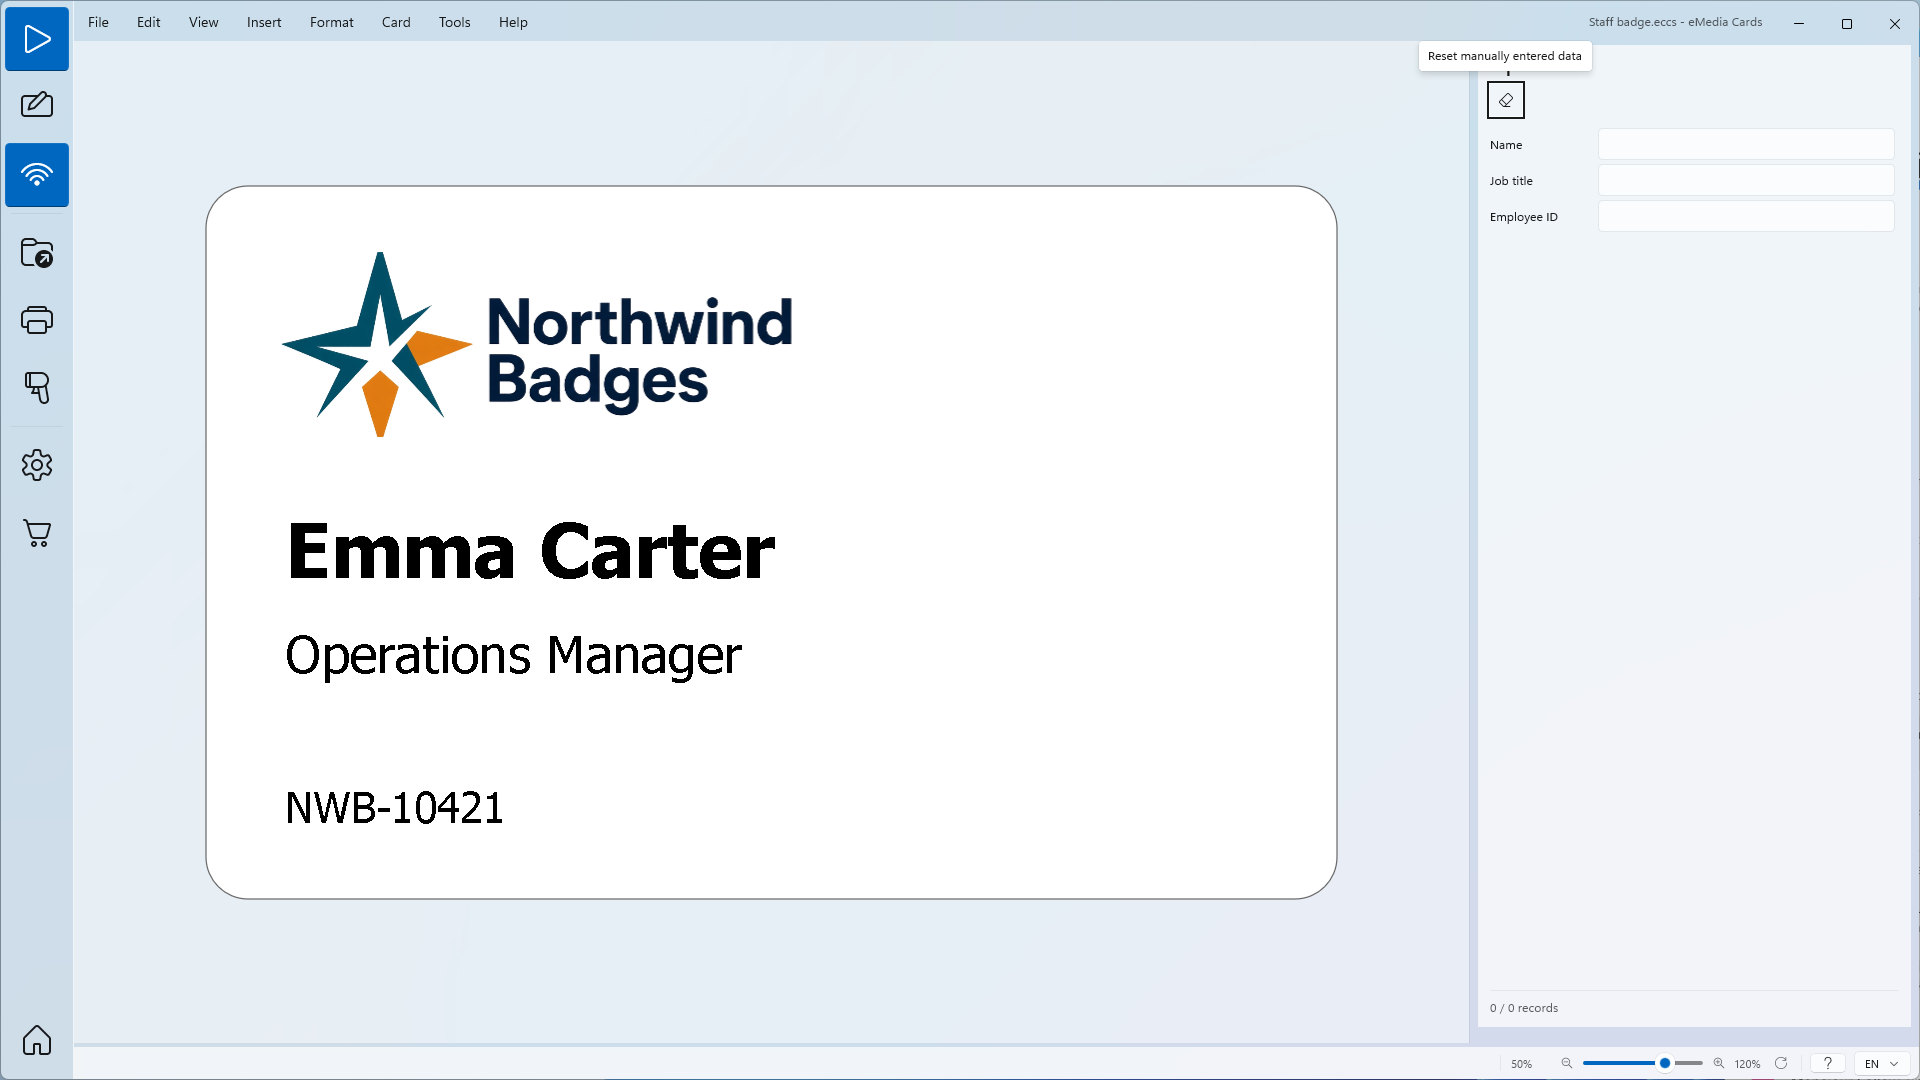
Click Operating in the left bar. The Input panel lists Name, Job title and Employee ID in that order. The boxes are empty and the card shows the default data, Emma Carter.
-
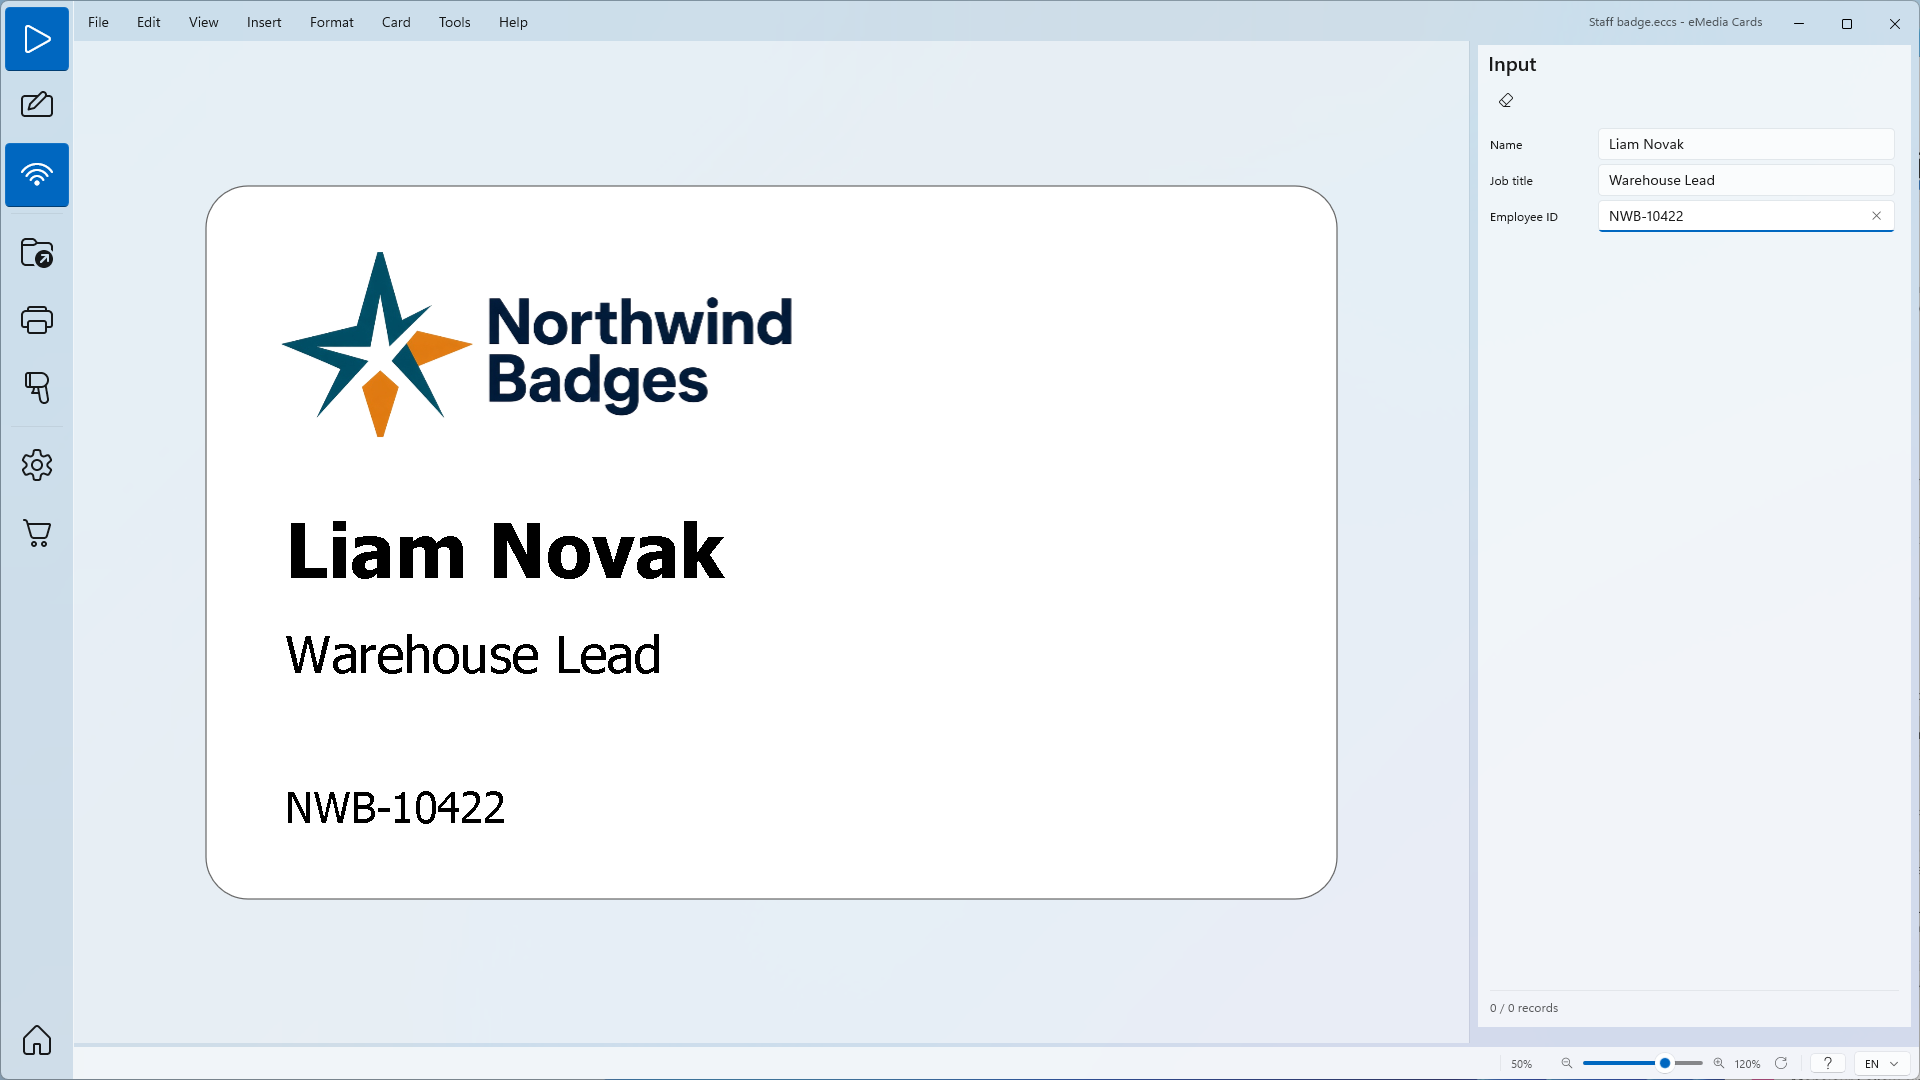
In Name, type
Liam Novak. The card changes as you type. -
In Job title, type
Warehouse Lead. -
In Employee ID, type
NWB-10422.
-
Click Print in the left bar. One card prints for Liam Novak.
-
Click Reset at the top of the Input panel, the eraser button. The boxes are cleared and the card shows the default data again. Edit > Reset datas does the same.
-
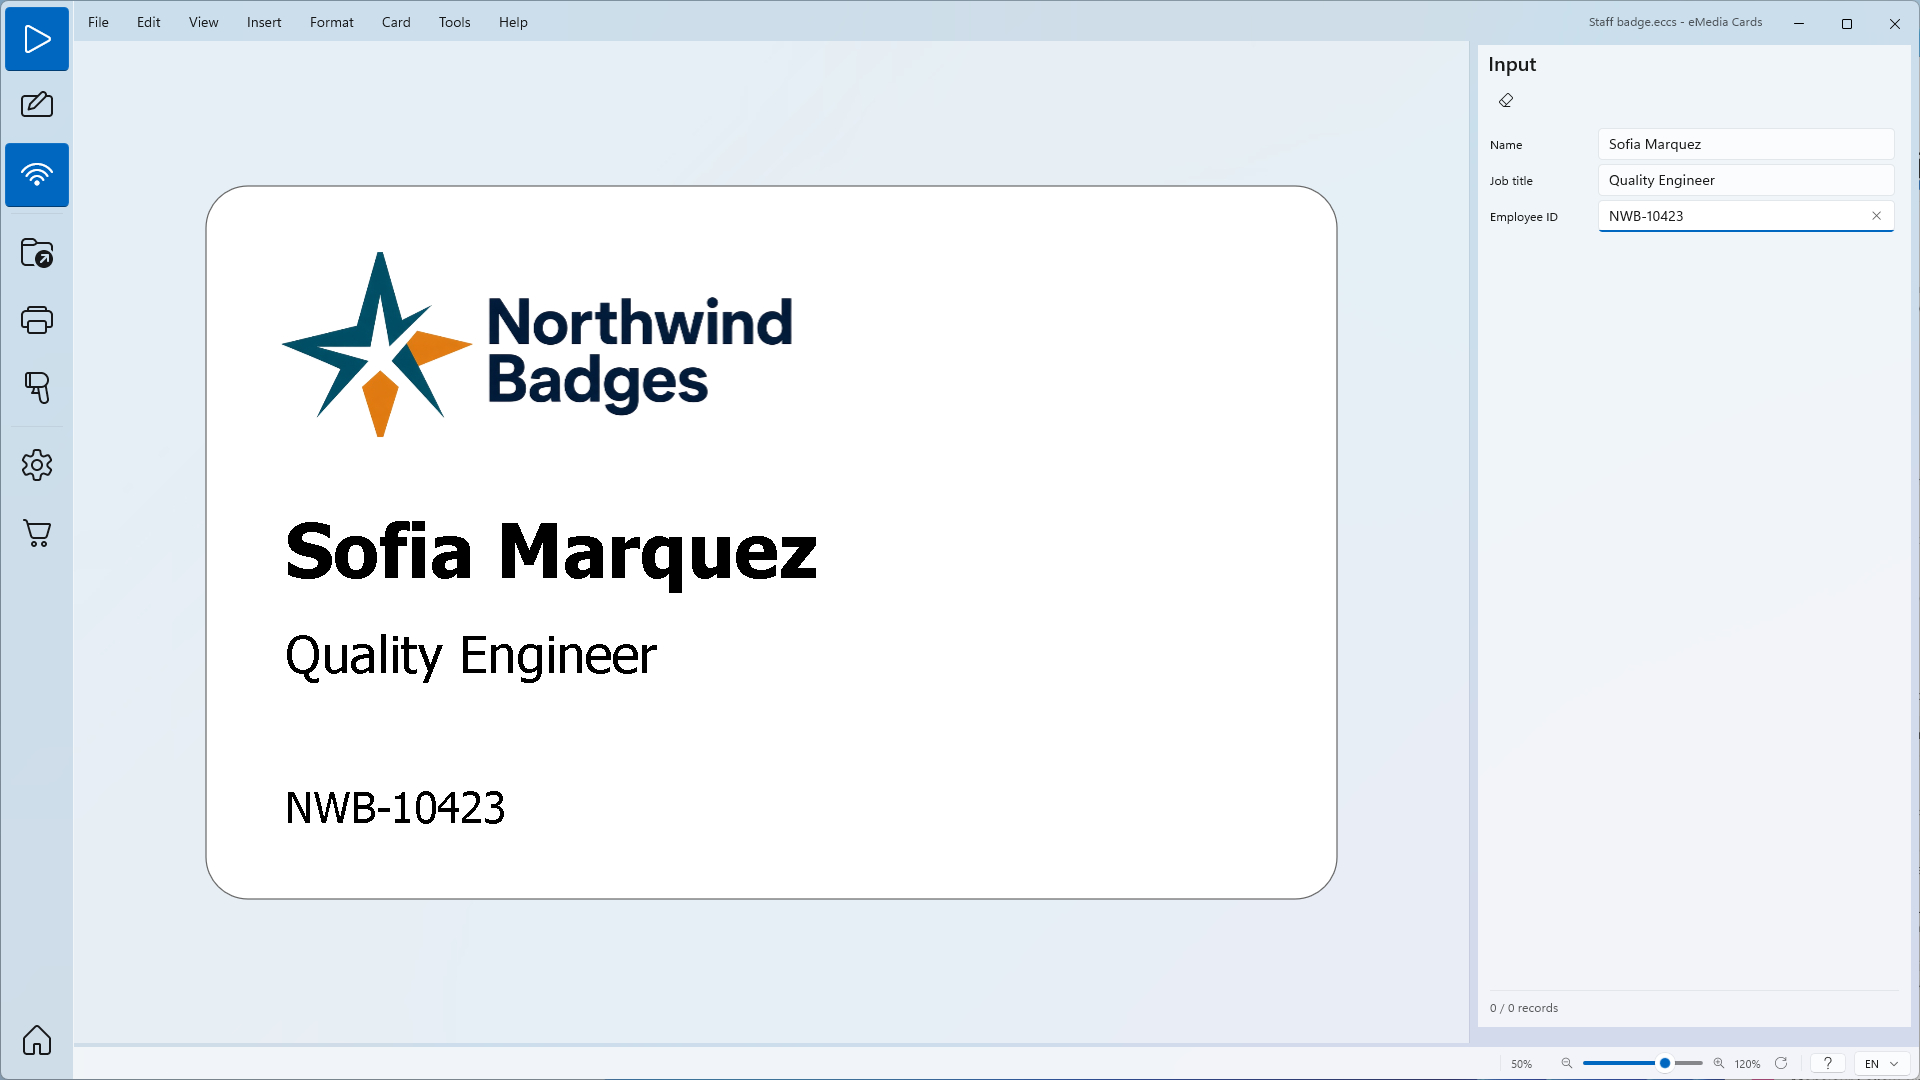
In the Input panel, type the third person:
Sofia Marquez,Quality Engineer,NWB-10423. -
Click Print. The template is the same for all three cards: you only typed new values.
On a Mac, Print opens the Print dialog first: click Print in the dialog to print the card.
On a Mac, the Input panel has no Reset button: use Edit > Reset datas.
Tips
-
What you type in the Input panel is not saved in the template. File > Save... keeps the Default data, so the next user starts from Emma Carter, not from the last person printed.
-
Put a placeholder such as
First Lastin Default data if you want an obviously empty card on screen. -
Tooltip under Caption adds a help text for the user, for example
As on the ID card. -
Only the objects that change need User input. The logo stays as it is.
-
For more than a handful of people, connect the template to a list instead of typing each one: see the next section.
Common errors
| Symptom | Cause | Fix |
|---|---|---|
| The Input panel says No object is set for user input. This card is read-only in Operating mode. | Every text is still Fixed data. | In Design mode, set Source to User input for each text that changes, then click Operating again. |
| The boxes are in the wrong order in the Input panel. | The Order values under Caption are missing or the same. | Give each object its own Order: 1, 2, 3. |
| A box has no clear label. | Caption Text is empty. | Type a label in Caption Text, for example Job title. |
| The card prints Emma Carter. | Nothing was typed, so the card uses the Default data. | Type the values in the Input panel before Print. |
| The previous person's values are still in the boxes. | Typed values stay until you clear them. | Click Reset, or Edit > Reset datas. |
Next: connect a database
Typing is quickest for a few cards. To print a whole list of people, link the same texts to a database instead, with Source Database field: