
How to create your first card in eMedia Cards
What you'll learn
Open a blank card in Design mode, find your way around the toolbar, the Layers panel and the properties panel, and make a one-off badge with a logo and three lines of typed text. No database.
Before you start
-
eMedia Cards installed and activated, any edition.
-
A picture for the logo: PNG or JPG. This example uses a fictitious Northwind Badges logo.
-
Optional: a card printer. Without one, check the card in Operating mode instead.
How to open a blank card
-
On the Home screen, click New Card Wizard. In Design mode, use File > New instead. The New Card dialog opens on How do you want to start?.
-
Click Blank card. It is already selected when the dialog opens.
-
Click Create. eMedia Cards opens an empty CR80 card, landscape, front side only, in Design mode.
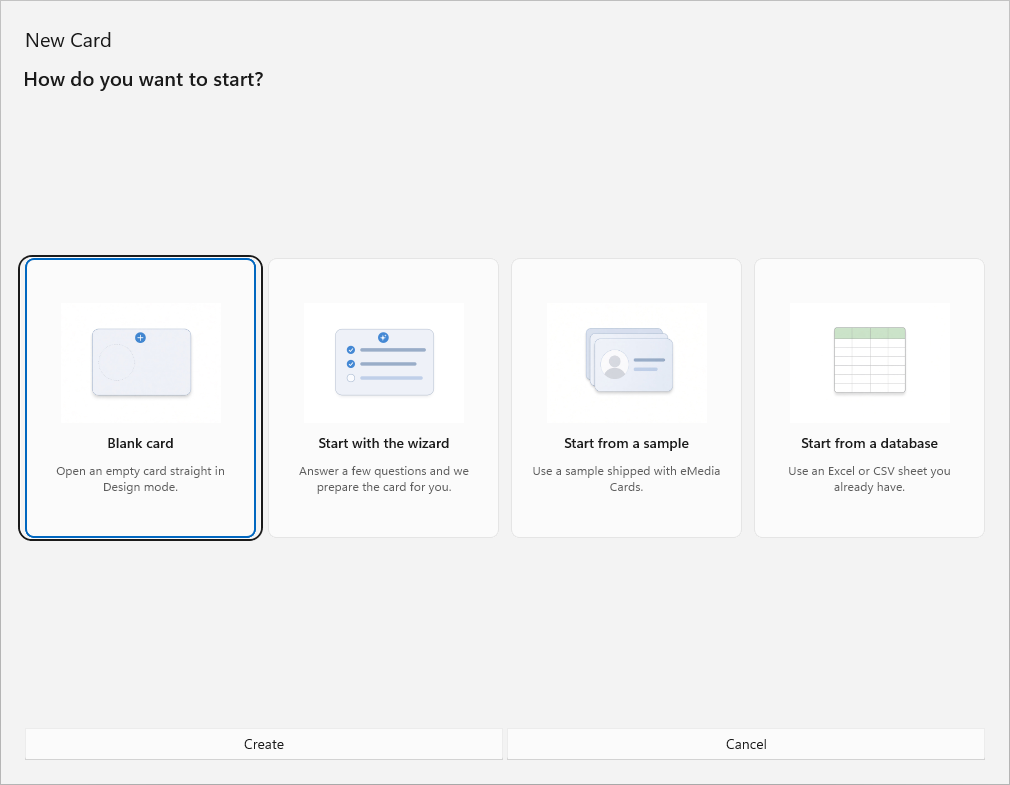
On a Mac, Blank card continues to the card type step of the wizard instead of opening Design mode directly.
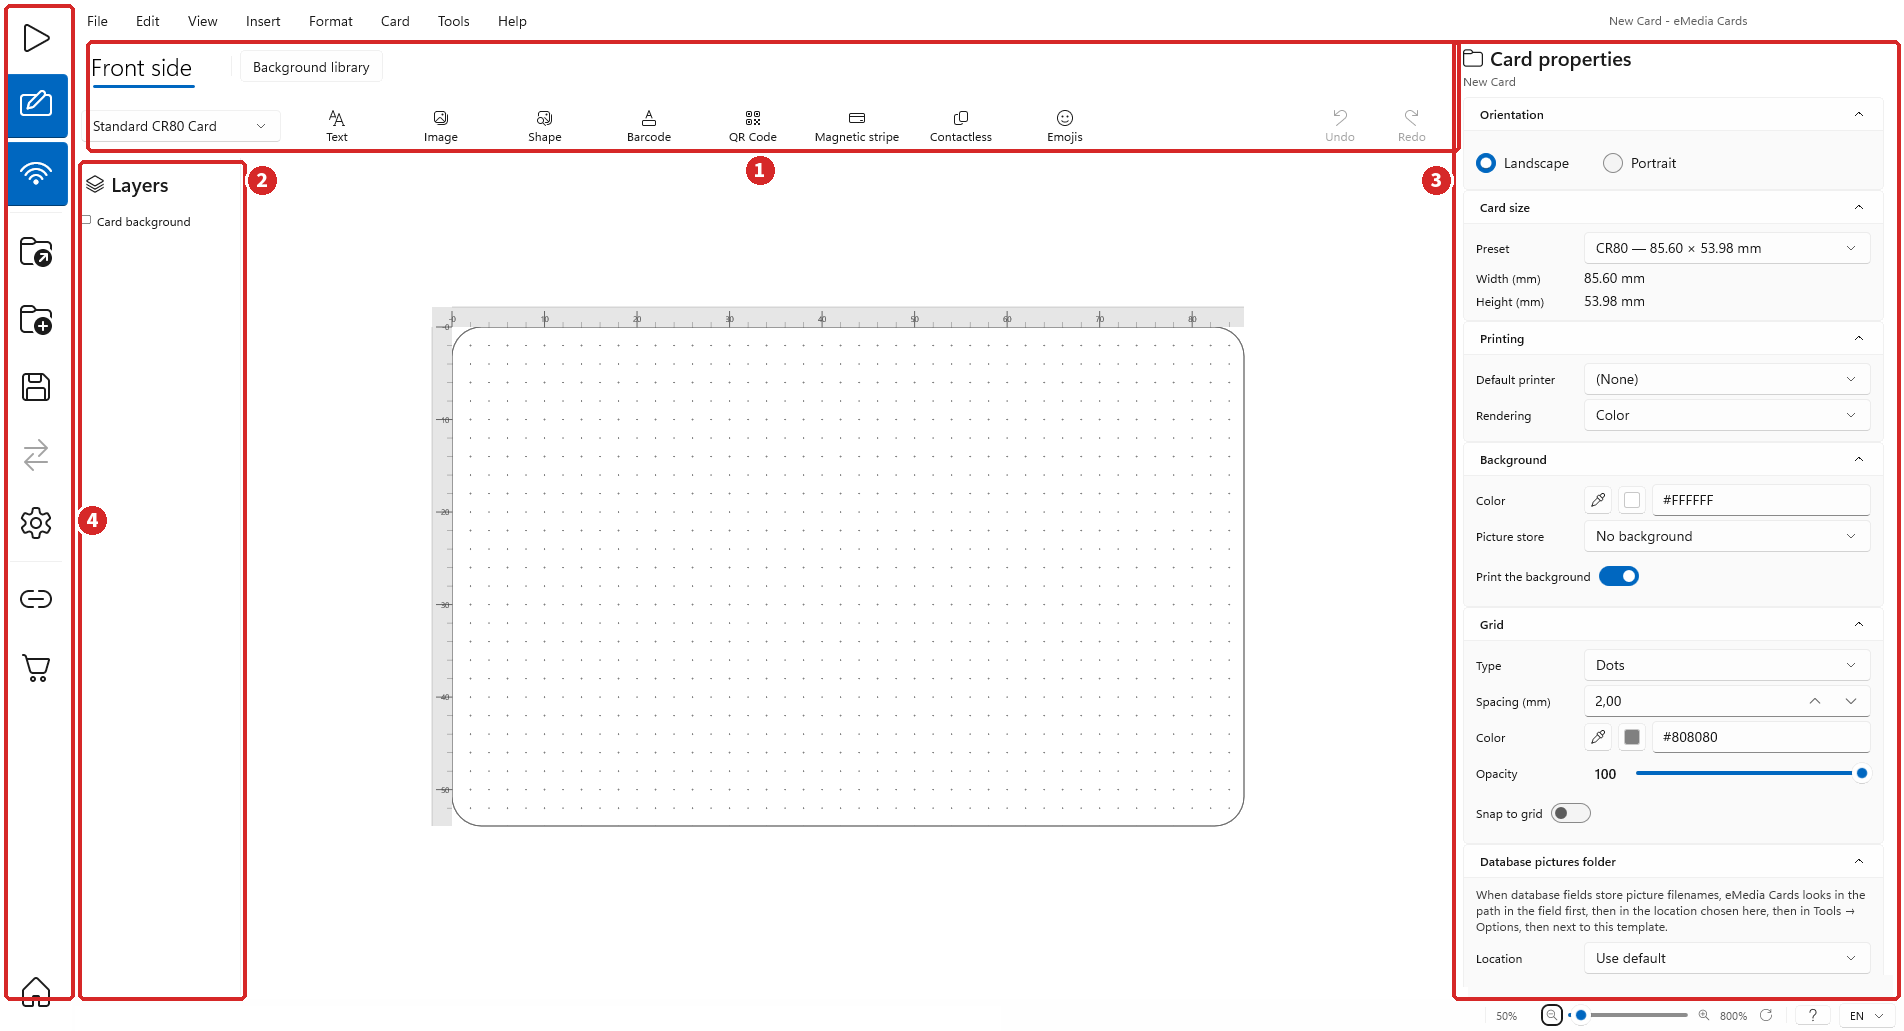
The Design mode screen
-
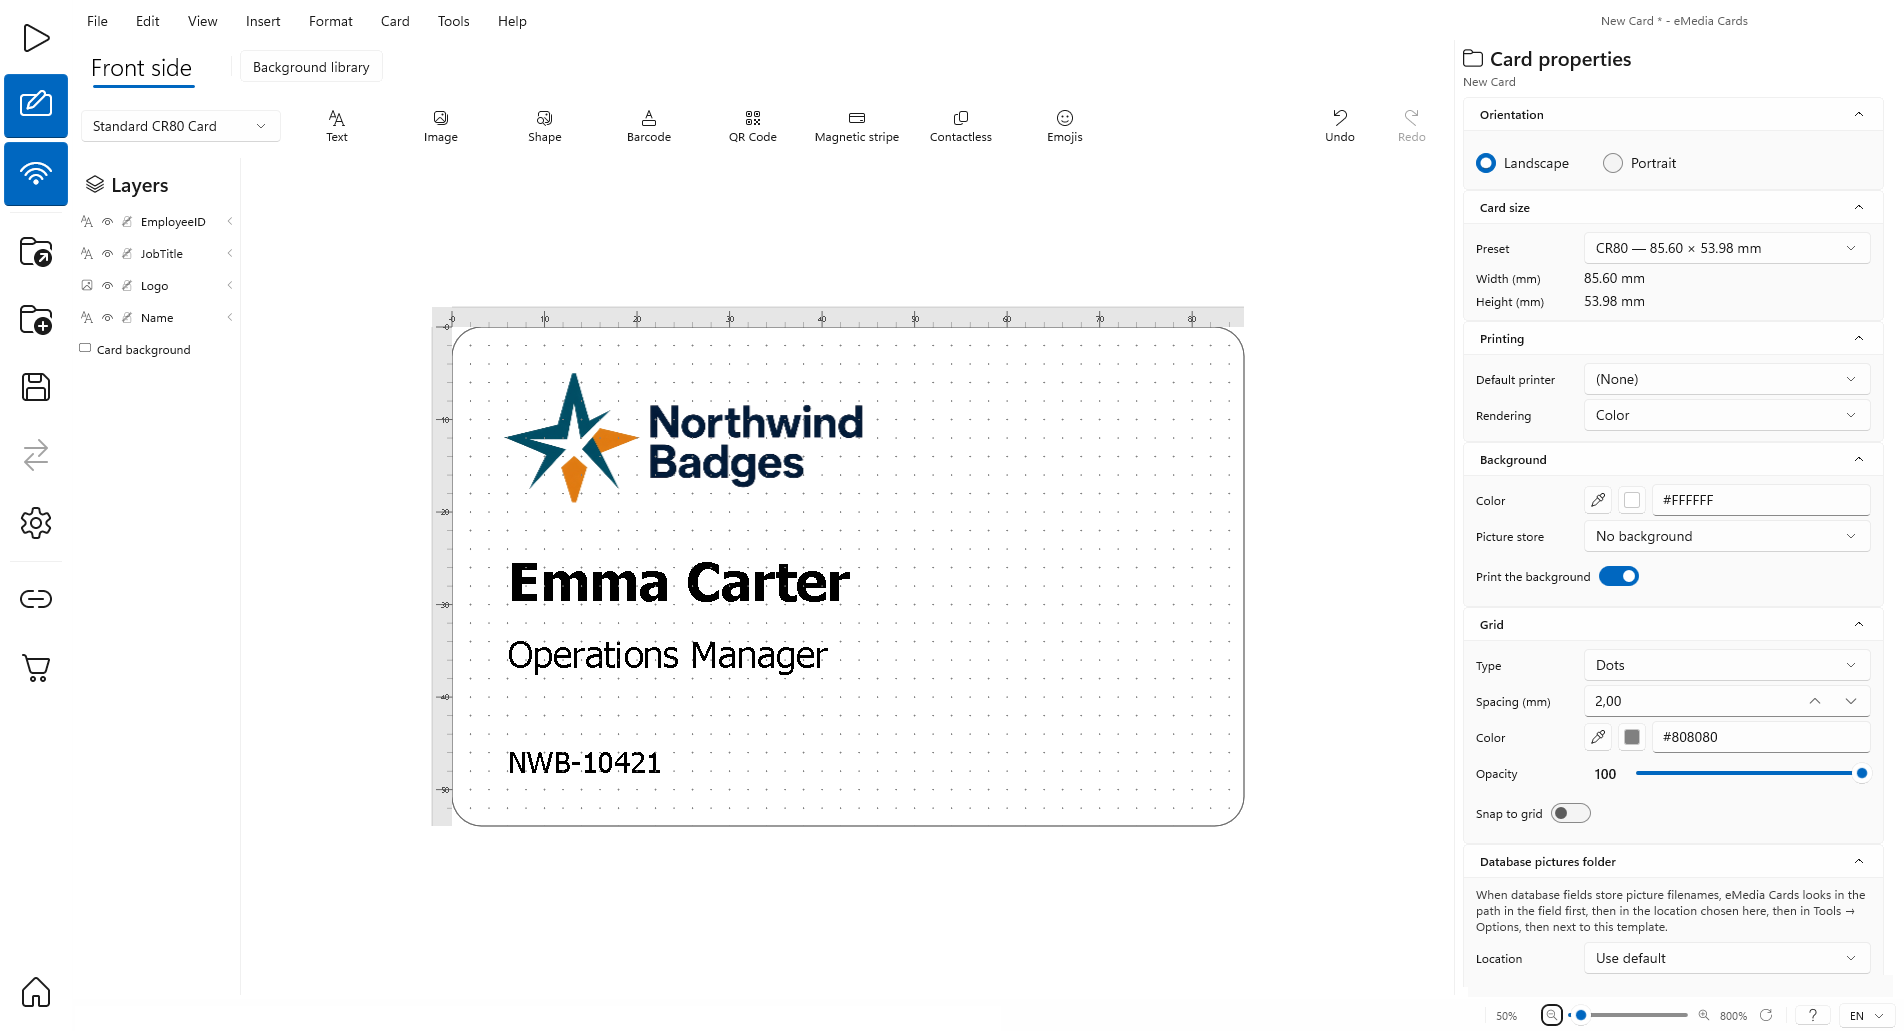
Toolbar. Front side shows the side you are editing. Background library picks a card background. The insert buttons add objects: Text, Image, Shape, Barcode, QR Code, Magnetic stripe, Contactless and Emojis. Undo and Redo are on the right.
-
Layers. One row per object on the side, plus Card background. Click a row to select the object. The icons hide or show an object and lock or unlock it. Drag a row to move the object up or down on the card.
-
Properties panel. It shows the properties of the selection. With nothing selected, it shows Card properties: Orientation, Card size, Printing, Background and Grid. With a text selected, it shows Text object properties; with a picture, Picture object properties. Click a section heading to fold it.
-
Left bar. Operating and Design switch the mode. Open, New and Save handle card files. Print appears in Operating mode. Home returns to the Home screen.
How to add a logo and typed text
-
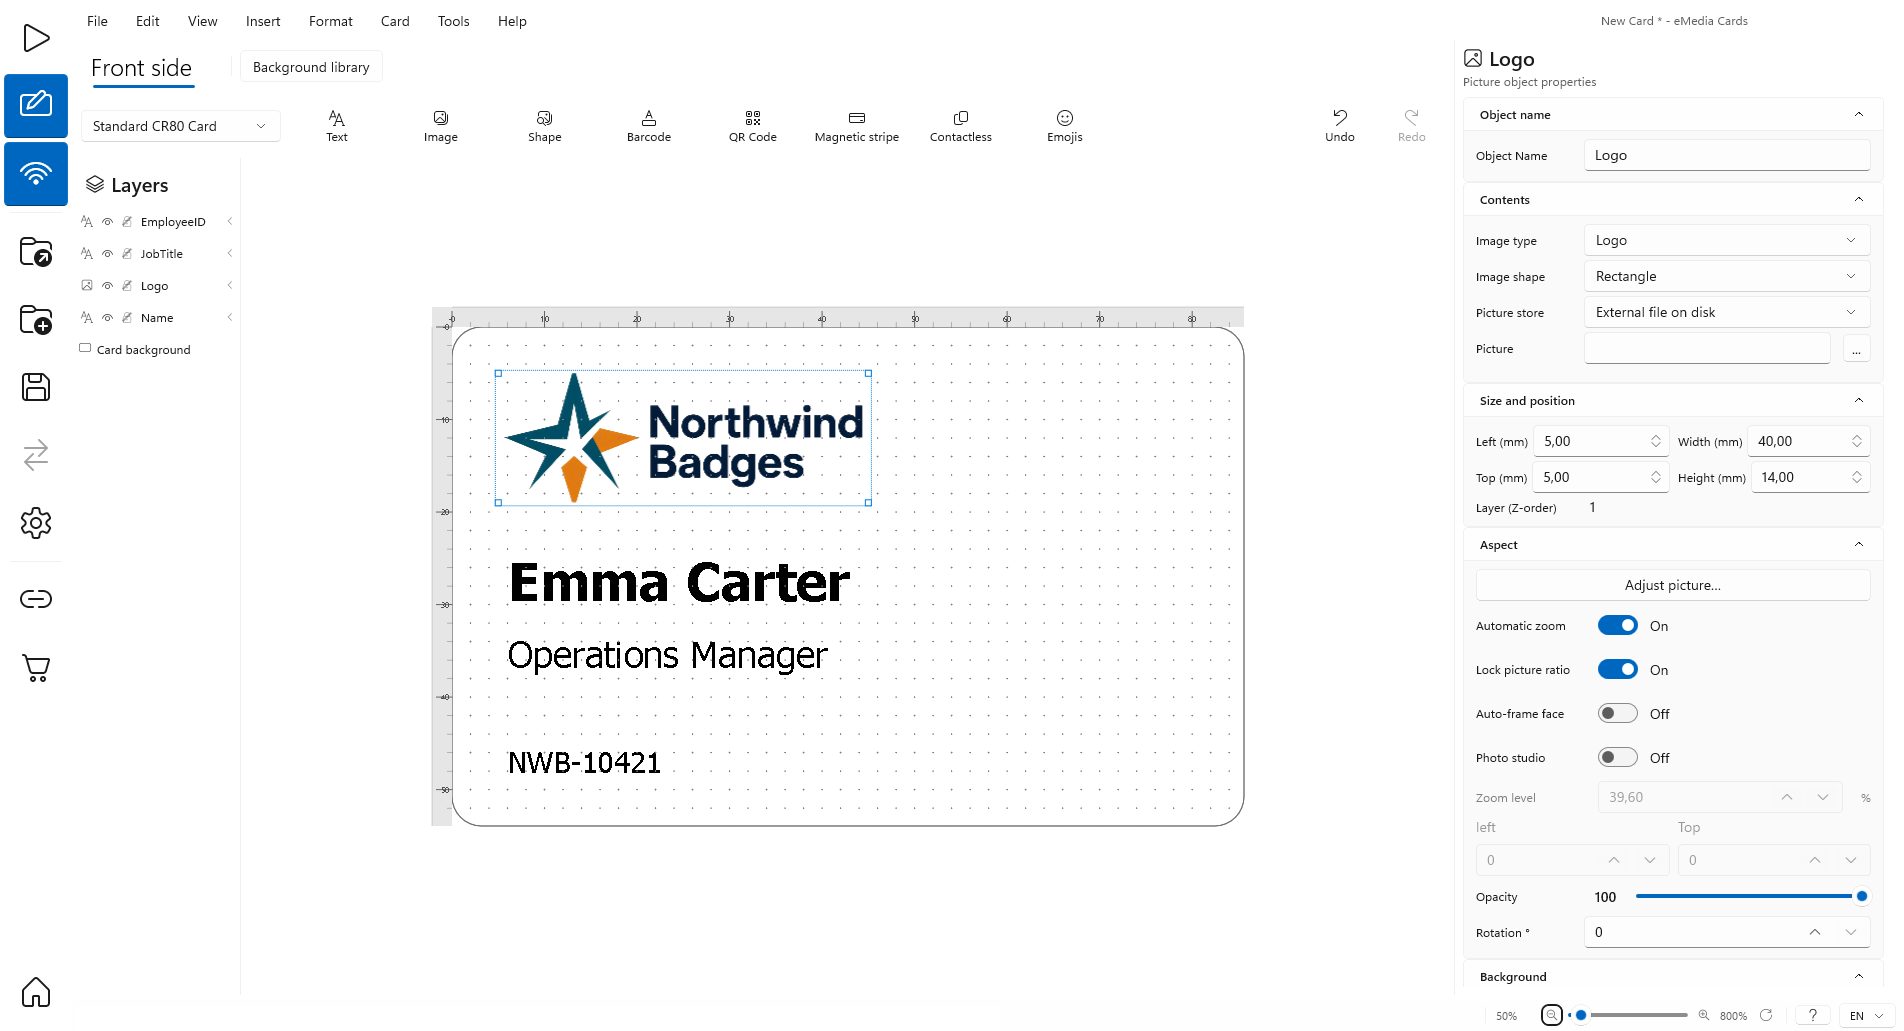
Click Image > Logo. A placeholder logo appears on the card and Picture object properties opens.
-
Next to Picture, click ... and open your logo file. Picture store stays on External file on disk.
-
Under Size and position, set Left (mm), Top (mm), Width (mm) and Height (mm). Here: 5, 5, 40 and 14. Lock picture ratio is on, so the logo keeps its proportions.
-
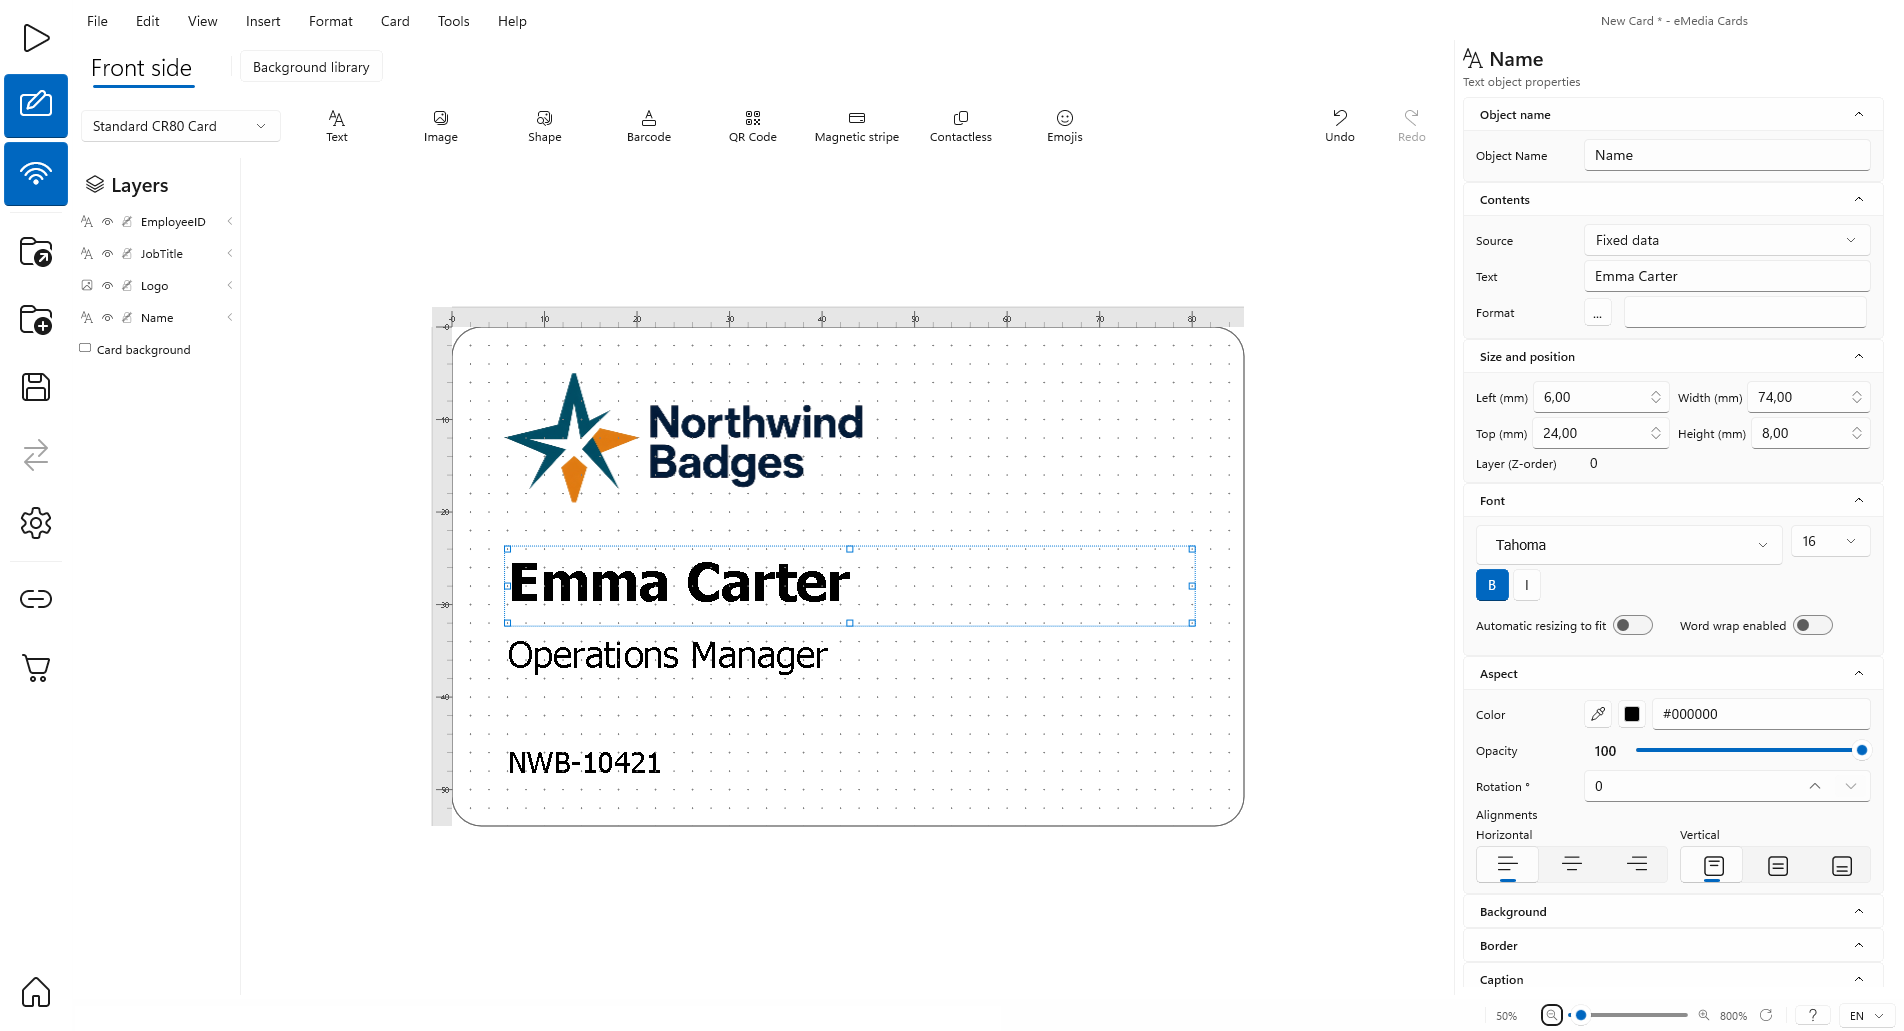
Click Text > Fixed data. A text object named Text1 appears and Text object properties opens.
-
In Text, type the name:
Emma Carter. -
In Object name, type
Name. The new name shows in Layers. -
Under Font, choose the size 16 and click B for bold.
-
Under Size and position, set Left (mm) 6, Top (mm) 24, Width (mm) 74 and Height (mm) 8.
-
Repeat steps 4 to 8 for the job title:
Operations Manager, object nameJobTitle, size 11, not bold, Top (mm) 33, Height (mm) 6. -
Repeat steps 4 to 8 for the employee ID:
NWB-10421, object nameEmployeeID, size 9, not bold, Top (mm) 45, Width (mm) 40, Height (mm) 5. -
Click an empty area outside the card. Card properties comes back and the card shows the logo and the three lines.
How to save and print the card
-
Click File > Save as....
-
Choose a folder, type a file name, for example
Emma Carter badge, and click Save. The card is saved as an.eccstemplate. -
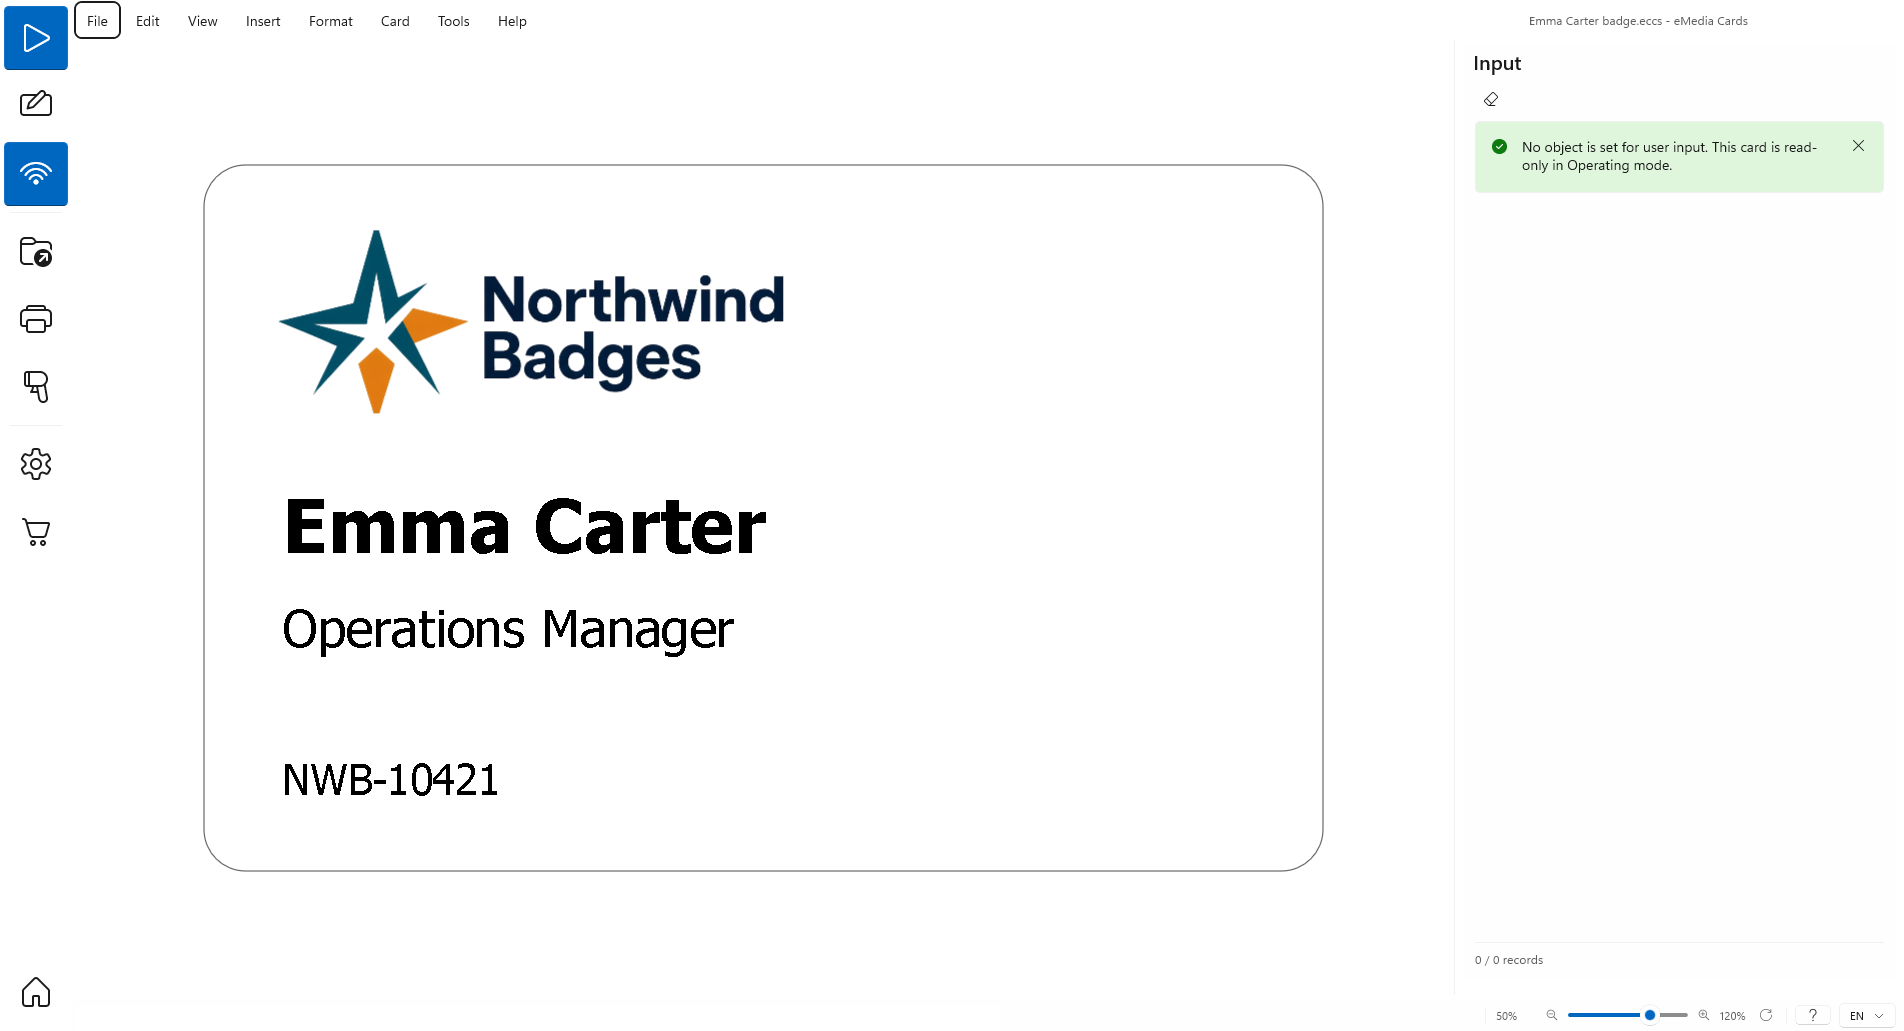
Click Operating in the left bar. The card shows as it will print. The Input panel says No object is set for user input. This card is read-only in Operating mode.: every text on this card is fixed.
-
Click Print in the left bar to print one card. With Default printer on (None) in Card properties, the card goes to the Windows default printer.
Tips
-
To keep the logo inside the card file, set Picture store to Template file after choosing the picture. The card then opens on another PC without the logo file.
-
Automatic resizing to fit shrinks the font so a long text stays inside its box.
-
For a different name on each card, use Text > User input or a database field instead of Fixed data.
Common errors
| Symptom | Cause | Fix |
|---|---|---|
| The card shows a YOUR LOGO placeholder. | Image > Logo starts with a placeholder picture. | Next to Picture, click ... and open your logo file. |
| The logo is missing when the card is opened on another PC. | Picture store is External file on disk and the file is not at the same path. | Set Picture store to Template file and save the card again. |
| The end of a text is cut off. | The text box is narrower than the text. | Increase Width (mm), or turn on Automatic resizing to fit. |
| File > Print is greyed out. | The card is in Design mode. | Click Operating in the left bar, then print. |