
How to add a photo for each record of a database
What you'll learn
Show a different photo on each card: link the photo object to a database field that holds the photo's file name, choose the folder where eMedia Cards finds the photos, and let eMedia Cards name each new photo from the record when you add it in Operating mode.
Before you start
-
eMedia Cards installed and activated, any edition. File naming with Formula needs the Standard edition or higher.
-
This example uses
Larkspur Hill School Student Card.eccsandstudents.csv, 20 students in a CSV file (UTF-8,;separated). Each row of thePhotocolumn holds a file name from thePhotosfolder, for exampleLHS-26001.jpg. -
Record 20, Zoe Adeyemi, has no photo yet. Her photo is in the
New photosfolder asStudent 20.jpg. -
The template, the CSV file and the two folders are in the download above, with a
README.txt. Unzip it to keep this layout. The school and the students are fictitious.
How to connect the students
-
Open
Larkspur Hill School Student Card.eccsand switch to Design mode. -
Click Tools > Connect to database..., then connect
students.csvas in How to connect a card template to a CSV file: Excel / CSV, CSV delimiter:;, File encoding: UTF-8, and Key column: StudentID. -
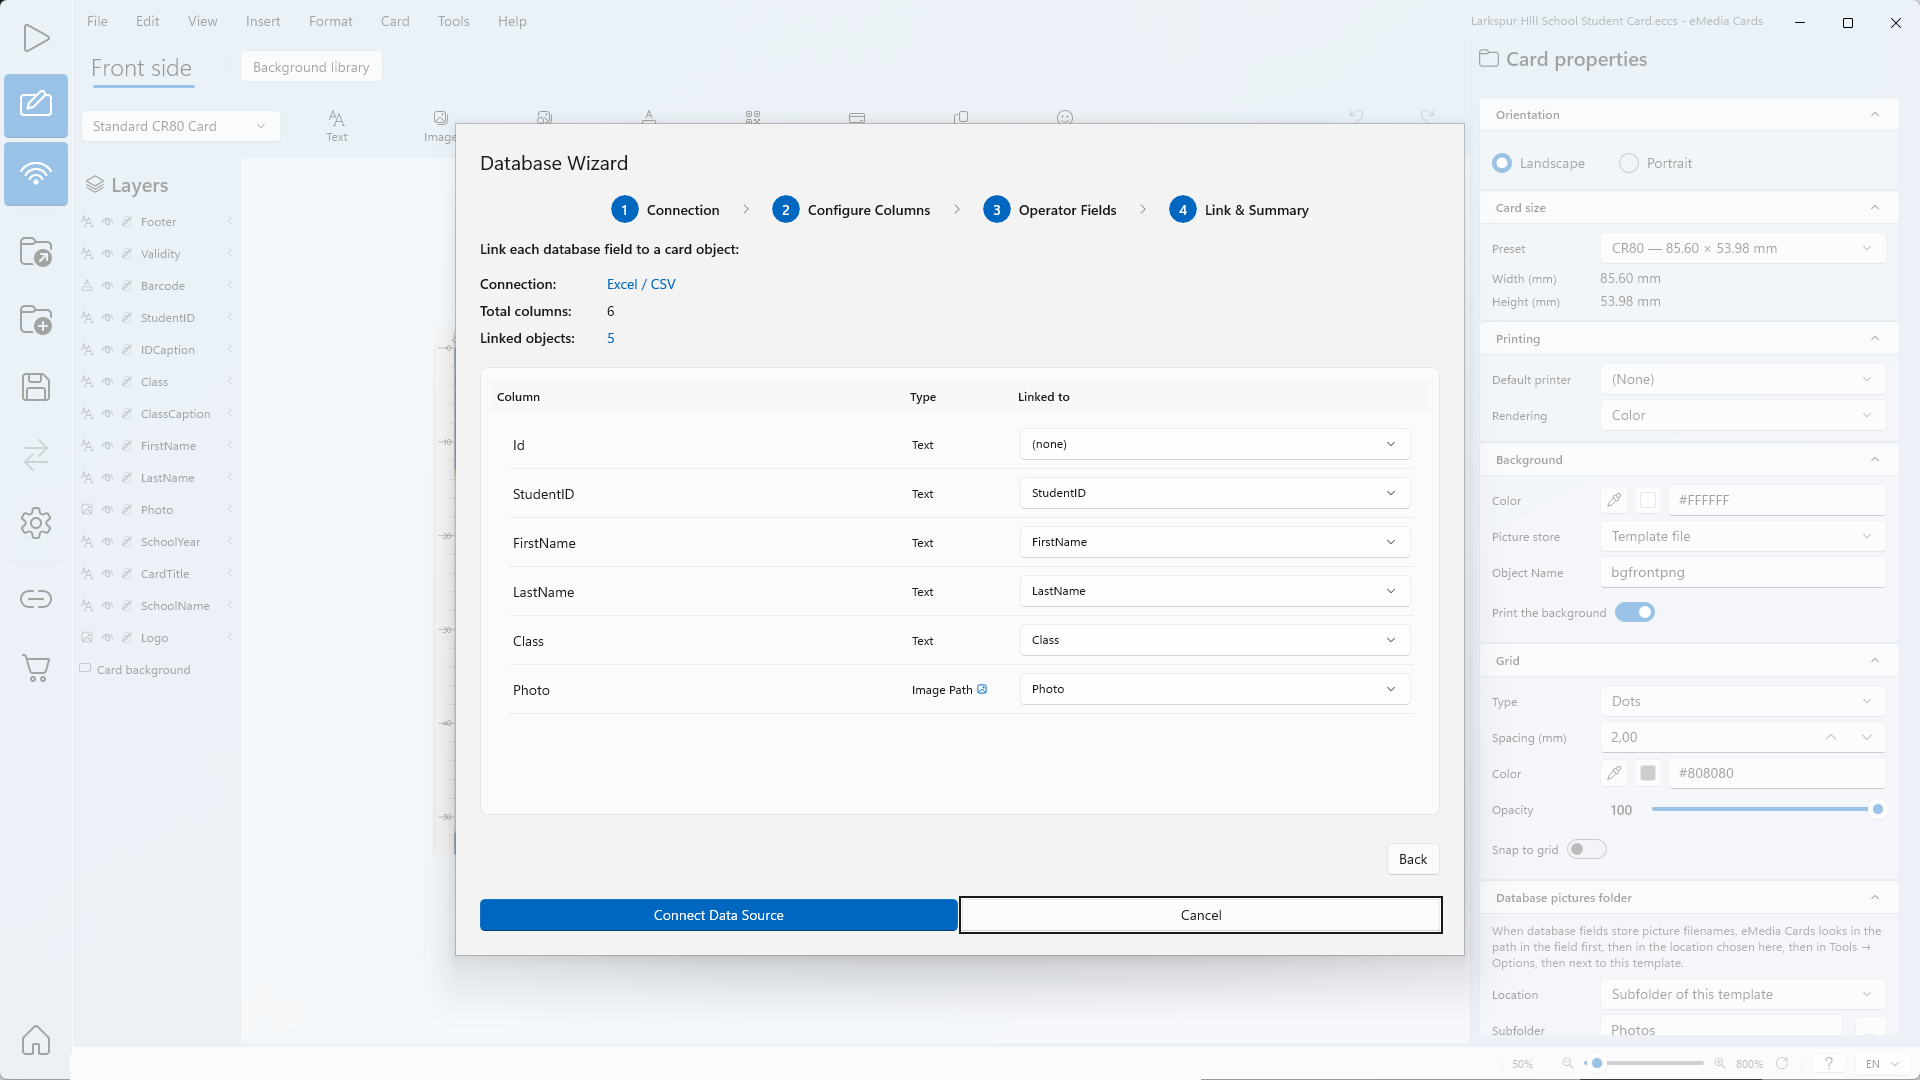
In Link & Summary, a column with the name of a card object is linked automatically: here StudentID, FirstName, LastName, Class and Photo. The type of the Photo column is Image Path: it holds the name of a picture file.
-
Click Connect Data Source.
How to link the photo to a database field
-
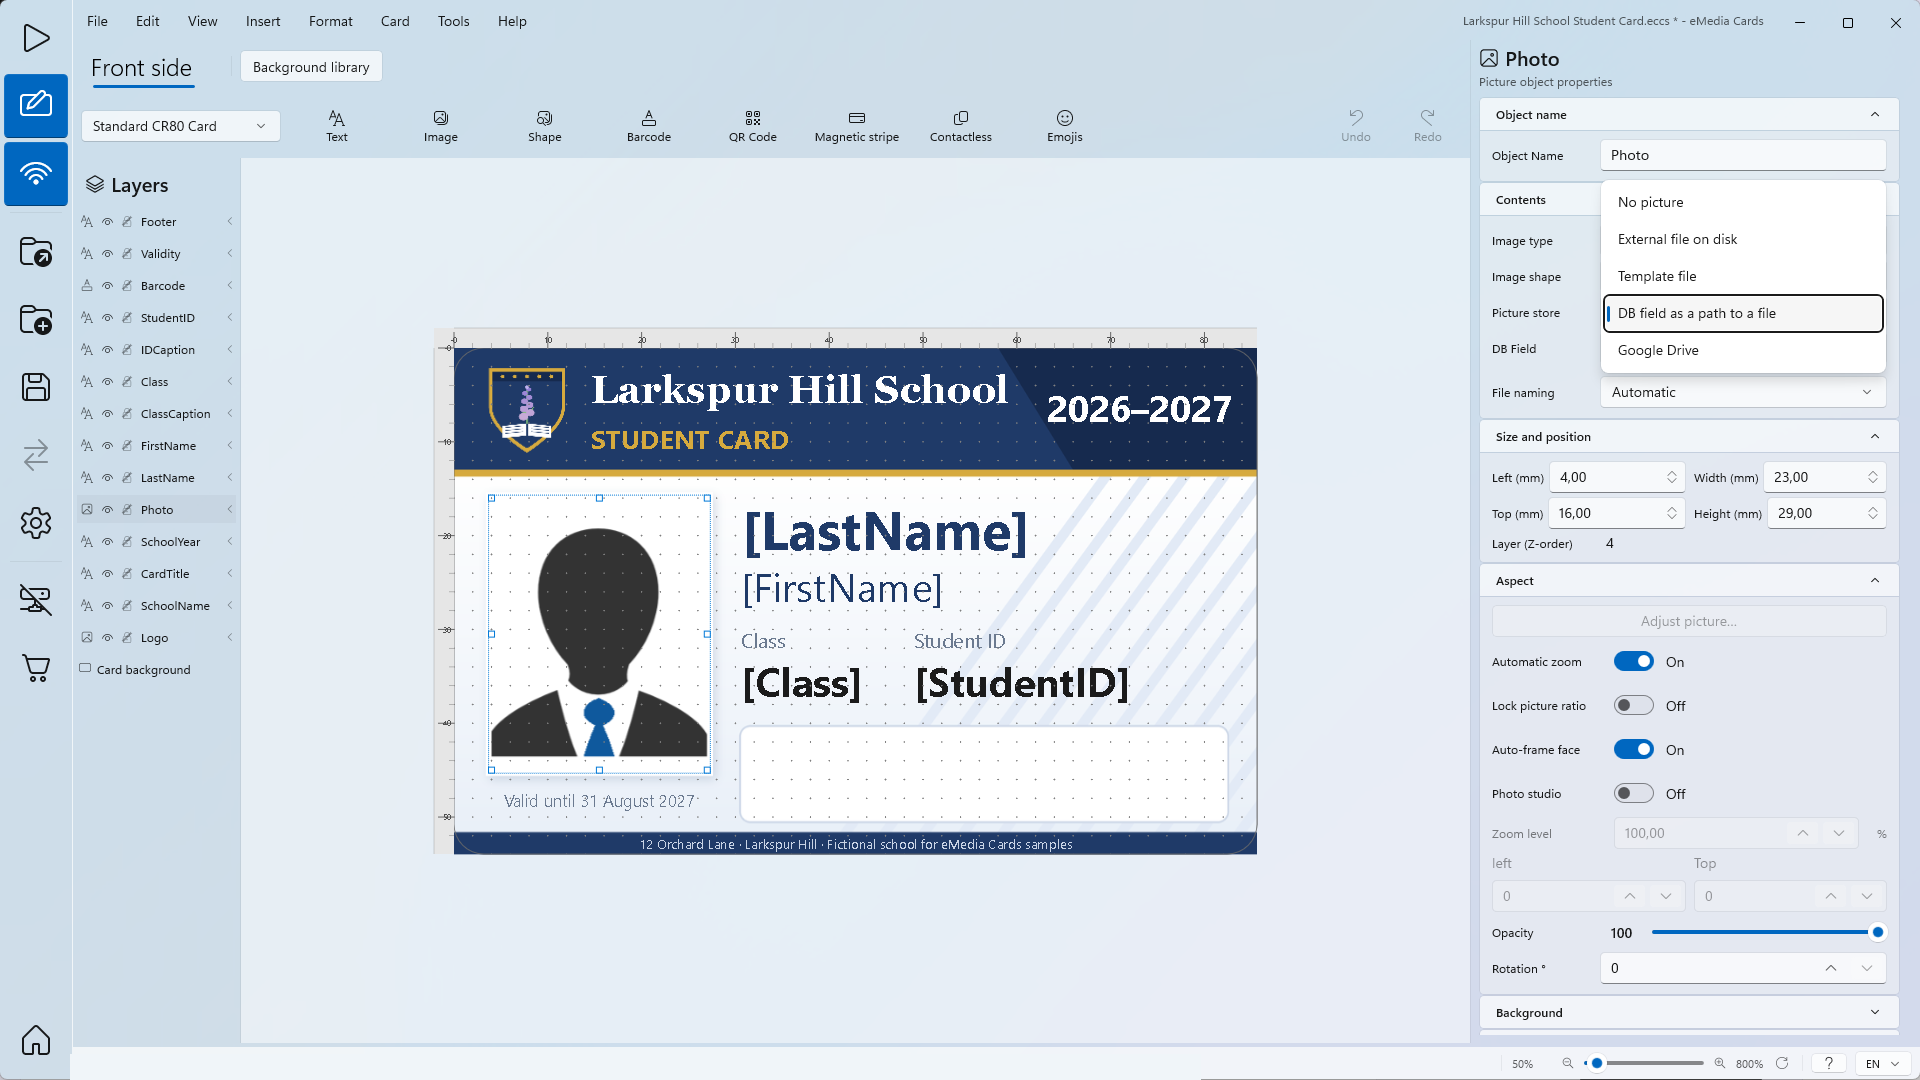
Click Photo in Layers. Picture object properties opens.
-
Under Contents, in Picture store, choose DB field as a path to a file. It is already set in this template.
-
In DB Field, choose the column that holds the file name: Photo.
The field can hold a file name or a full path.
How to name the new photos
File naming sets the file name of a photo you take with the webcam, or browse and copy, in Operating mode:
| File naming | Name of the new photo |
|---|---|
| Automatic | A new, unique name made by eMedia Cards. This is the default. |
| Manual | A new, unique name made by eMedia Cards. |
| Database field | The value of the field chosen in Naming DB field, for example the student ID. |
| Formula | The result of the formula in Formula:. Needs the Standard edition or higher. |
-
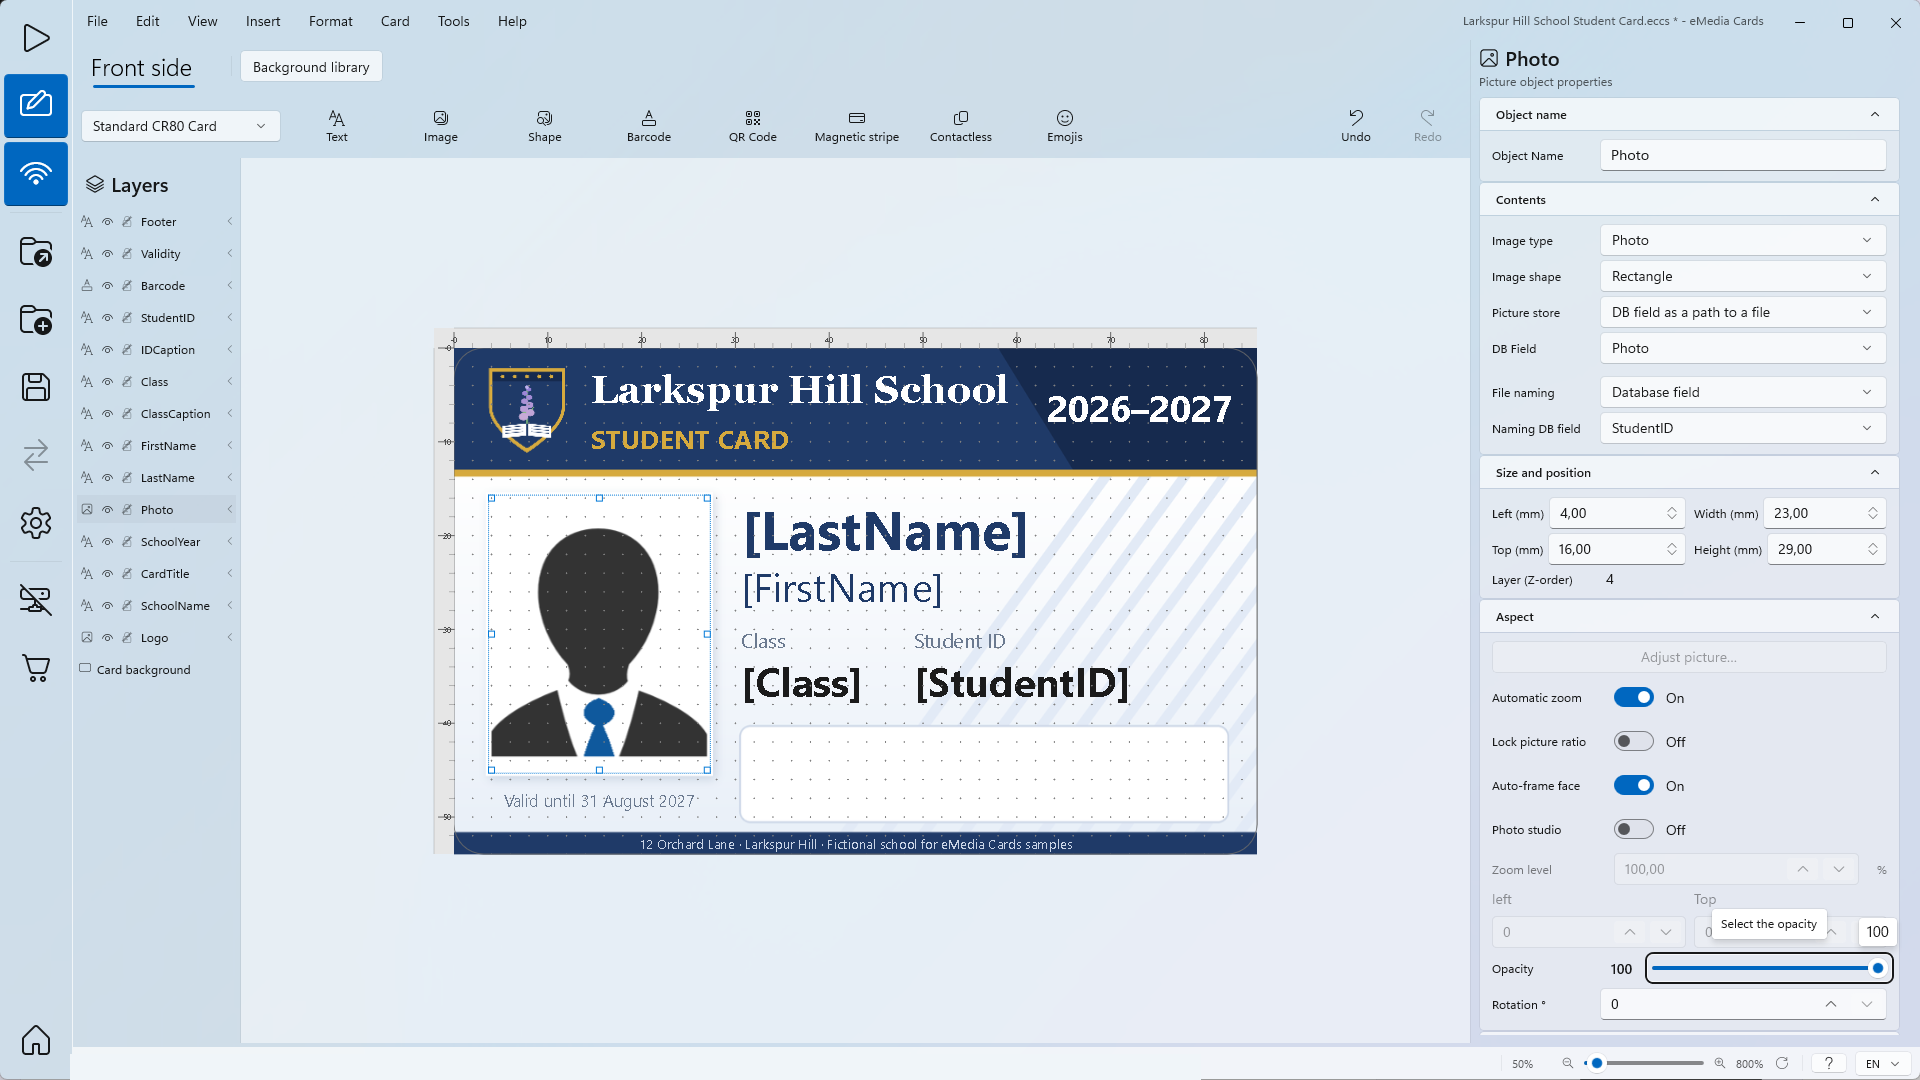
In File naming, choose Database field.
-
In Naming DB field, choose StudentID. Zoe's new photo will be
LHS-26020.jpg.
How to choose the photos folder
-
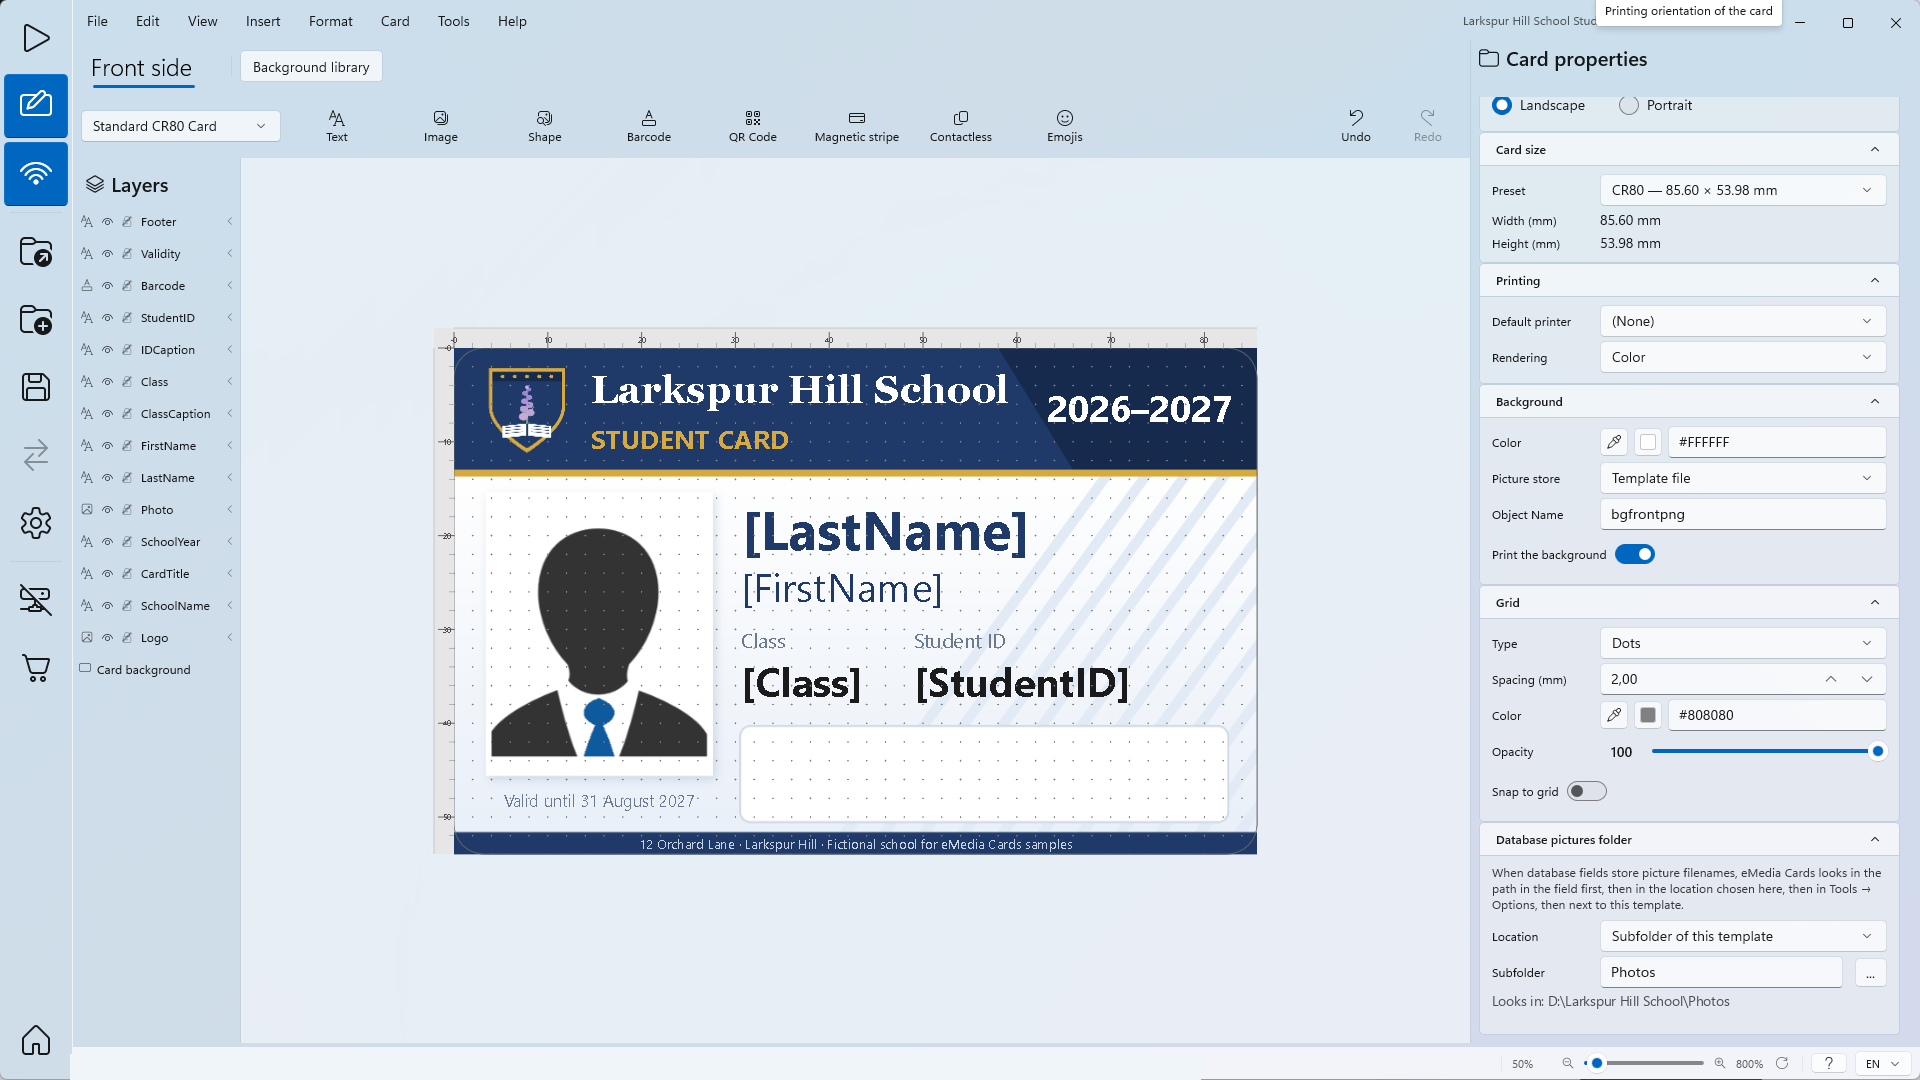
Click an empty area outside the card. The Card properties panel opens.
-
Under Database pictures folder, in Location, choose where eMedia Cards finds and saves the photos:
-
Use default: the Default folder in Tools > Options... > Acquisition, under Pictures.
-
This template's folder: the folder of the card file.
-
Subfolder of this template: a folder inside it, named in Subfolder. Here:
Photos, already set in this template. -
Specific folder: any folder, chosen with ....
-
-
Looks in: shows the folder eMedia Cards uses. See also How to connect a card template to an Excel file.
-
Click File > Save... to keep the connection and these settings in the template.
To show a photo, eMedia Cards looks for the file named in the field in this order: the path in the field, then the folder in Location, then the Default folder in Tools > Options..., then the template's own folder.
How to add the photo of one record
-
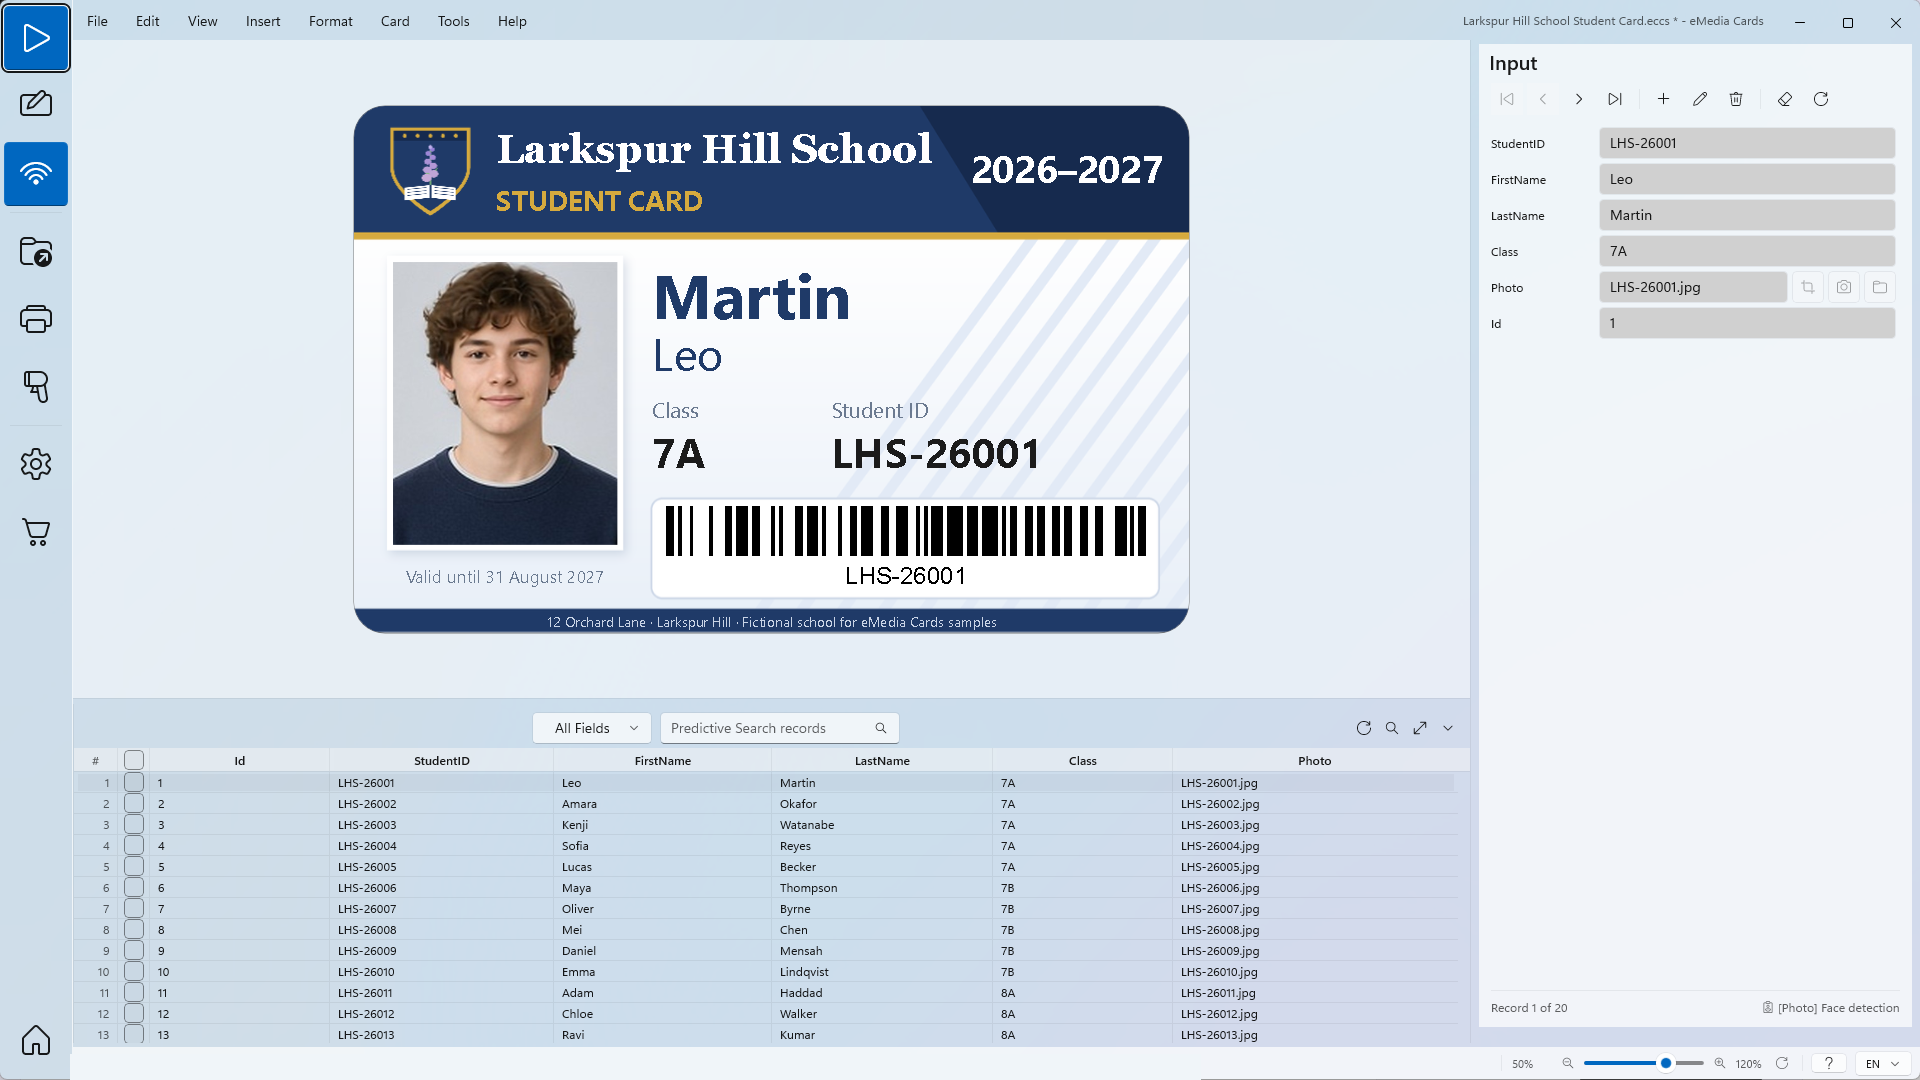
Click View > Operating mode. Each card shows the photo named in its Photo cell.
-
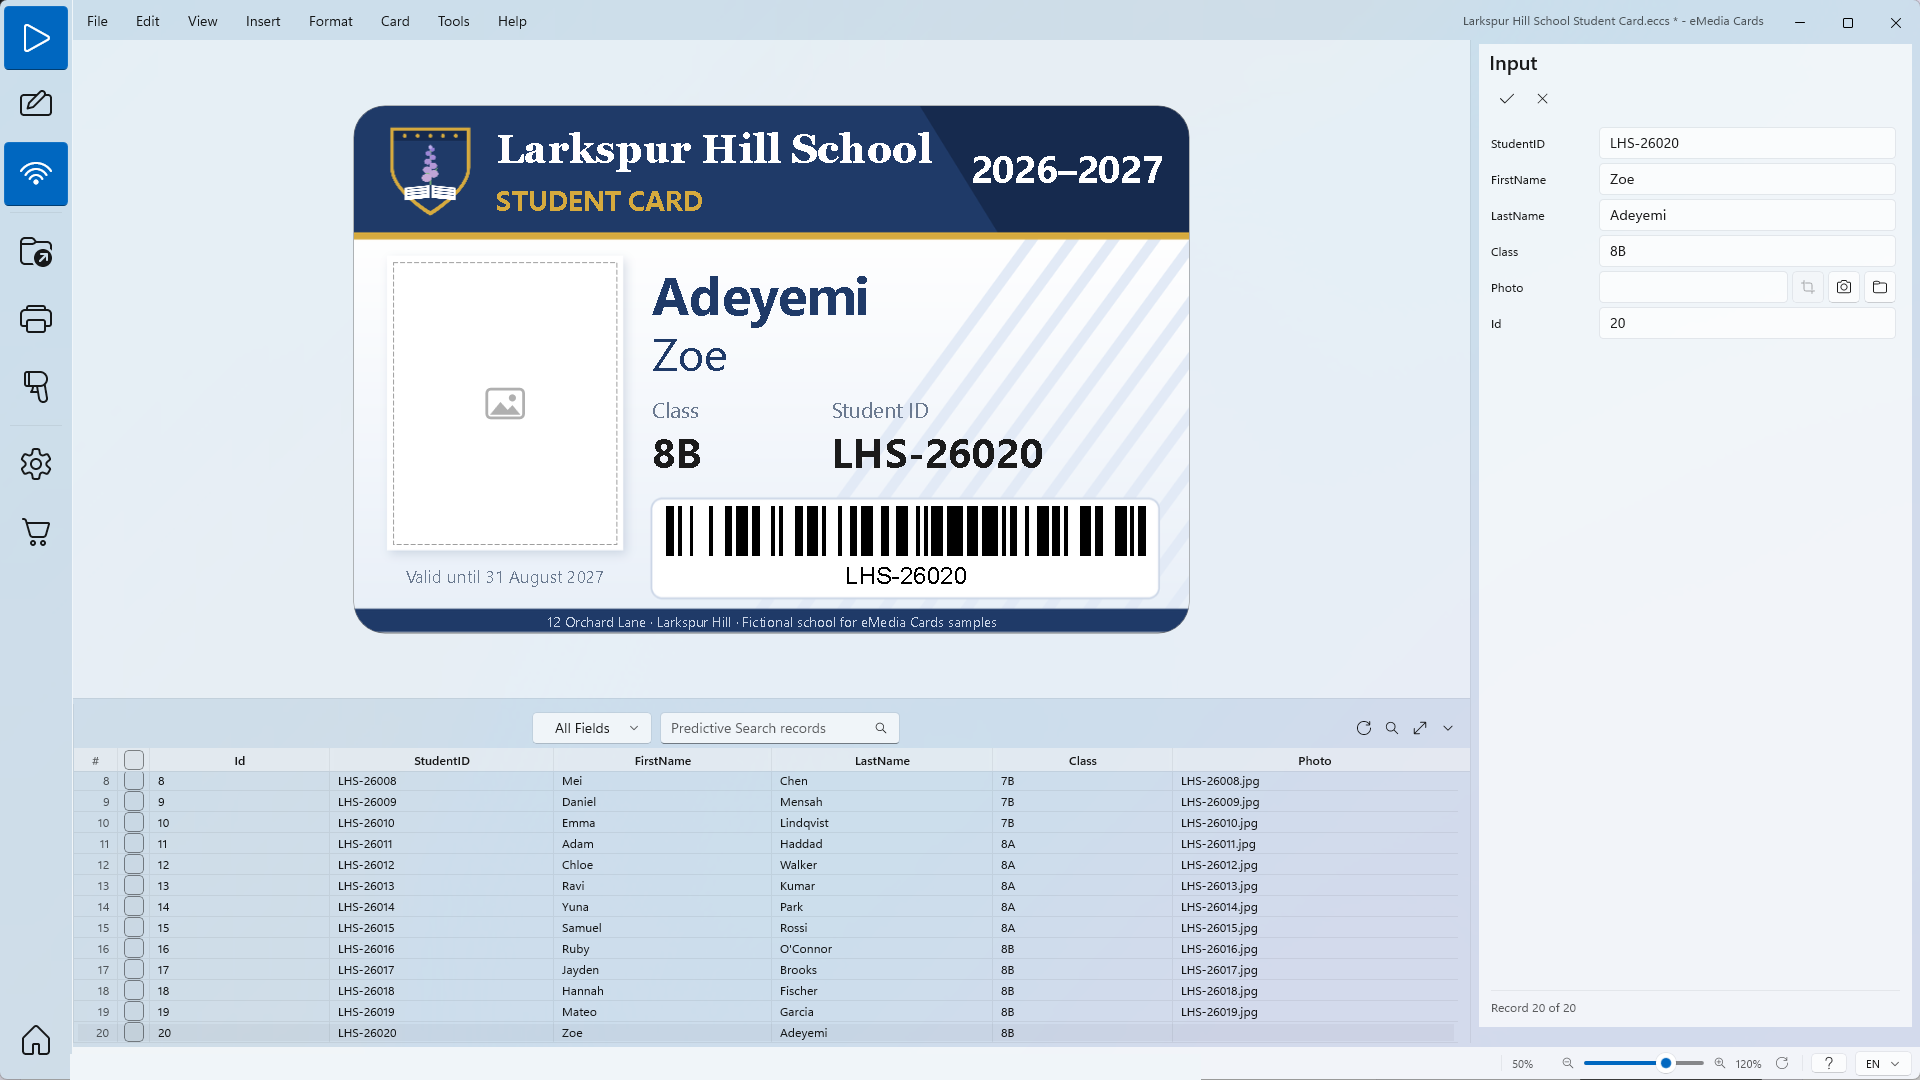
Click Last at the top of the Input panel, or click row 20 in the records grid. Zoe Adeyemi's card has no photo.
-
Click Edit. OK and Cancel replace the record buttons.
-
Next to Photo, click Browse for a picture and open
New photos\Student 20.jpg. eMedia Cards copies it into thePhotosfolder asLHS-26020.jpg, and the Photo field showsLHS-26020.jpg. To take the photo with a webcam instead, click Acquire picture. See How to take a photo with a webcam. -
Click OK. The record is saved: in
students.csv, thePhotocell of row 20 is nowLHS-26020.jpg.
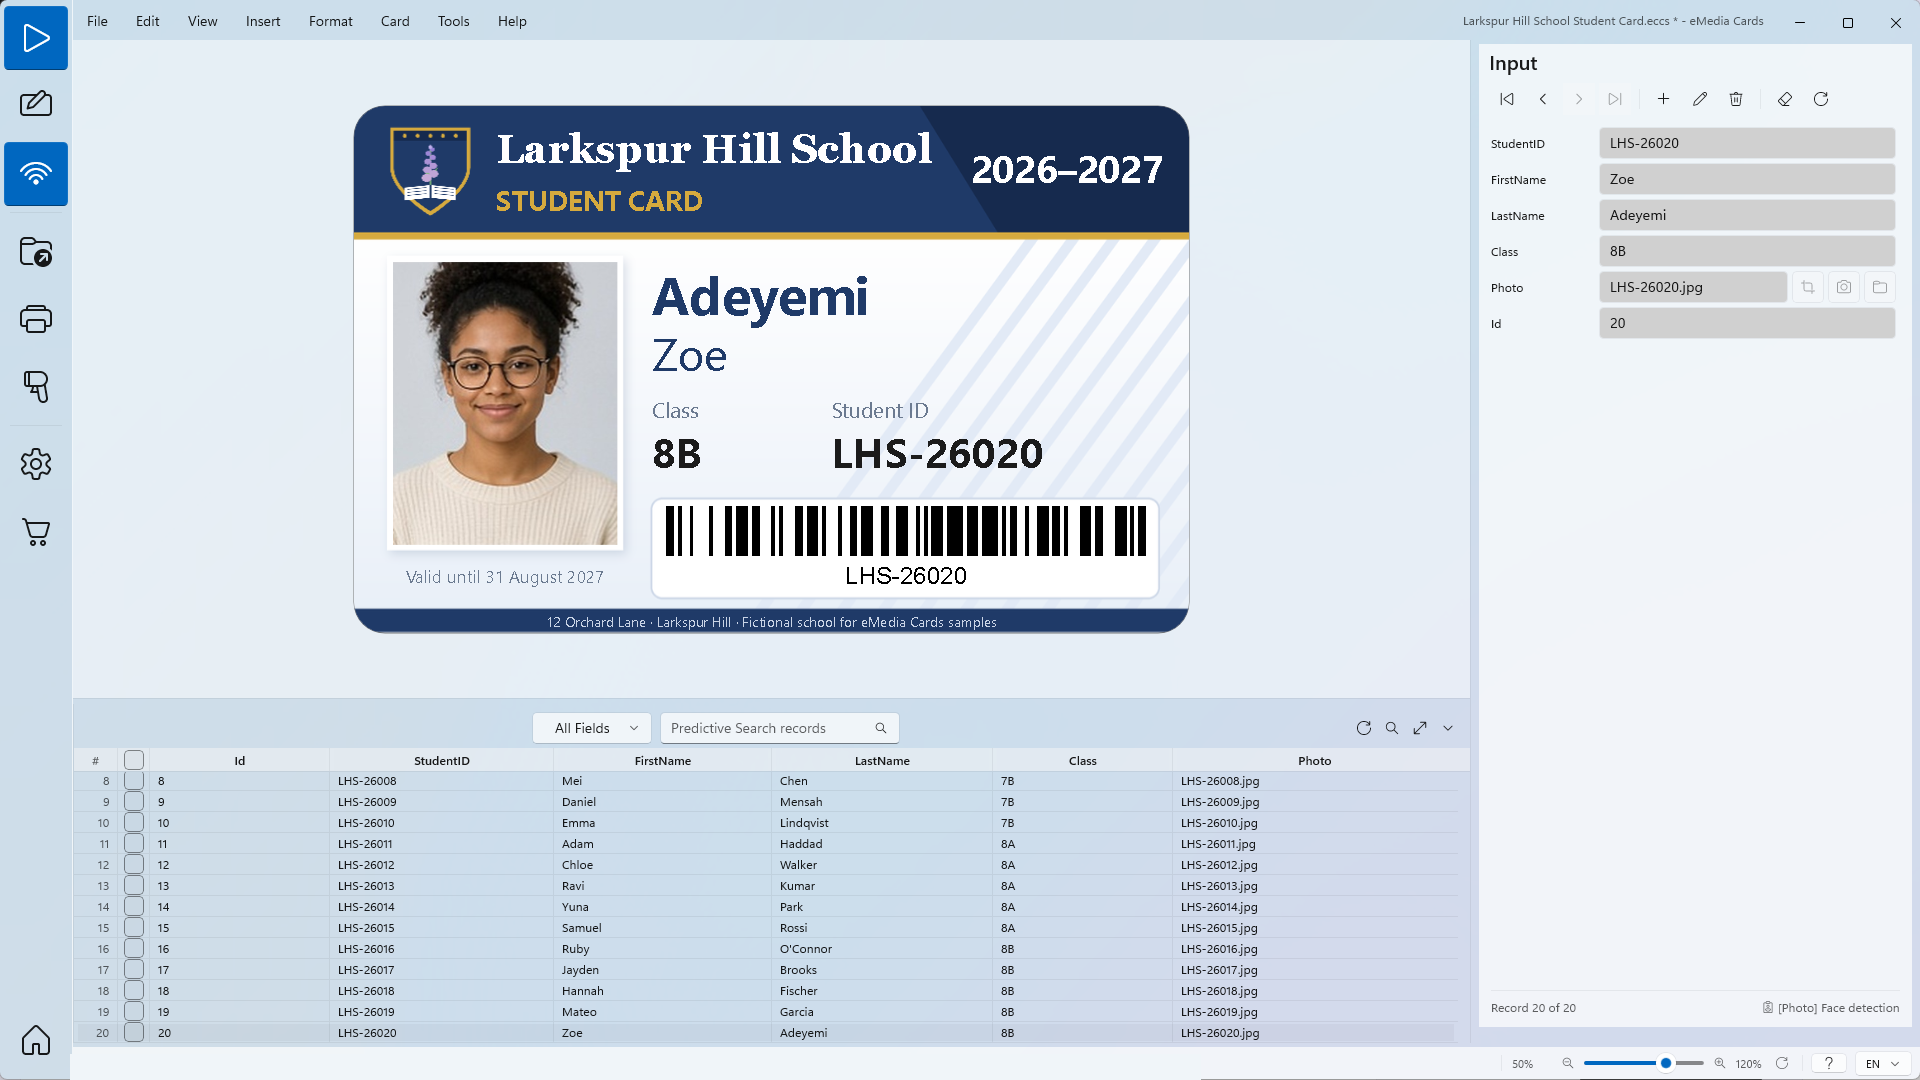
For the next record, click Next, Edit, add the photo, and click OK.
How to keep the photos in the database
Some databases can keep the picture itself instead of a file name. Picture store then has more choices:
-
DB field as a binary object keeps the picture in a database field. It needs the Professional edition. In other editions, it does not appear in the list.
-
DB field as the picture is for a picture field of a FileMaker database.
-
Google Drive keeps the photos in a Google Drive folder. See How to add a photo to a card.
Tips
-
Copy browsed pictures, in Tools > Options... > Acquisition, under Pictures, is on by default: a picture you open with Browse for a picture is copied into the photos folder and named with File naming. The original file is not deleted. Off, the record keeps the path of the file you opened.
-
If a file with the new name is already in the folder, eMedia Cards adds a number in brackets to the name instead of replacing the file.
-
When you add a new record, type the student ID before you take the photo. If Naming DB field is still empty, the photo gets a temporary name, and eMedia Cards renames it when you save the record.
-
Auto-frame face, Automatic zoom and Photo studio apply to every photo of the object. See How to crop and zoom a photo on a card and How to remove a photo's background.
-
Keep the template, the CSV file and the
Photosfolder together when you copy them to another PC.
Common errors
| Symptom | Cause | Fix |
|---|---|---|
| The photo frame stays empty in Operating mode. | The file named in the field is not in the folder shown in Looks in:, or the name is different. | Put the photo in that folder, or correct the file name in the record. |
| Moving a picture stored in a database field can only be done while creating or modifying the record! | The record is not in edit mode. | Click Edit first. |
| The formula set for naming the picture filenames caused an error. Please check. | The formula in Formula: cannot be calculated for this record. | Correct the formula, or choose Database field. |
| Not available per record when the picture is stored in the field. Set it for every record in Design mode. | Picture store is DB field as the picture: Adjust picture works for every record only. | Set the framing in Design mode. |