
How to add a photo to a card in eMedia Cards
What you'll learn
Add a photo object to a card in Design mode, open a picture file, let Auto-frame face crop it like an ID photo, set its size and shape, and choose where eMedia Cards keeps the picture.
Before you start
-
eMedia Cards installed and activated, any edition.
-
A card open in Design mode. This example uses
Benjamin Turner badge.eccs, the badge from How to create your first card with a fictitious name. -
A photo: JPG or PNG, the face looking at the camera. The sample files have
Benjamin Turner.jpg, a computer-generated portrait.
How to add a photo object
-
In Design mode, click Image in the toolbar. A list opens with Logo, Photo and Signature.
-
Click Photo. An object named Photo1 appears on the card with a placeholder silhouette, and Picture object properties opens.
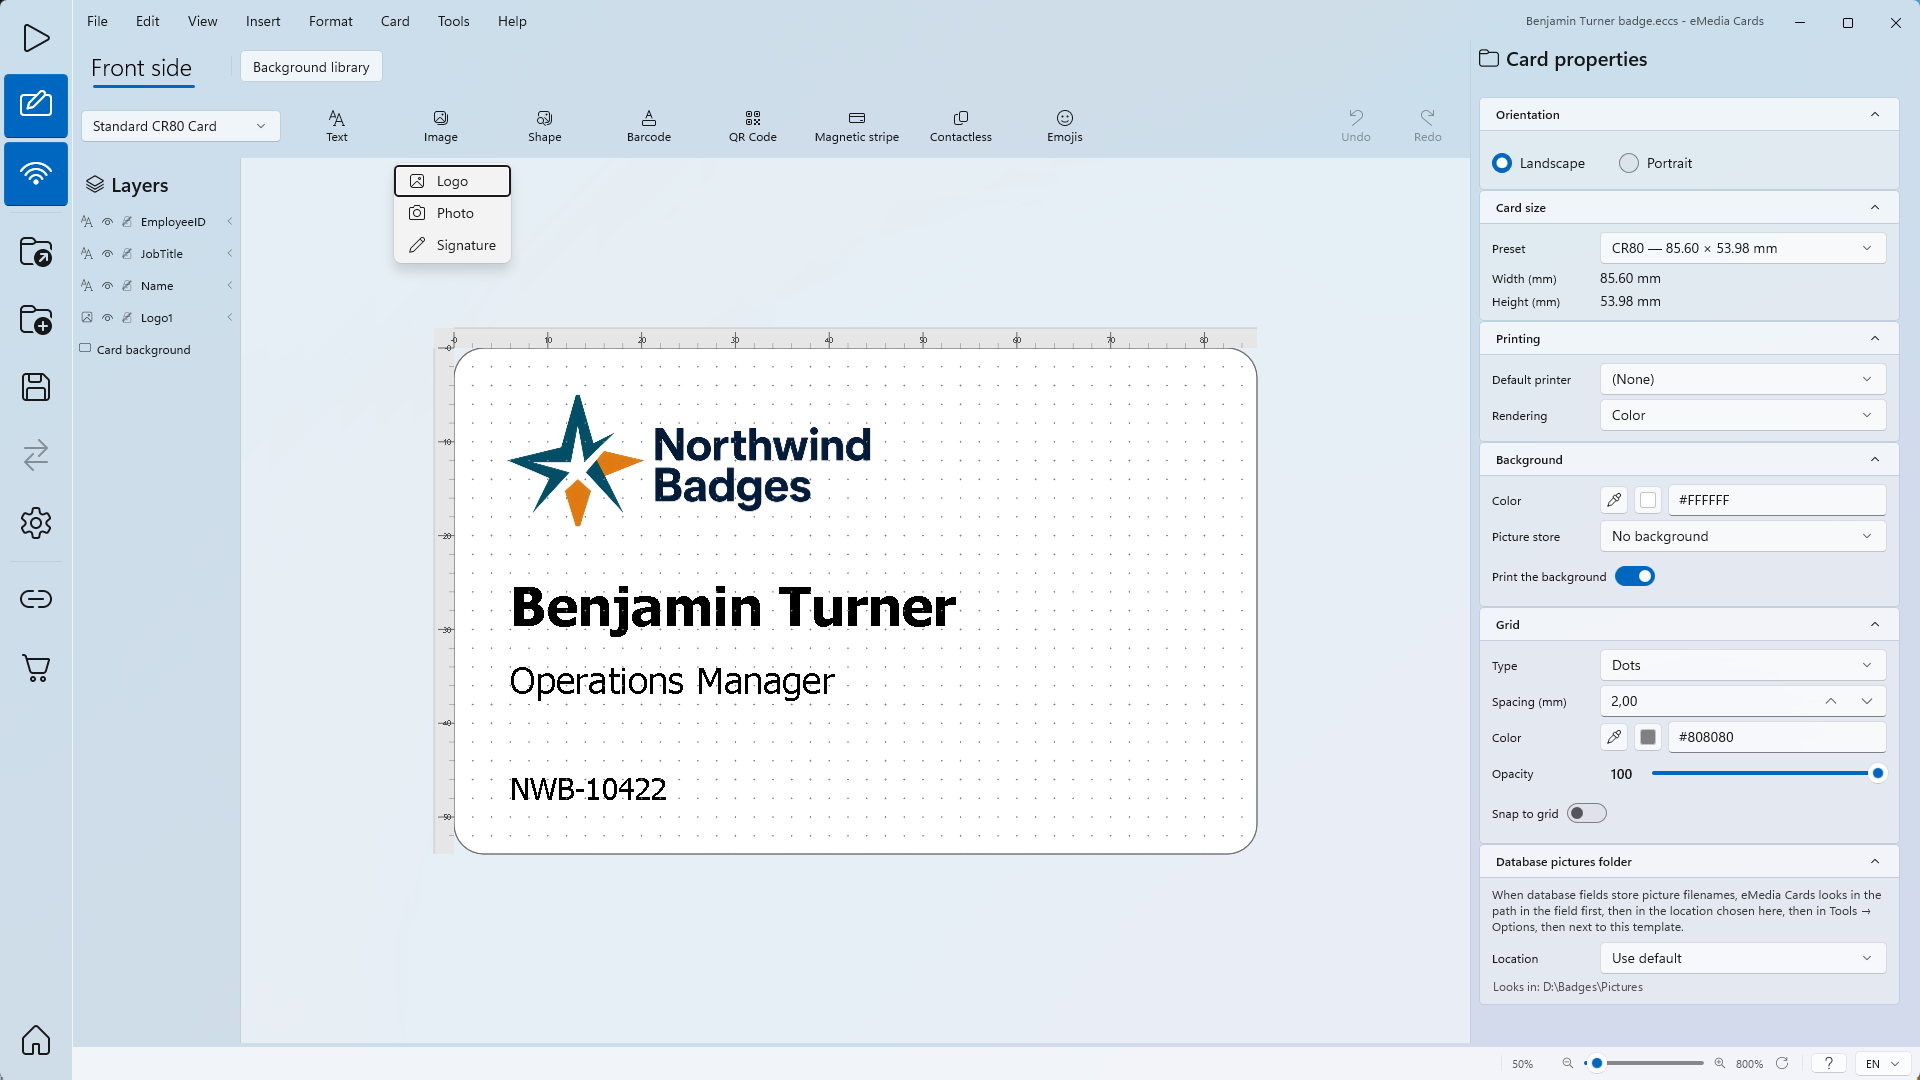
Image type shows Photo. A photo starts with Auto-frame face on and Lock picture ratio off, the right settings for an ID photo. A logo starts the other way round.
How to open the picture file
-
Under Contents, next to Picture, click ... and open your photo, or
Benjamin Turner.jpgfrom the sample files. -
The photo replaces the silhouette. Auto-frame face finds the face and crops the picture around it, and Automatic zoom makes it fill the frame.
How to set the size, position and shape
-
Under Size and position, adjust the size and position to fit your needs.
-
Under Contents, open Image shape. The choices are Rectangle, Rounded Rectangle, Circle, Heart and Shield.
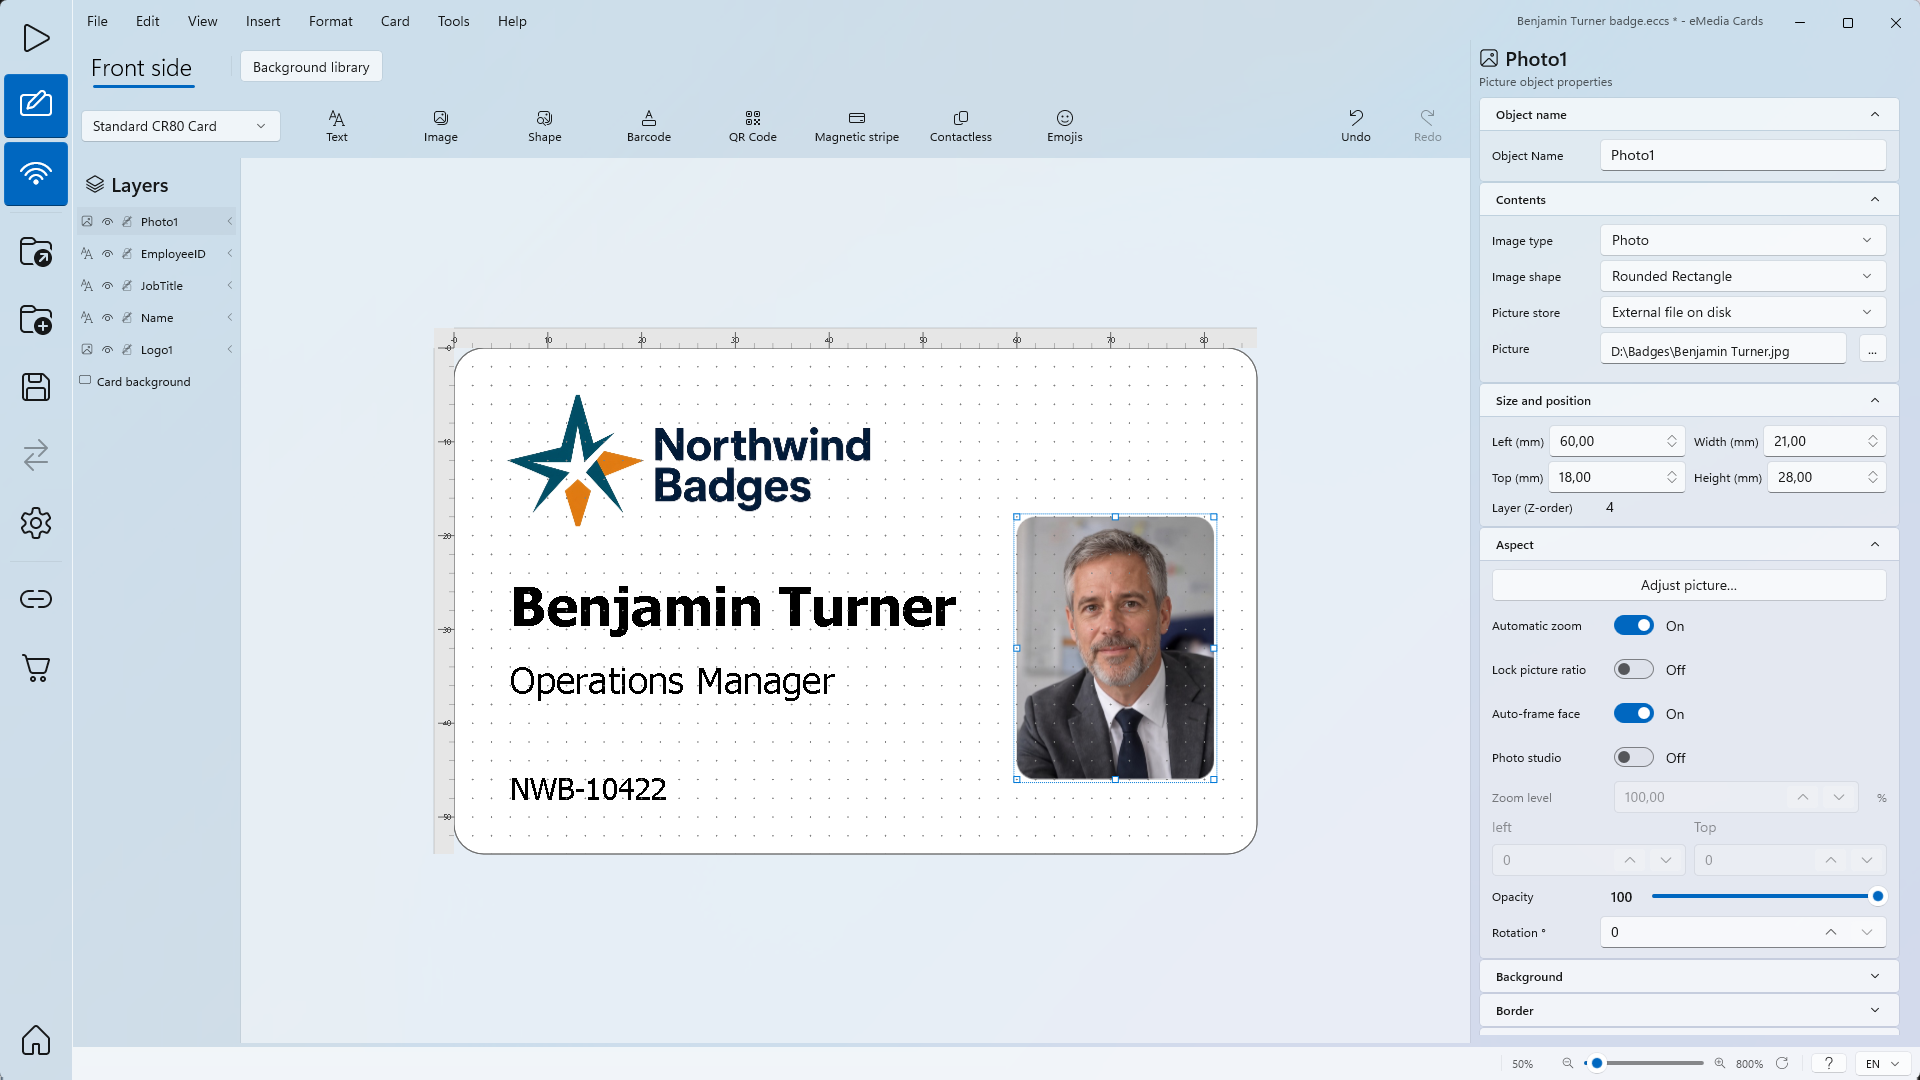
You can also drag the photo on the card, and drag its handles to resize it.
How to choose where the picture is stored
Picture store tells eMedia Cards where to find the picture each time the card opens or prints.
-
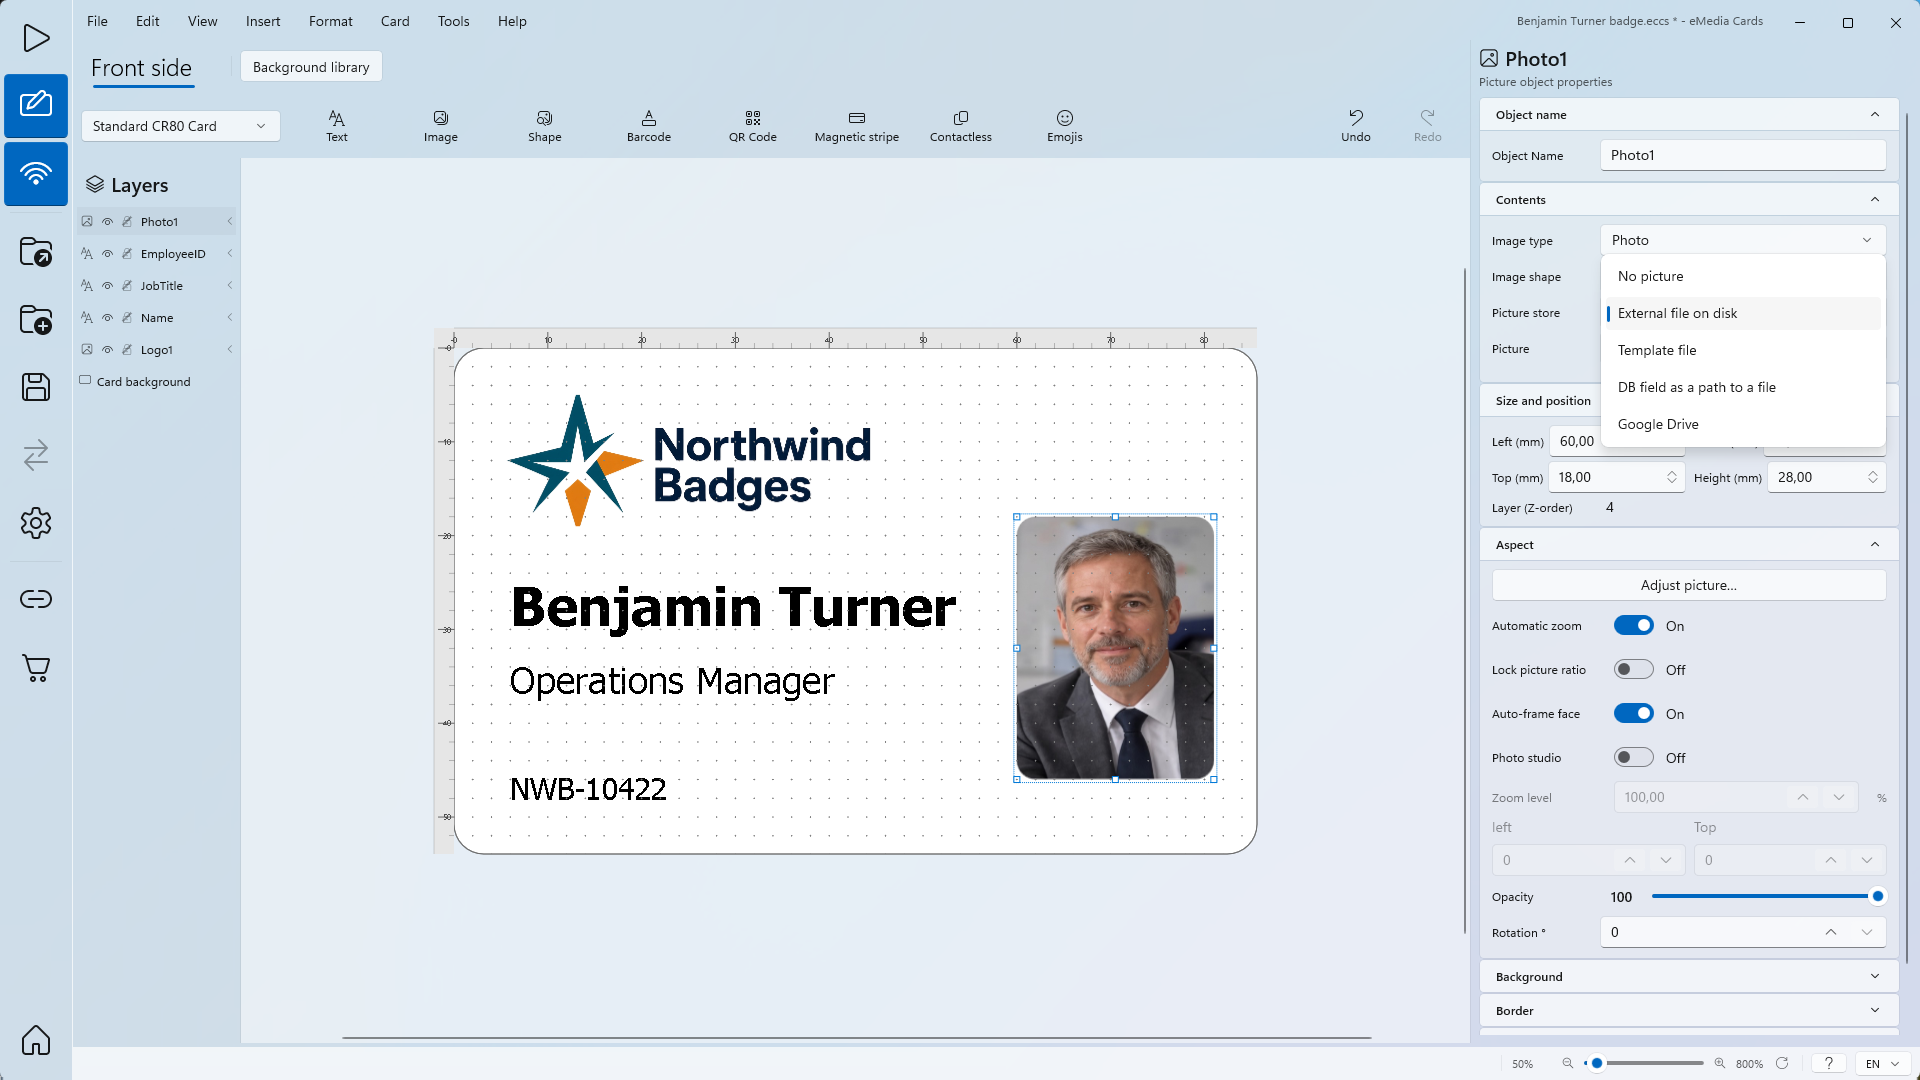
Under Contents, open Picture store.
-
Choose where the picture comes from in Picture store:
| Picture store | Where the picture is | Use it for |
|---|---|---|
| No picture | Nowhere: the object stays empty. | Keeping the frame for later. |
| External file on disk | A file on this PC. The card keeps its path. This is the default. | One photo, or a photo you change in Operating mode. |
| Template file | Inside the card file (.eccs). |
A picture that must travel with the card file. |
| DB field as a path to a file | A picture named in a database field, one per record: a full path, a file name or a web link. | A different photo on each card. |
| Google Drive | The picture file is in a Google Drive folder. It needs a connected database and a field that stores the picture's file name. Google sign-in and the Standard edition or above are required. | Photos shared between PCs, kept in Google Drive. |
With DB field as a path to a file, the field can hold a full path, just a file name, or a web link to a picture. For a file name, eMedia Cards looks in the folder set in Database pictures folder, in the card properties. See How to connect a card template to an Excel file.
How to change the photo on each card
In Operating mode, the Input panel lists Photo1 with three buttons:
-
Adjust picture, to change the framing by hand.
-
Acquire picture, to take the photo with a webcam. See How to take a photo with a webcam.
-
Browse for a picture, to open another picture file.
Tips
-
Use a sharp photo, face to the camera, on a plain background. Auto-frame face works best when the face is clearly visible.
-
Zoom level and the crop boxes left and Top are greyed out while Automatic zoom is on. Turn Automatic zoom off to set them yourself.
-
With External file on disk, keep the photo next to the card file when you copy the card to another PC. The sample files are made to stay together.
-
Opacity, Rotation °, Background and Border work as for other objects.
Common errors
| Symptom | Cause | Fix |
|---|---|---|
| The photo is missing when the card opens on another PC. | Picture store is External file on disk and the file was not copied. | Copy the photo with the card, then click ... next to Picture and open it again. |
| The silhouette still shows. | No picture was opened, or the file was moved or renamed. | Click ... next to Picture and open the file. |
| The face is cut off or off-centre. | Auto-frame face could not find the face, for example in a side view or a dark photo. | Click Adjust picture... to set the framing by hand, or use a clearer photo. |
| Zoom level, left and Top are greyed out. | Automatic zoom is on. | Turn Automatic zoom off. |